
I am writing this article because most often we Admins set up a lab environment to test the new technologies available to us. I myself have a test lab which I run on my Windows 7 machine and would like to access even if I am not in front of my desktop.
Setting up a VPN connection helps me access my desktop from anywhere I am via Internet and access your shared files and resources, though this isn't one of the most secure ways to do it, but if you are on a budget, then you can get done with this.
Avoiding IP conflicts
Since VPN connections link networks together, you must be careful with the subnet and IP addressing so there aren't any conflicts. On the network hosting the VPN server, you should use an uncommon default IP for the router, such as 192.168.50.1. If you have multiple offices, assign each to a different uncommon IP/subnet, such as 192.168.51.1, 192.168.52.1, and so on.
Create an incoming VPN connection in Windows
To configure a VPN connection, you must first "create an incoming connection". Thius will act a server or host for the VPN connection. While configuring, you will have to specify the users you want to be able to connect. Follow this steps to create the incoming connection.
VPNconnection Figure1
- Right-click the network icon in the system tray and select Open Network and Sharing Center.
- Click on Change Adapter settings.
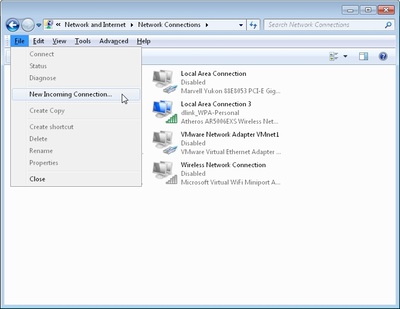
- Press the Alt key to show the File Menu and click File > New Incoming connection… .
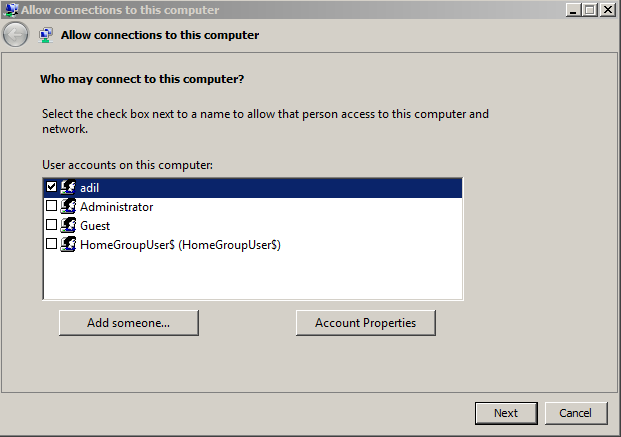
- Select who you'd like to give VPN access to and/or create custom accounts by clicking on Add someone. See Figure 2 for an example. When you're done, click on Next.
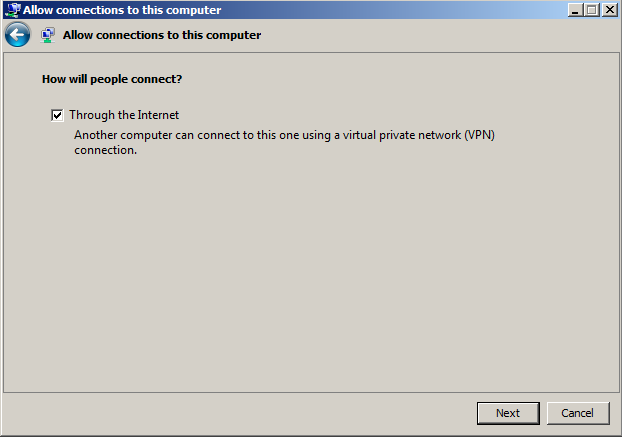
- Select Through the Internet, as Figure 3 shows, and click Next.
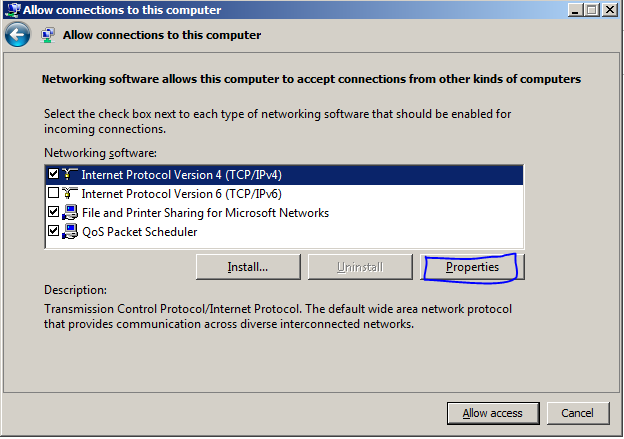
- Such as shown in Figure 4, select the protocols you want to enable for this connection. You'll likely want to select Internet Protocol Version 4 (TCP/IPv4), so remote users receive an IP address and can access the Internet and/or network. Plus if you want the remote user(s) to access file and/or printer shares, select File and Printer Sharing for Microsoft Networks. When you're done, click Allow access.
- On the next window, click Close.
VPN connection Figure 2
VPN connection Figure 3
VPN connection Figure 4

VPN connection Figure 5
Now you need to access the properties of the newly created incoming network connection and define the IP address range for VPN clients:
- On the Network Connections window, double-click Incoming Connections.
- Select the Networking tab and double-click Internet Protocol Version 4 (TCP/IPv4).
- Select Specify IP addresses and then enter a starting and ending address that's within range of your local subnet but not conflicting with the DHCP range. For example, if your router's IP is 192.168.50.1, you might enter 192.168.0.51 to 192.168.0.52 as shown in Figure 5, which would support 2 clients. If you want clients to be able to assign themselves an IP, select that option.
- Click OK on both dialog boxes to save the changes.
Configure any third-party firewalls
Windows will automatically allow the VPN connections through Windows Firewall when you configure the incoming connection on the host PC. However, if you have a third-party firewall installed on the host PC, you need to make sure the VPN traffic is allowed. You may have to manually enter the port numbers 47 and 1723.
You may have to congigure your router to forward the incoming connections to the specified Windows PC. Refer this article to see how to forward the ports on a TP-link router.


2 Comments
Adil you r making us understand in simple words. Really i am taking advantage of your blog and started practising. Please keep posting more articles on windows and VMWARE.
Thank you for your positive comments. Kindly write to [email protected] for any specific articles that you would want to learn.