
I had no idea that I would writing this article till now, but I came across a very peculiar problem where in my lab I was able access my virtual machines through RDP. But surprisingly I was not able to receive any ping responses back from the hosts.
On further analysis, I found that the default setting in Windows Server 2008 R2 and other new operating systems from Microsoft have this value set to not respond by default.
So my ping responses used to always end with Request timeout error.
In this example, I am trying to ping one of my VM's with the IP address 192.168.0.205.
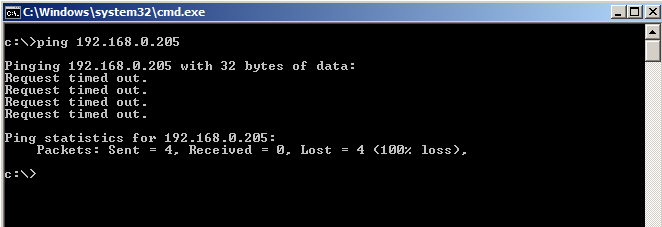
As you can see above that the request timed out. But there is an easy resolution to this.
First, log in to the server that is not responding to ping requests.
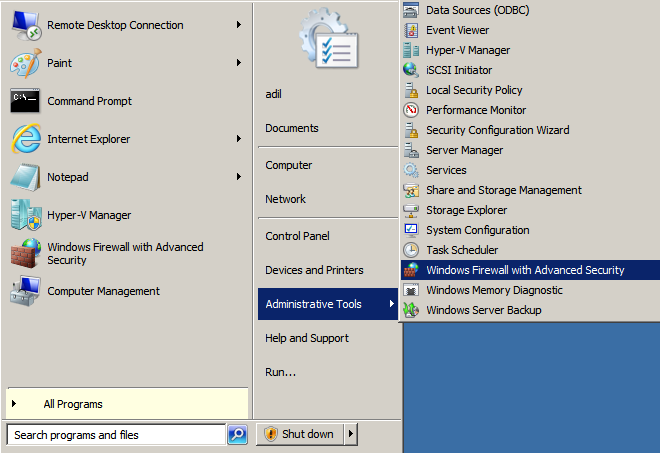
After logging, select Windows Firewall with advanced security from the Administrative Tools.
Click on Inbound rules and search for File and Print Sharing(Echo Request-ICMPv4 In) rule.
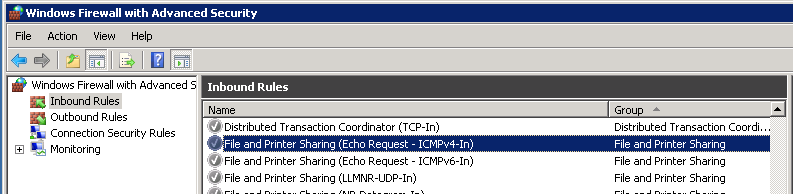
Right click on the rule and select Enable Rule.

Now you will see the green colour check mark on the Firewall rule. If you use IPv6 in your environment, you might want to enable the rule below the one shown above as well.
That's it! You have successfully enabled the ping on the server in question in few easy steps.

Now you can see that I am receiving successful ping responses from the machine.
Enable with Powershell
Well, I love doing things with Powershell, as there is so much ease and flexibility in the ways that I can accomplish tasks.
In this particular example, you will need to have a Windows Server 2012 / 2012R2 Operating Systems. The reason behind this is that Powershell 3.0 comes with certain modules that are present only on these OS's. The module that I am talking about is NetSecurity.
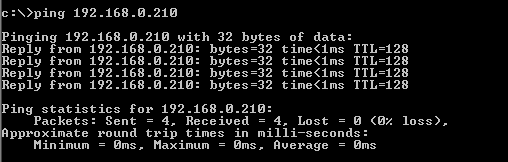
So I have a VM built with a copy of Windows Server 2012 R2. And the IP address that I have assigned is 192.168.0.210
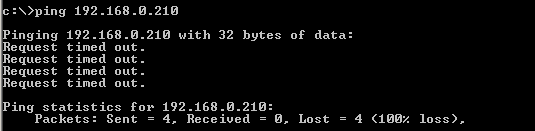
The way that we are going to enable is shown below:
First, you need to Import the Powershell module NetSecurity
Then Set the value for File an Print sharing rule for ICMPv4 in Inbound Rules of Windows Firewall to true.
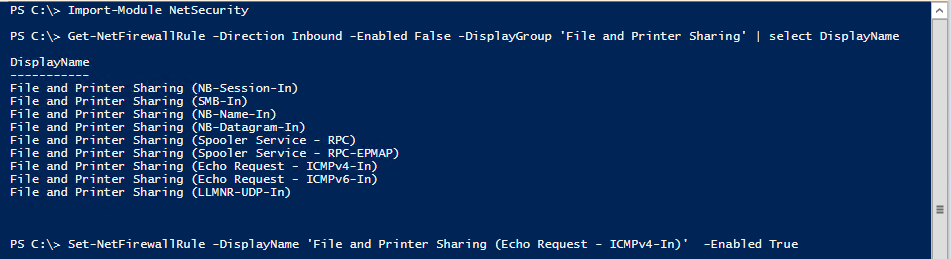
So first I made to query to list the rules belonging to the RuleGroup of File and Print Sharing using Get-NetFirewallRule and by select method I chose to display only the DisplayName.
Then, I chose the rule specific to IPv4 and set it to enable by Set-NetFirewallRule command.
You can verify the same from the GUI of Windows Firewall as well.
Now, you can see that I do get proper ping response back from the server.
I hope that this will help you if you ever come across such issues in future. Thank you for reading!


6 Comments
Adil your article was too good and very easy to understand
Thank you Vinay! I am glad that I could help. Keep visiting for more interesting topics!
Ping is easy from powershell
Test-connection $server
☺
Yes definitely we could use that as well 🙂
This is nothing to do with Windows Server 2008 R2. Not responding to ICMP requests was the case back in Windows XP where File and Printer Sharing wasn’t passing through the firewall on any profile be it Public, Private or Domain. Also you could simply drop the built-in firewall to accomplish this as most people do.
Hello Adrian,
Maybe that could be the case from XP, I am not very sure. I will have to look into that. But do you really think disabling the firewall is a good idea? I wouldn’t want to do that. It leaves security vulnerabilities that I wouldn’t want to deal with.