
Hello All,
This is the final post in the 6 part guide for Installing Exchange Server 2010 on a Windows Server 2008 R2 machine. The previous post dealt with the preparing your Active Directory Environment to install Exchange. Now, we are just a step away from having a fully functional Exchange environment.
Before we start, we know that I already have a DC called ED-DC01 configured. Now we will be adding two more servers ED-EX2K10-CAH and ED-EX2K10-MB1 which will be member servers of the EnterpriseDaddy domain. Also, we have provided static IP addresses for all the three machines mentioned above.
On the server ED-EX2K10-CAH, we will be installing Client Access and Hub Transport Server Roles. And on the ED-EX2K10-MB1 server, we will just install Mailbox Server Role. Note that these three are mandatory roles for you to have a fully functional Exchange setup.
Alright, lets get on with it. I am kicking of the Exchange Installation Wizard on the ED-EX2K10-CAH by double-clicking the mounted media.
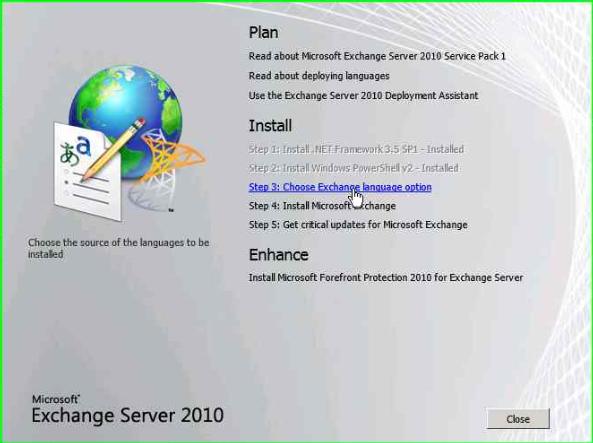
Notice that since we took care of installing the prerequisites in an earlier post, we don't have to perform the first two steps.
Click on Step 3, an select Install only languages from the DVD. The installation will start installing the required languages for the Exchange setup.
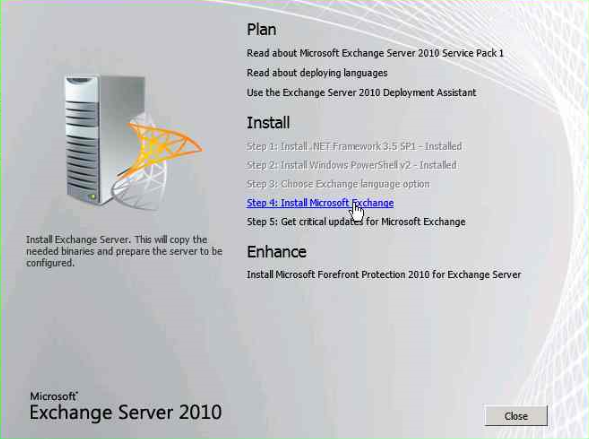
Now go ahead with clicking on step 4. You will be presented with the Exchange setup wizard, which will take you through the Introduction. Accept the License agreement and select the Installation Type as Custom Exchange Server Installation.
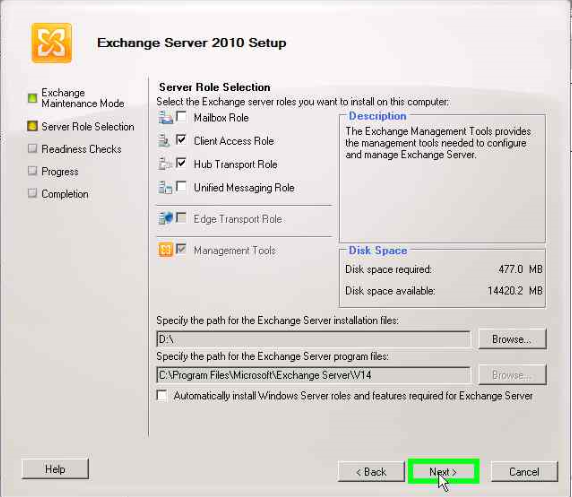
Select the Client Access Server role and Hun transport Server role and proceed by clicking next.
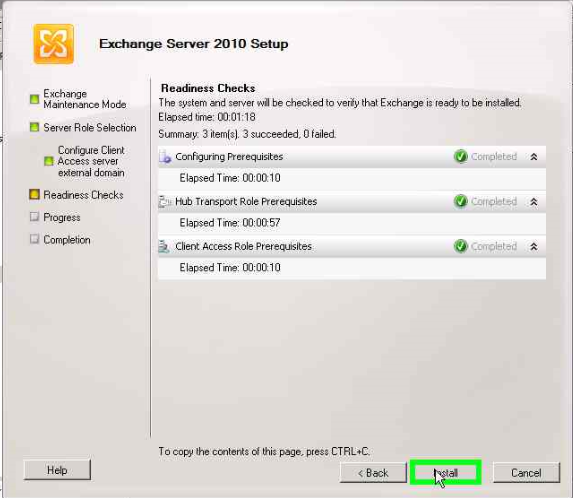
The setup will perform the Readiness checks and then click on Install to start the installation. Make sure that you reboot the server for changes to take effect.
We now have a server which will host two of our mandatory roles in our Exchange setup.
Next, you will have to install the Mailbox Server Role in the ED-EX2K10-MB1 server as mentioned above. While installing, it will automatically contact the Hub Transport Server and Client Access Server which in our case is ED-EX2K10-CAH server and apply the changes accordingly.
Once, the installation completes, you will have to reboot the server. Once done, you have a fully functional Exchange setup in your environment. Now everyone in your domain will be able to send mails to one another using their email addresses.
Next, we will go ahead and configure send and receive connectors so that we can send and receive emails fro people outside our organization.


2 Comments
Adil can u pls gimme prerequisites to build a exchange server in home labs.
Hello Vinay,
This guide is sufficient to build a lab at home. If you are asking about the configuration, then with the help of virtualization, you can build this with 8 GB of RAM.