Hello Everyone,
Today we will seeing how to setup a Windows Server 2012 as a VPN server. Not many must be aware that Windows has this feature built in in both its Server ans Desktop Operating Systems. For setting up a VPN server a windows 7 machine, go check it here.
Well the prerequisite is here that you need a Windows Server 2012 R2 installed to follow along this article. Note that the steps are different for a Windows Server 2008 machine.
Install the Remote Access Server Role
We will be doing this through a GUI. Open Server Manger and click on Manage and select Add Roles and Features.
A wizard comes up, select Next and click on Roles based or feature based installation and click on Next.
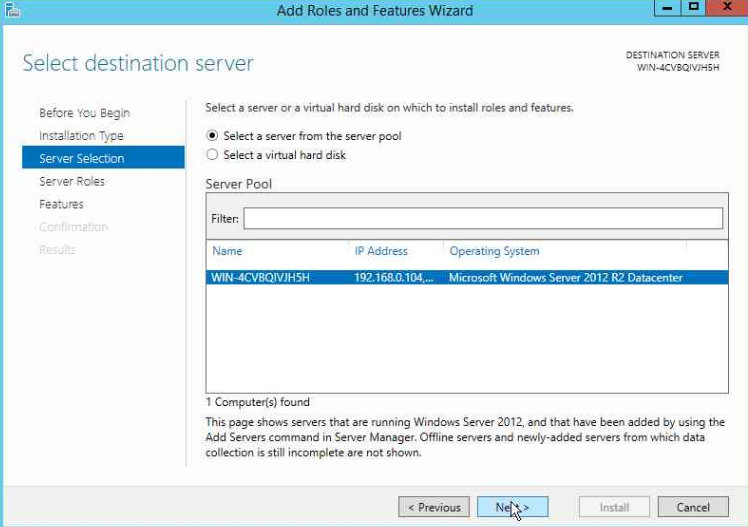
On the next page select the destination server, which is the local machine.
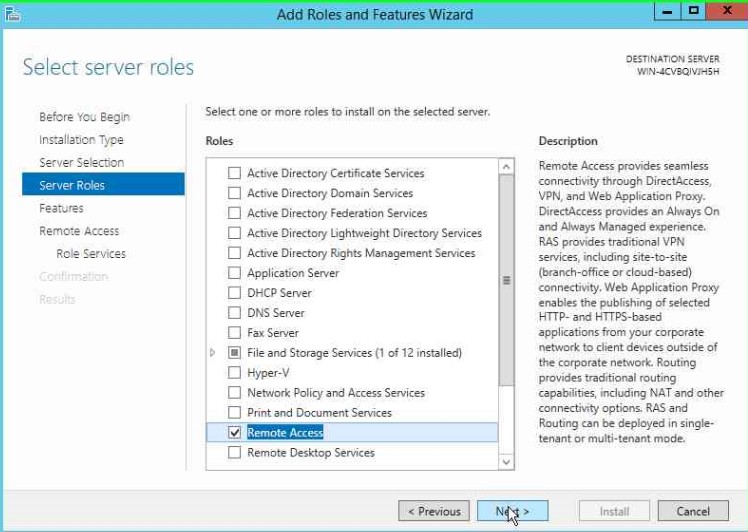
Select the Remote Access Role on the next page and click on Next.
It will by default install the required features like .NET framework, click on Next. The next page will give you a brief introduction about the Remote Access role, go through it and click on Next.
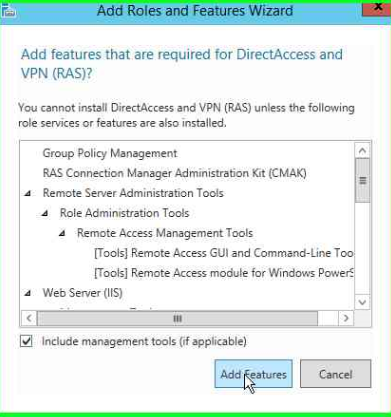
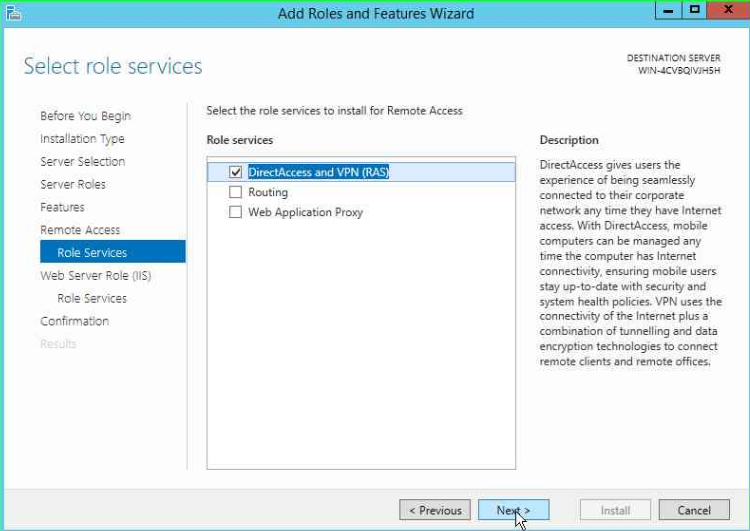
On the next page, select Direct Access and VPN Role services because this is what we are interested in. It will prompt to install the required features, click on Add Features and Next.
It also requires Web Server to be installed, you are fine by just selecting the defaults and clicking on Next.
Click on Install and wait for the installation to complete.
Configure the Remote Access Server Role
Now that we are done with installing the Server Role, we need to go enable it and provide a few details to start accepting the incoming connections.
From Administrative Tools, select Remote and Routing Access. A window comes up, right click on the server and select Configure and Enable and Remote and Routing Access.
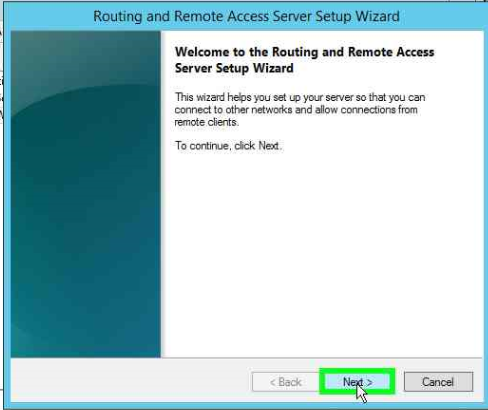
A wizard pops up and follow along.
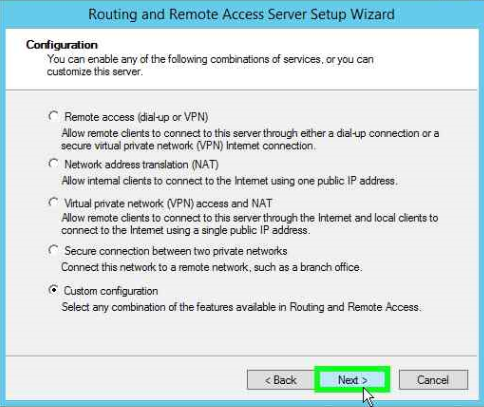
Select Custom Configuration and click on Next.
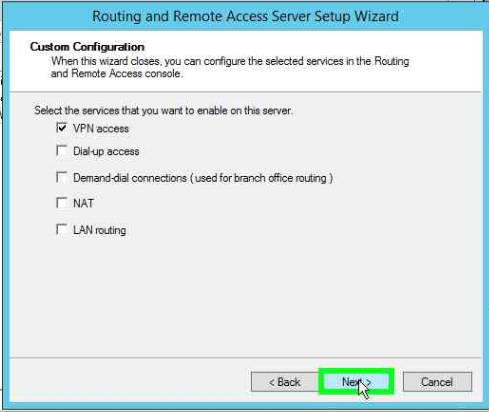
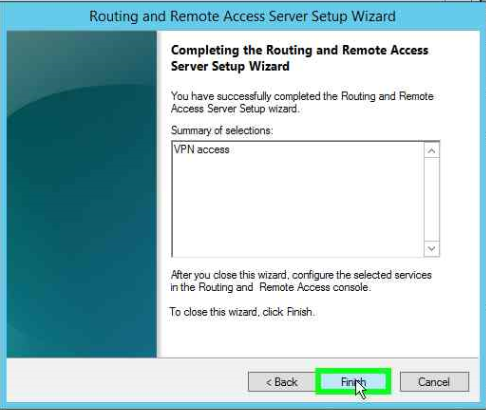
On the next page, select VPN server and click on Finish.
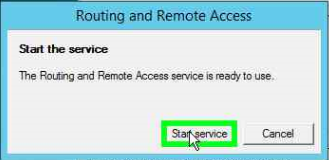
Next step will be to start the services.
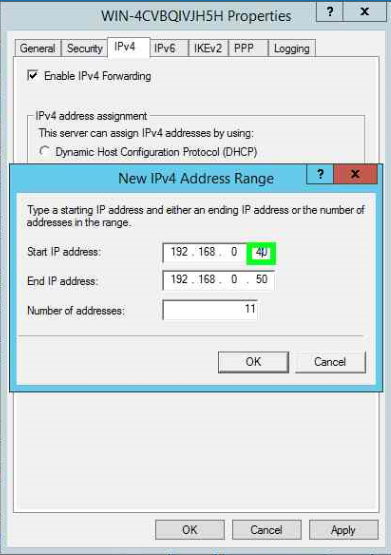
Now Right click on the server and click on Properties to configure the IP addresses that it will give out once the connections are made.
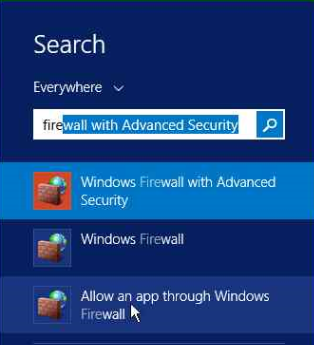
Now you will need to allow the connections coming in on the Windows Firewall. Go to start and type Firewall and select the third option as shown below.
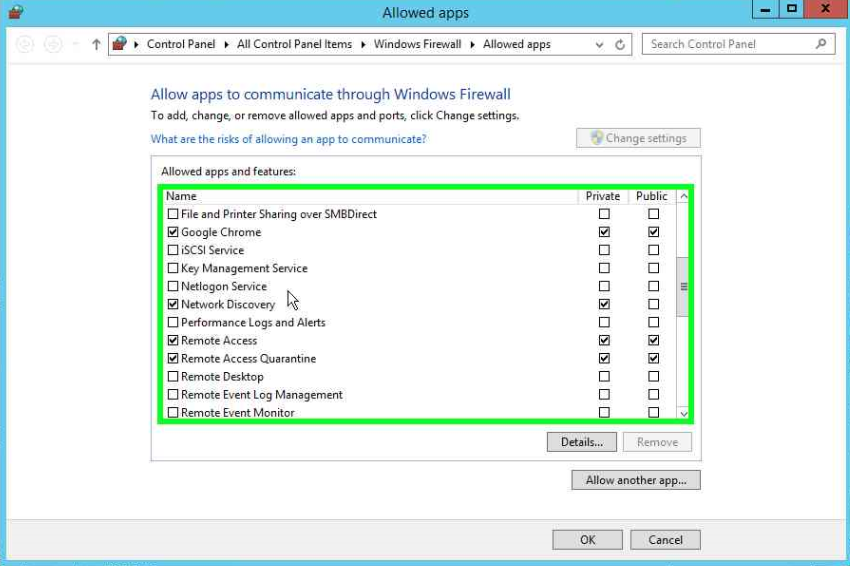
Make sure that the connections are allowed for Remote Access as seen below.
That's it! You are done. Before you can receive connections you will have to configure your Firewall.
Configure Perimeter Firewall
Based on the type of firewall you have, ensure the following ports are allowed traffic to the RRAS server:
PPTP Connections:
TCP 1723
L2TP/IPSec Connections:
TCP 1701
UDP 500
SSTP Connections:
TCP 443
You can test the connections by following the the article, how to set up outgoing VPN connections.
I hope this was informative and thank you for reading!






4 Comments
yeah the Microsoft Windows Server VPN solution is a great inexpensive (free) solution and the advantage is that all Windows Vista/7/8 client PC’s already have the client software included – no third-party programs to download and configure.
The downside of using PPTP is that security is based entirely on username/password combination so ensure that strong password policies are used.
It would be best practice use SSTP and client certificates.
Also many user locations have firewalls that block PPTP and L2TP ports so SSTP may be the only reliable option.
Yes that is correct! Someone told me that we could include a two-factor authentication along with PPTP connections as well.
Two-factor authentication is an option you can choose from the initial setup wizard.. Great article, still working on setting up my test lab for direct access. Found this very handy thank you.
Your welcome 🙂