
As most of you are aware that we are covering the 70-410 Exam. In today's post, we will be covering Exam 70-410 Objective 1.3 - Configure Local Storage.
If you are following along, I would like you to point to the dedicated page for Microsoft Windows Server 2012 R2 70-410 Exam- Installing and Configuring where I have listed all the exam objectives.
Be sure to bookmark the above page, because you will want to visit again as and when I update the page.
In this objective, we will be discussing on how to configure Local Storage on Windows Server 2012 R2.
This objective will cover the following:
- Configure MBR and GPT disks.
- Configure Basic and Dynamic Disks.
- Manage Volumes.
- Create and mount VHDs.
- Design Storage spaces.
- Configure Storage Pools and Disk Pools.
Configure MBR and GPT Disks
When you try to set up a new disk, you will be presented with two options to select from. They are MBR and GPT disk format.
We will see the comparison between the two below to understand the characteristics better.
| Master Boot Record (MBR) | GUID partition Table (GPT) |
| It uses partition table in the first sector of the disk to describe the location of disk partitions. | Uses extensible firmware interface to store partition information with redundancy. |
| Supports disks up to 2 TB. | Supports disks more than 2 TB. |
| Four primary partitions or three primary partitions plus one extended partition. | Not all previous versions of Windows can recognize GPT disks. |
As an example, I have added an extra disk to my VM. Let us now see how to make the disk usable and select the disk type.
Go to Server Manager > Tools > Computer Management > Disk Management.
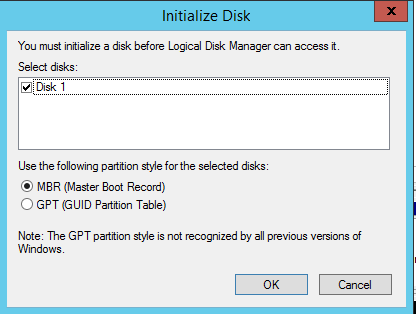
Right click on the Disk 1 and click on Initialize Disk.
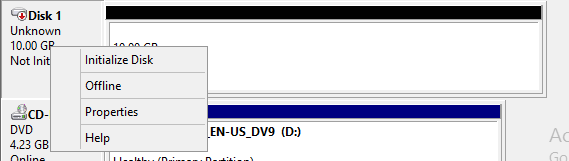
Now you will be presented with the above two options that we spoke of.
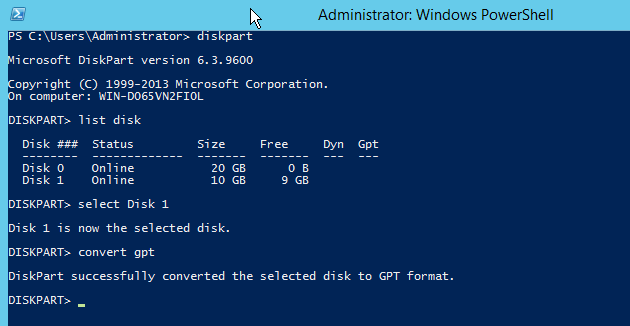
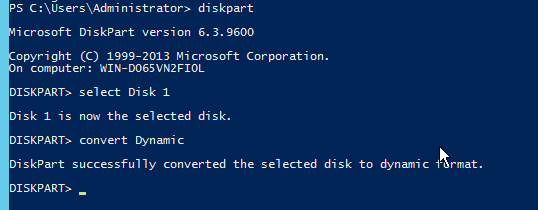
Let us say that you want to convert the disk type from MBR to GPT. You can do so from the diskpart utility.
Open a PowerShell console and type the below.
diskpart
list disk
select Disk 1
convert gpt
Configure Basic and Dynamic Disks
We will see the differences between Basic and Dynamic Disks in the table below.
| Basic Volumes | Dynamic Volumes |
| These type of Disks are in existence from the time of MS-DOS | Dynamic disks support spanned, striped, mirrored and RAID-5 volumes. |
| Basic Volumes are used as a common configuration for most of the disks even today. | Dynamic disks support an unlimited number of volumes, unlike basic disks. |
| They can be extended only to adjacent, unallocated space on the same disk. | Spanned volumes can extend across multiple disks. |
| Always better to start as a basic disk type. | Not always the best choice. |
Whenever a disk is added, it is brought online as a Basic disk.
You can convert the disk to Dynamic by right clicking the disk from the computer Managment snap-in.
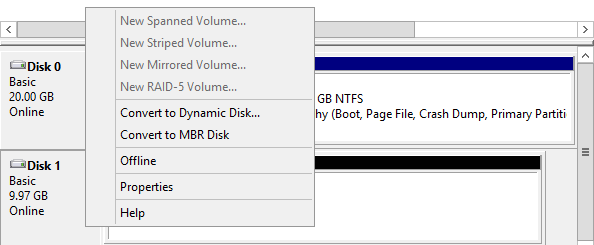
If you have to perform the same steps from the command line, then kindly refer below figure.
Manage Volumes
A dynamic disk can contain an unlimited number of volumes that function much like primary
partitions on a basic disk.
When you create a volume on a dynamic disk by using the Disk Management snap-in in Windows Server
2012 R2, you choose from the following five-volume types:
Simple Volume: Most basic type of volume and can be created and used only on one physical disk.
Spanned Volume: Spanned Volume can combine two or more physical disks and allow you to create a volume larger than a single physical disk on your system.
The requirement is that this can work only on Dynamic disks.
The disadvantage of spanned volume is that one of the disks fail, all the data is lost.
Stripped Volume: Like spanned volume, they can combine two or more disks. The data stored on these disks is stripped, which means when writing data on the drives, it is written equally on both the drives. It is commonly known as RAID 0.
The disadvantage of these type of disk is that they don't have any redundancy.
Mirrored Volume: Combines two disks that are duplicate of each other. It is commonly known as RAID 1. It has redundancy as there are two copies of the same data.
RAID: It stands for Redundant Array of Independent Disks. There are different levels of RAID and all of them provide redundancy and data protection with the exception of RAID 0.
Create and Mount VHDs
Hyper-V relies on the virtual hard disk (VHD or VHDX) format to store virtual disk data in files
that can easily be transferred from one computer to another.
The Disk Management snap-in in Windows Server 2012 R2 enables you to create VHD and VHDX files and mount them on the computer.
To create a VHD in Disk Management, use the following procedure.
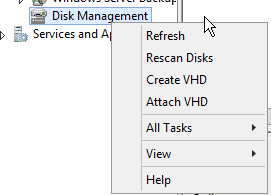
In Server Manager, click Tools, Computer Management. The Computer Management console opens. Click Disk Management to open the Disk Management snap-in.
From the action menu, click on Create VHD.
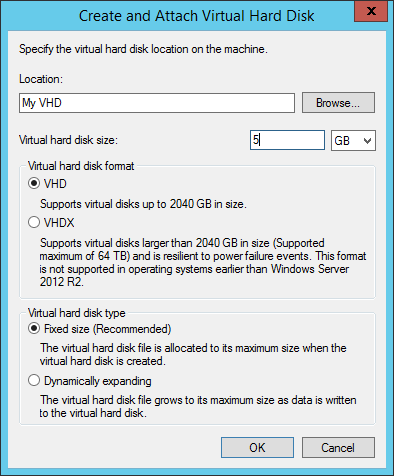
Leave the defaults as they will be fine in most situations.
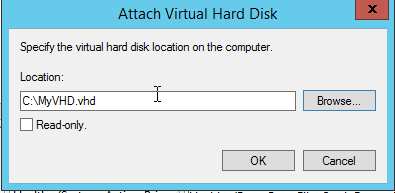
To Attach a Virtual Hard Disk, click on Attach VHD from the action menu and provide the path of the VHD.
Design Storage spaces
Windows Server 2012 R2 includes a disk virtualization technology called Storage spaces, which enables a server to add storage space from individual disks and attach that space to create virtual disks of any size supported by the hardware.
This virtualization feature is often associated with SAN and NAS, which require huge investments and administrative skills.
Storage spaces provide similar capabilities by using Standard Direct-attached disk drives or single external "Just a Bunch of disks" (JBOD) arrays.
Storage spaces use unallocated disk spaces on server drives to create storage pools.
A storage pool can span multiple drives, giving the administrators the freedom to add or remove disks as per the requirement. By using storage pool, administrators can create virtual disks of any size.
Once created, virtual disks would act like physical disks, just that the actual data would be stored on one of the physical disks.
After creating a virtual disk, you can create volumes on it just as you would on a physical disk.
Just to make this easier to understand, I have created a visual presentation of the entire concept below.
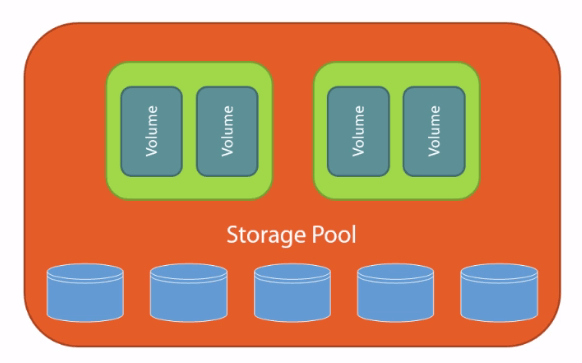
The blue drives below are the physical disks. The green boxes are the Virtual disks and you can see the volumes created inside of it.
Configure Storage Pools and Disk Pools
In this part, we will see how to add the Storage Pools and create virtual disks.
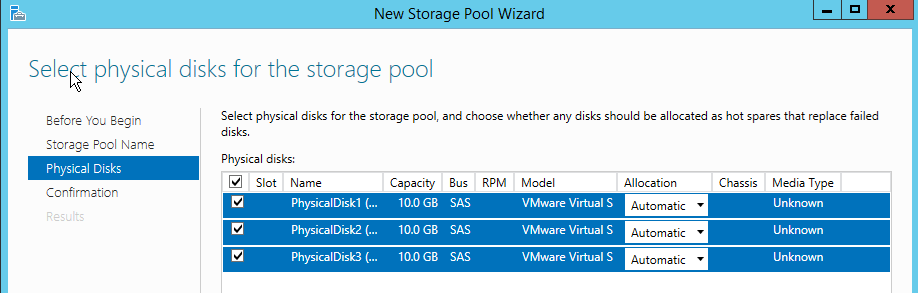
To create a storage pool by using Server Manager > File and Storage Services > Storage Pools > add Tasks > New Storage Pool
Give the storage pool a name, in our case I am giving it Test Pool. Next you will be presented with an option to select the Physical that are directly attached to the server.
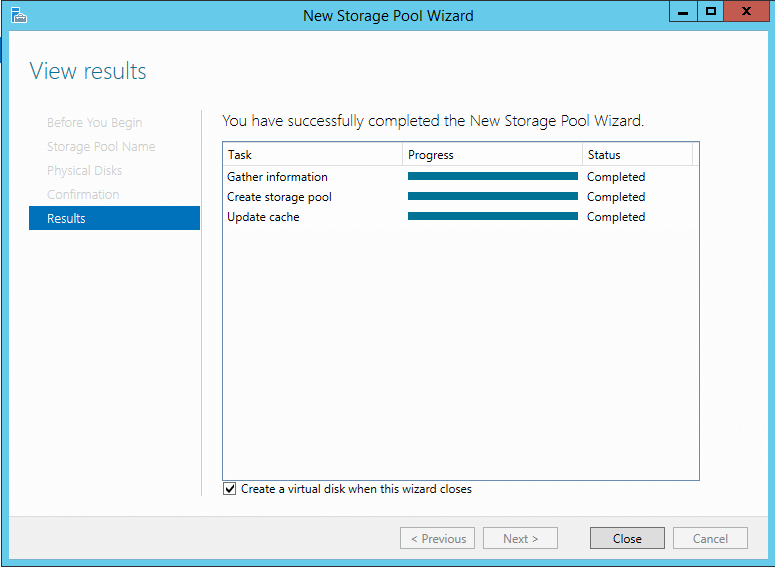
Click on Next and then create.
Once done, you will be presented with completion wizard which will show the results. Click on the checkbox which reads Create a virtual disk once this wizard closes to create our Virtual Disks.
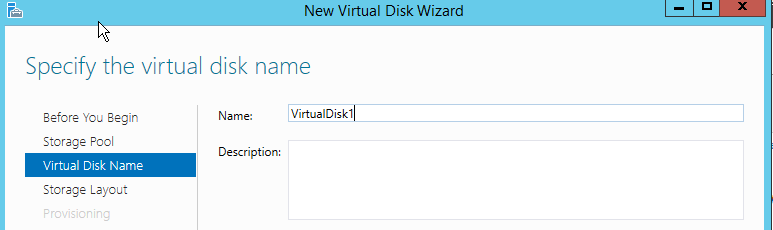
Next up, you will see the New Virtual Disk wizard, select the Storage Pool "Test Pool" we just created and provide an appropriate Virtual Disk name.
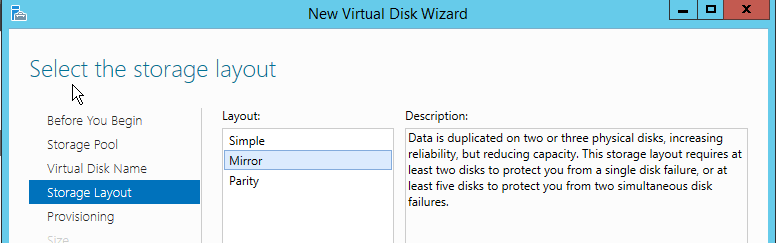
You are then presented with the type of disk that you want to create. Below are the following options.
- Simple: Requires the pool to contain at least one physical disk and provides no fault tolerance. When more than one physical disk is available, the system stripes data across the disks.
- Mirror: Requires the pool to contain at least two physical disks and provides fault tolerance by storing identical copies of every file. Two physical disks provide protection against a single disk failure; five physical disks provide protection against two disk failures.
- Parity: Requires the pool to contain at least three physical disks and provides fault tolerance by striping parity information along with data.
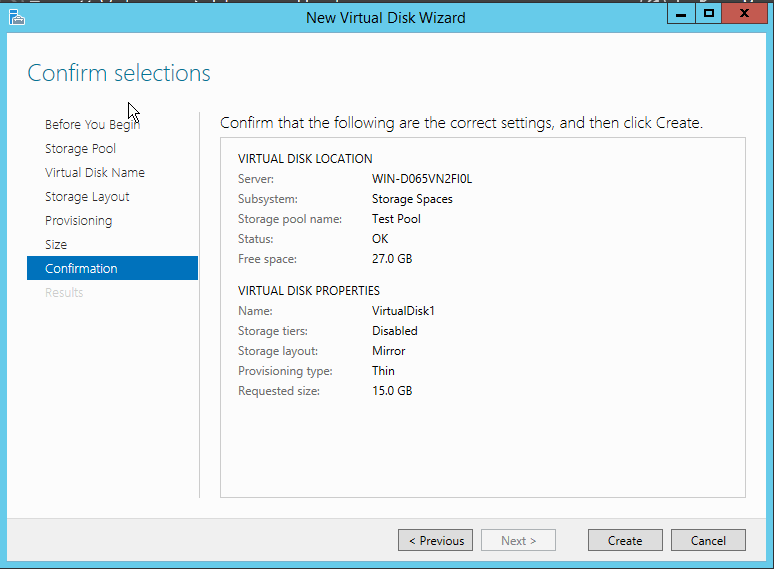
Select the provisioning type as Thin provision and specify the space that you want to use.
You will now be presented with the confirmation page. Click on Create.
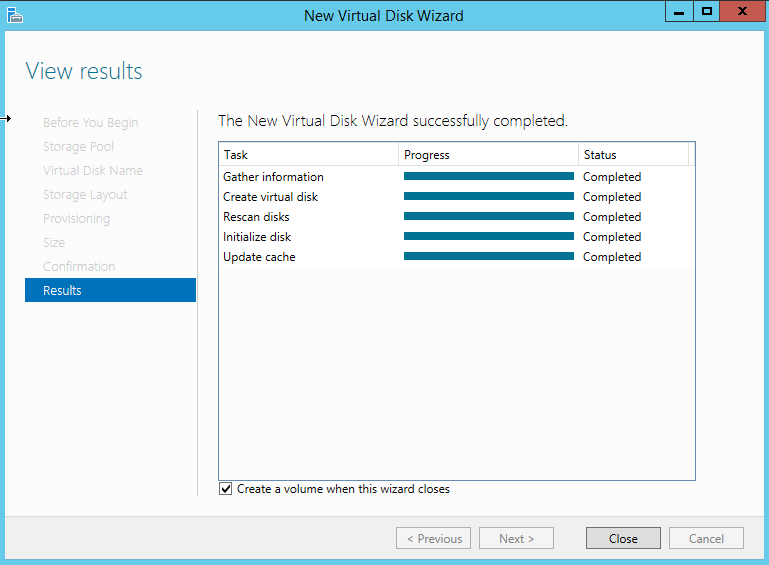
Once complete, you will now be given an option to create Volume on this Virtual Disk.
A new wizard, New Volume wizard comes up, select the local Sever and the Virtual Disk that we just created.
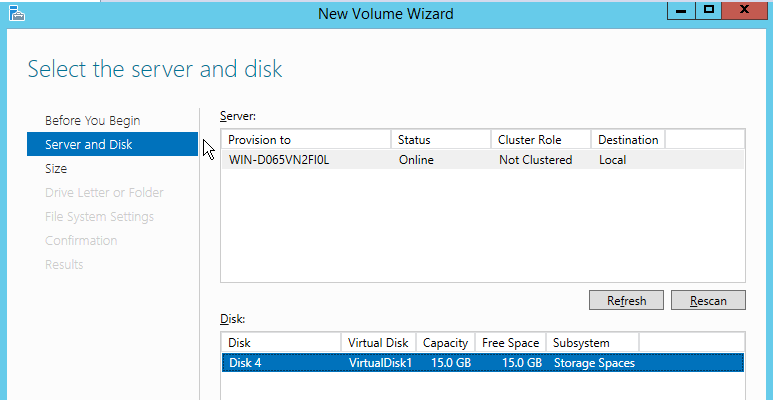
Select the size, drive letter, File system type from the options available. Once confirmed, it will present you the confirmation page.
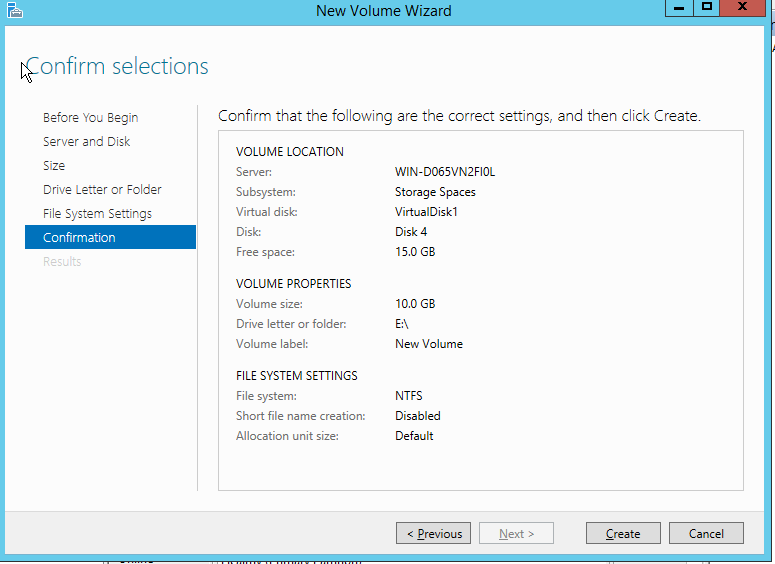
Click on Create and you are done.
You should now be able to see it as any other volume on the local computer.
That is all I have in the Exam 70-410 Objective 1.3 - Configure Local Storage.
I hope that this has been informative and thank you for reading.


2 Comments
Thanks For your wonderful work… it helps a lot.. keep spreading the knowledge.
Imran,
Glad I could help.