
iSCSI Port Binding is used when one needs multiple paths to each iSCSI target. The default iSCSI configuration on the VMware ESXi host creates only one path to each iSCSI target.
Before vSphere 5.0, administrators had to configure iSCSI port binding using the command line. There was no other of doing it and was quite confusing, to say the least.
VMware then introduced a graphical user interface which continues until vSphere 6.0, to perform iSCSI port binding for the software iSCSI initiator.
We will be performing this changes using multiple vmkernel ports on the VMware ESXi host.
However, there are some considerations to be made when using port binding. I have listed a few of them below:
- The target array should reside on the subnet as the vmkernel ports.
- All the vmkernel ports used should also be in the subnet.
- Port binding does not support network routing at this time.
With that being said, let us work through by looking at an example so that we are clear with the concepts.
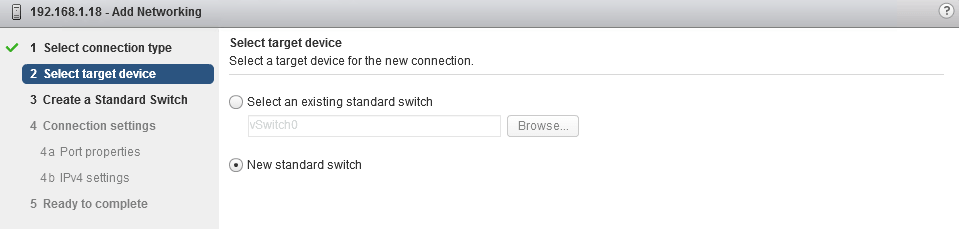
Configure iSCSI Port Binding using vSphere Web Client


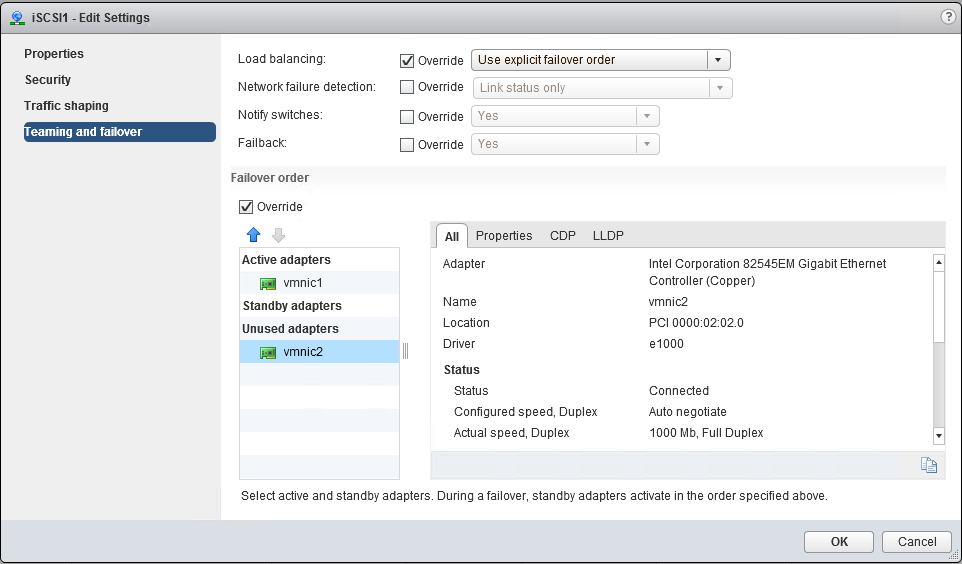
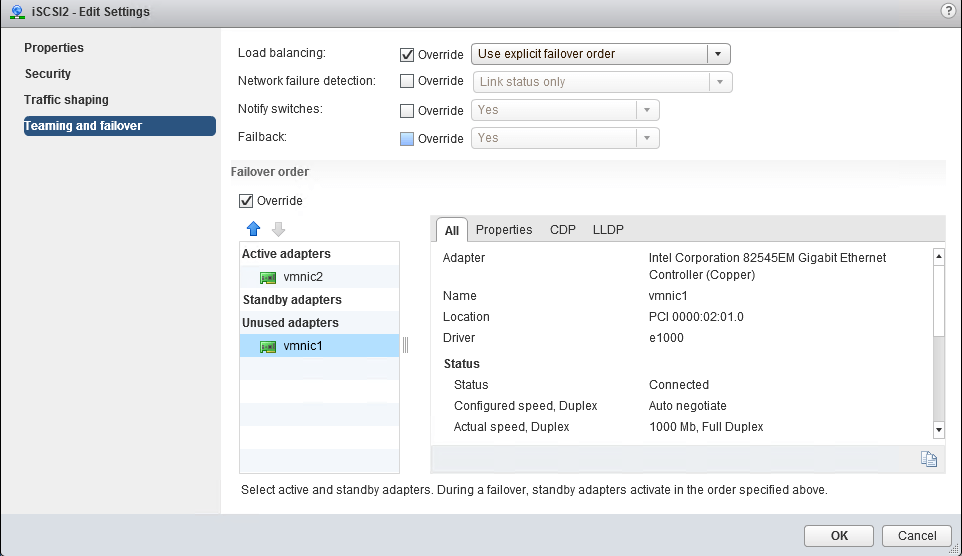
- Select the Load Balancing policy as Use Explicit failover order
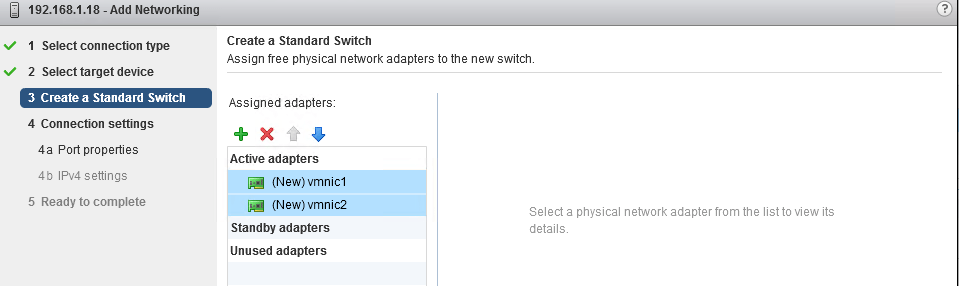
- Active Adapter as vmnic1
- Unused Adapter as vmnic2

Configure iSCSI Port Binding using ESXCLI
Another way to perform this activity is through esxcli. The steps would remain the same as done from the vSphere Web Client.
So let us quickly go through the steps required to perform this.
Create a new standard vSwitch called vSwitch1:
~ # esxcli network vswitch standard add -v vSwitch1
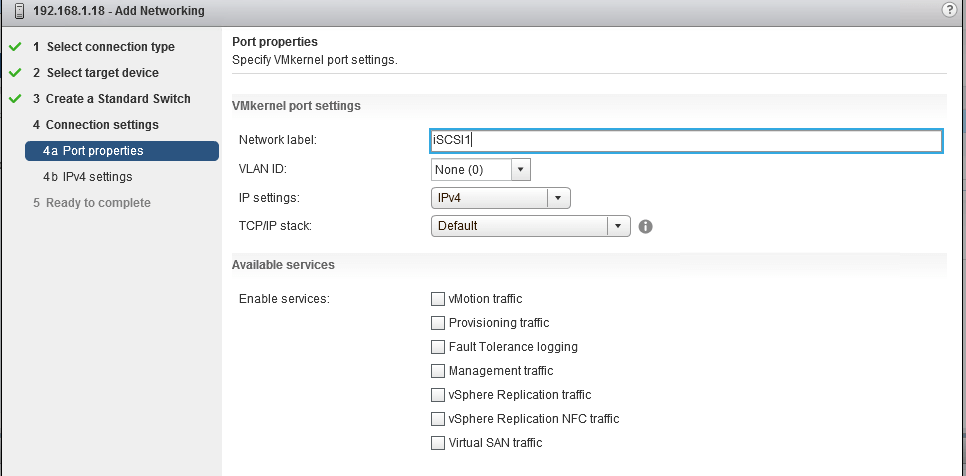
Once the switch is created we will create the two new portgroups called iSCSI1 and iSCSI2:
~ # esxcli network vswitch standard portgroup add -p iSCSI1 -v vSwitch1
~ # esxcli network vswitch standard portgroup add -p iSCSI2 -v vSwitch1
Next, we need to add the uplinks vmnic1 and vmnic2 to the new vSwitch:
~ # esxcli network vswitch standard uplink add -u vmnic1 -v vSwitch1
~ # esxcli network vswitch standard uplink add -u vmnic2 -v vSwitch1
Next steps would be to set them active.
~ # esxcli network vswitch standard policy failover set -a vmnic1,vmnic2 -v vSwitch1
We will now have to associate vmnic1 to the portgroup iSCSI1 and vmnic2 to iSCSI2 portgroup.
~ # esxcli network vswitch standard portgroup policy failover set -a vmnic1 -p iSCSI1
~ # esxcli network vswitch standard portgroup policy failover set -a vmnic2 -p iSCSI2
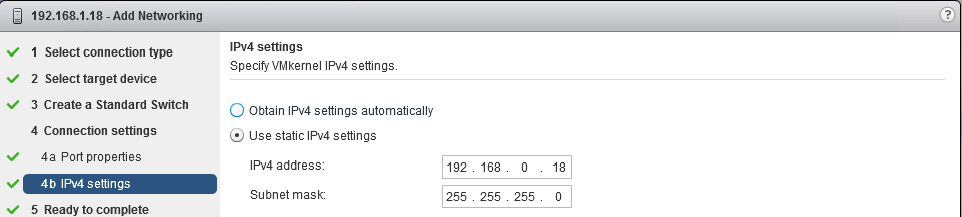
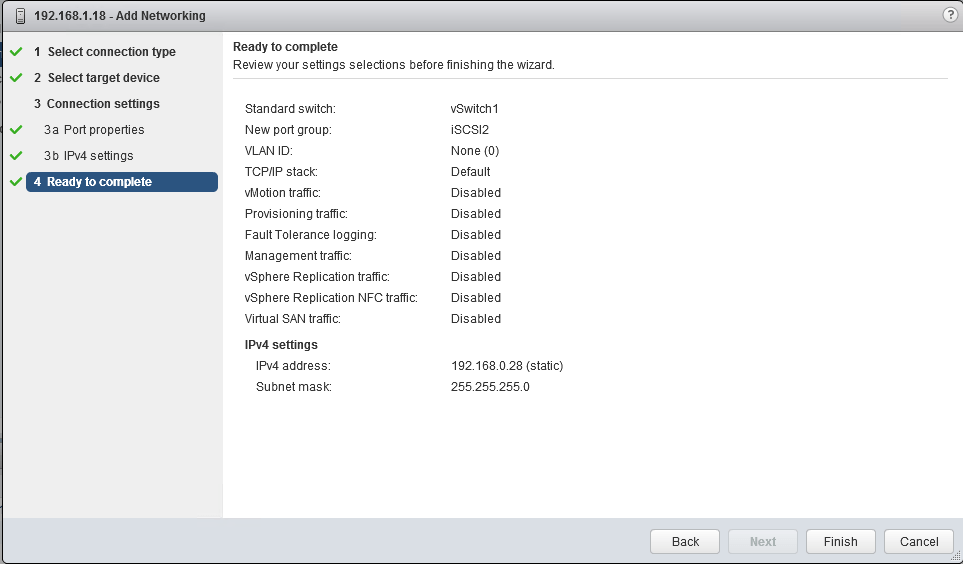
The last step would be to create the VMkernel interfaces and associate them with the portgroups we have just created and provide the correct IP addresses.
~ # esxcli network ip interface add -p iSCSI1 -i vmk1
~ # esxcli network ip interface add -p iSCSI2 -i vmk2
~ # esxcli network ip interface ipv4 set -i vmk1 -I 192.168.0.18 -N 255.255.255.0 -t static
~ # esxcli network ip interface ipv4 set -i vmk2 -I 192.168.0.28 -N 255.255.255.0 -t static
Once that is done the network configuration will be complete and will match as shown below.
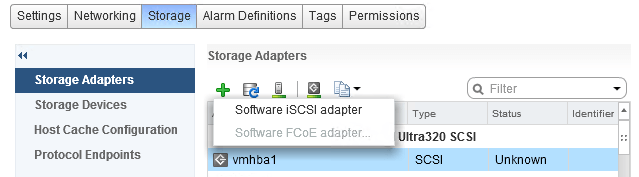
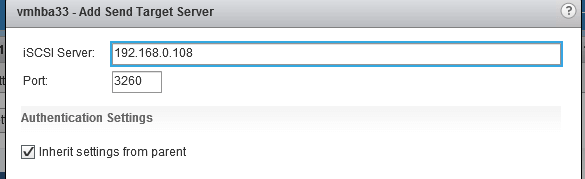
Next, we will have to make the add the target IP address for the Software iSCSI Adapter that was created.
~ # esxcli iscsi adapter discovery sendtarget add -a 192.168.0.108:3260 -A vmhba33
The final step would be to perform the Network Port Binding.
~ # esxcli iscsi networkportal add --nic vmk1 --adapter vmhba33
~ # esxcli iscsi networkportal add --nic vmk2 --adapter vmhba33
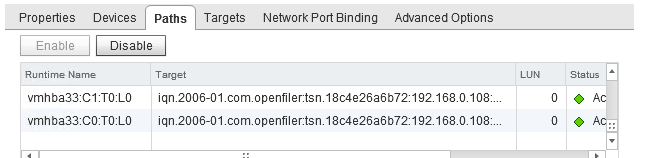
Both the methods will achieve you the same results. You can also verify if multipathing is set correctly by running the below command which will list all the paths on the ESXi host.
~ # esxcli storage core path list

The output of this command exactky mateches with the Paths that we saw earlier in the vSphere Web Client.
Well that is all I have for today! I hope this has been informative and thank you for reading!


1 Comment
I’ve always set up ISCSI this way but then I came across this: https://kb.vmware.com/kb/2038869 and I’m very confused. How could I remove the network port binding and still use all the nics?