
Hello Friends,
In today's post, we will see ow to use OVFtool to copy VMs from one host to another without having shared datastore between them.
The idea behind this article came from one of the questions that were directed to me recently regarding how to copy a VM from one host to another without having shared storage between them.
Now you could perform this from the vCenter Server if both the source and destination hosts are registered to the vCenter Server.
And yes, this operation cannot be performed when the Virtual Machine is in a power ON state even from the vCenter Server.
But if the two hosts were to be standalone hosts, then you could use another VMware product like VMware Converter, but it has its own set of issues.
Another method would be to download the files of the Virtual Machine to your local desktop and upload it to the local datastore of the destination host.
Now you can imagine the complexities and efforts that the above two tasks can take, which is when I came across the ovftool utility and was surprised to see that this can be done with no efforts and is the easiest way to probably do this.
And another good thing about the ovftool is that it is available for Windows, Linux, and MAC Operating Systems.
In our demo here, I will be making use of the Windows msi file to install on a Windows 8.1 machine which has access to both my source and destination hosts.
To download the latest version of the ovftool as of today, use the below link.
In our example, I have two ESXi hosts with the IP Addresses 192.168.1.15 and 192.168.1.16. I have a VM called DSL which I am interested in copying from one host to another.
The VM DSL is currently running on host 192.168.1.15 residing on the local datastore of that host (LocalESXiH)
First, you will open a command prompt to navigate to the directory where the ovftool is installed.
Run the below command to connect to the ESXi host remotely.
ovftool.exe vi://[email protected]
We are making the connection using the root account.
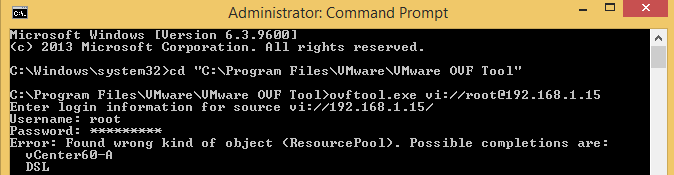
As you can see above, it is listing the VMs registered on the host and Test is one of them.
Now, we just need to specify the source ESXi host and the destination ESXi host as well as the datastore using the -ds option using the ovftool.
The actual copy of the VMs happens through the NFC protocol.
Here is an example of using ovftool to export the VM from one ESXi host to another ESXi host:
ovftool.exe -ds=LocalESXiF vi://[email protected]/DSL vi://[email protected]
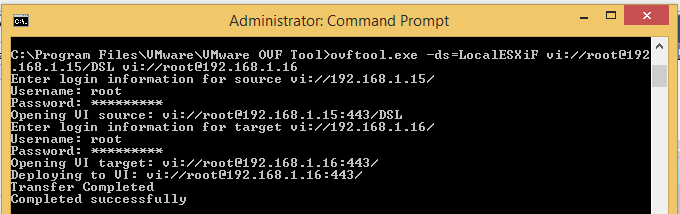
There we go, you can see that the copy of the VM was successful from the above message.
But a couple of things to remember when you try this.
- If you have snapshots running on the VM, then it will not copy over the delta files.
- If you have thin provisioned disk, it will convert to thick provisioned on the destination datastore by default.
If you wish to learn more about the ovftool, kindly use the -h parameter to list out the available options.
I hope this has been informative and thank you for reading!


3 Comments
Thanks!
+1 Thanks
Can we copy vm while it powered on or it should be powered off ?