
I was recently evaluating backup solutions for my lab environment and I came across a new solution called NAKIVO.
Nakivo has a great product called Nakivo Backup and Replication which is an all-in-one solution to backup, replicate and recover VMs onsite, offsite and even to cloud.
They were kind enough to provide me a Beta license once I contacted them and the latest version is called Nakivo Back and Replication 6.1 Beta.
Nakivo Backup and Replication Architecture Overview
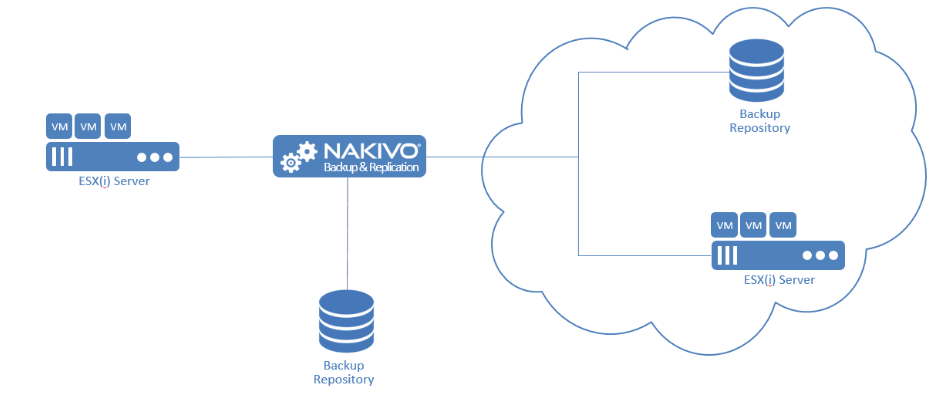
NAKIVO Backup and replication is a server application that can be installed on a Virtual or Physical machine. The product consists of the following components:
- Director
- Transporter
- Backup Repository
Director
The Director is a central management instance of the product. It provides the Web interface, discovers and maintains the inventory of a Virtual environment.
It also enables to create and run jobs, manages various backup repositories and Transporters.
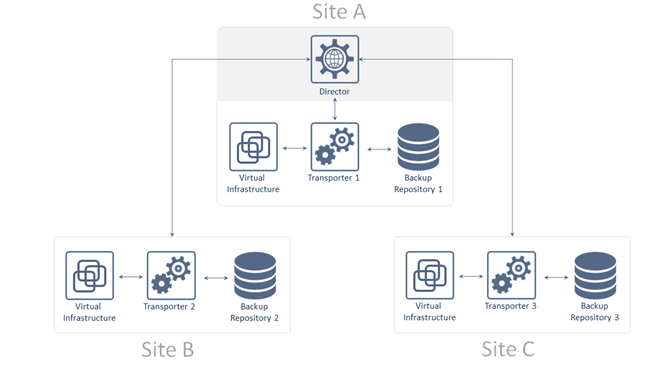
Only one Director is required to be installed per customer as seen below.
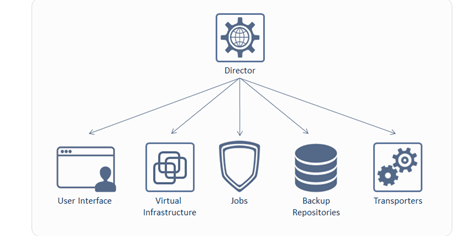
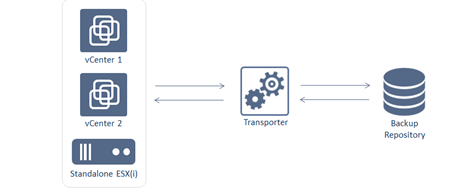
Transporter
The Transporter is the component that does all of the work: it performs the backup, replication, and recovery, as well as data compression, deduplication, and encryption. An instance of the Transporter (Onboard Transporter) is included in each installation to enable backup, replication and recovery out of the box. The Onboard Transporter is automatically configured.
Backup Repository
A Backup repository is a folder used by Nakivo Backup and Replication to store VM backup. When you add a Backup Repository to the product, NAKIVO Backup and Replication creates a folder called "NakivoBackup" in the location and keeps all the VM data
When you add a Backup Repository to the product, NAKIVO Backup and Replication creates a folder called "NakivoBackup" in the location and keeps all the VM data in that folder.
Nakivo Backup and Replication Installation
You can actually deploy your NAKIVO Backup & Replication in one of five ways:
- Windows installer
- Linux installer
- Pre-configured VMware virtual appliance
- Network Attached Storage (NAS) installer
- Pre-configured Amazon Machine Image (AMI)
In my case, I have installed the Pre-configured VMware Virtual appliance. You can download from here.
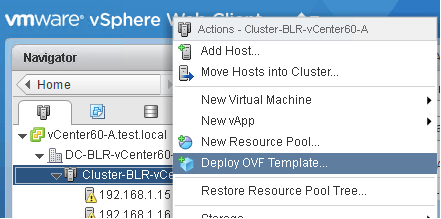
Log in to vSphere Web-Client to start the deployment of the NAKIVO virtual Appliance v6 on VMware vSphere Platform. Right click the vSphere cluster or ESXi host and Select “Deploy OVF Template”
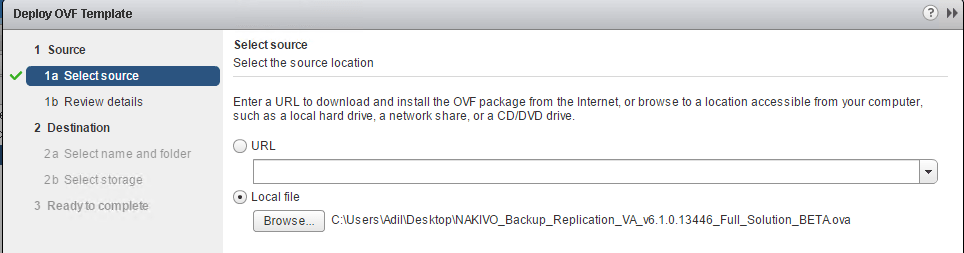
Browse the directory and select the downloaded file.
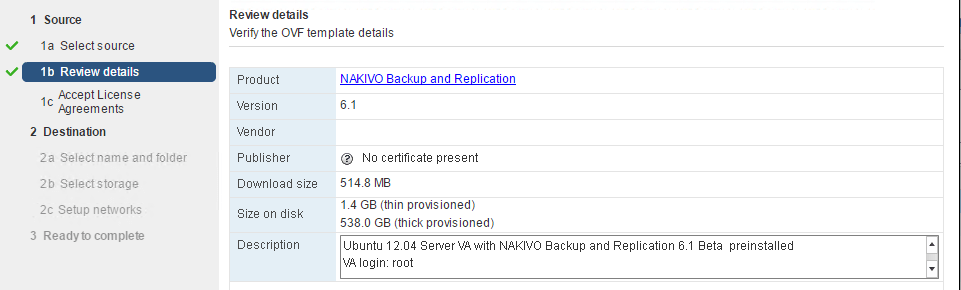
Review the OVF template details. In Description, you find the appliance OS information and login credentials.
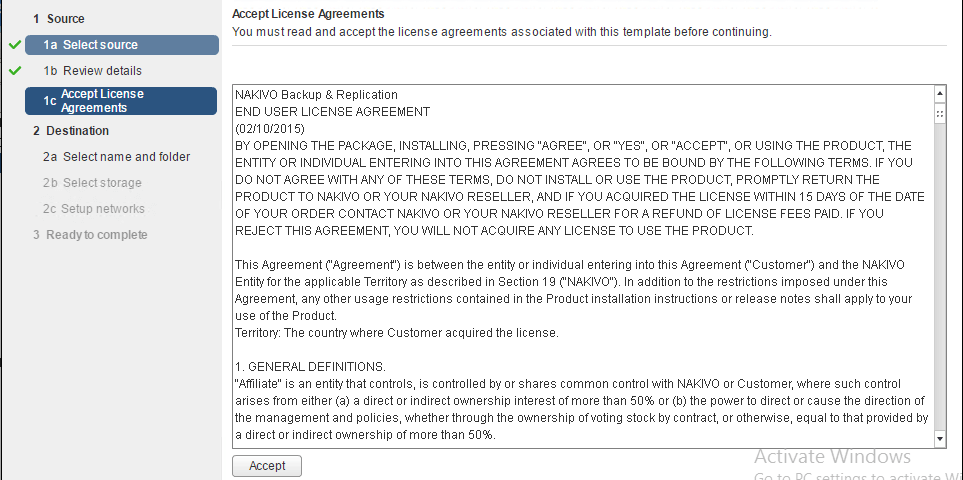
Accept the Nakivo backup license agreement.
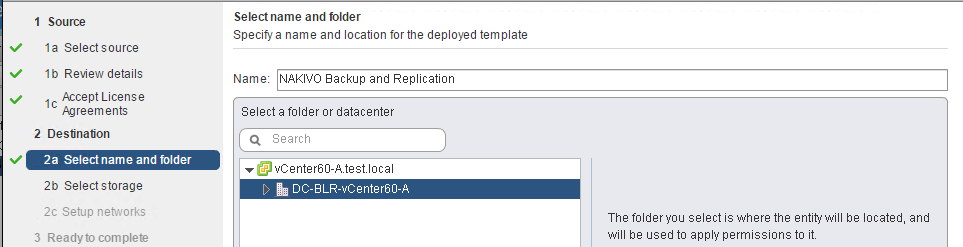
Provide the name for the virtual machine and Select the folder or datacenter location. Click Next.
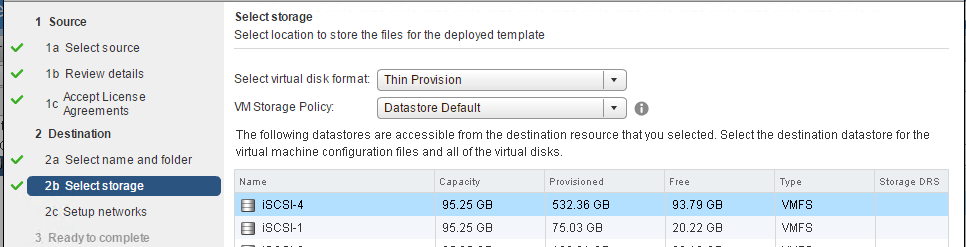
Select a datastore where you would like to keep the Virtual Appliance disk and click Next. If you deploy the Virtual Appliance disks using the Thin Provision option, then the disks will not reserve space on your datastore and will only consume space when actual data (such as your backups) is written to disks.
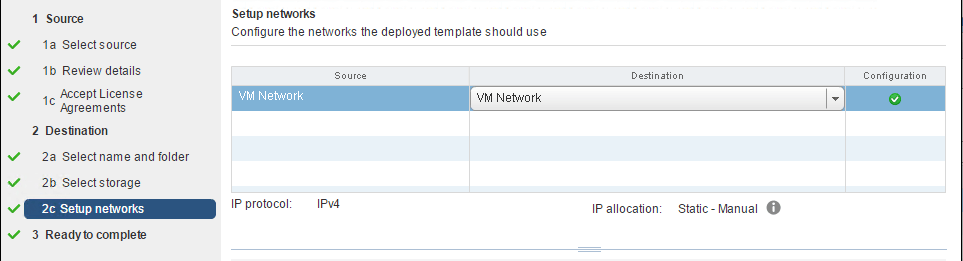
Select the Virtual machine port group from the drop-down to connect to the Nakivo Backup and replication virtual appliance. Click on Next.
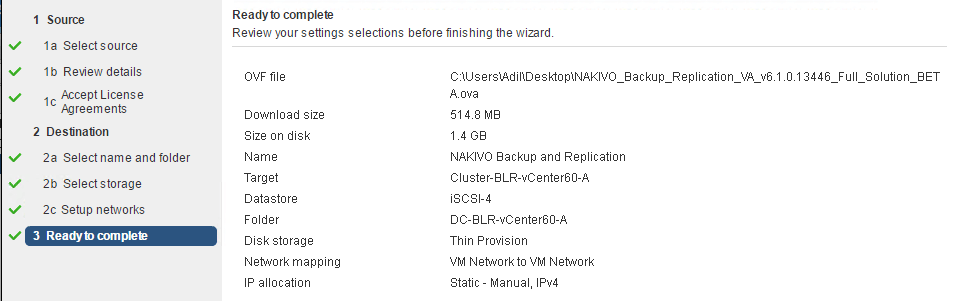
Click on Finish to complete the deployment of Nakivo Backup & Replication virtual appliance.
That's it! It was that easy to deploy the Nakivo Backup and Replication appliance. In the next section, we will deal with the configuration part of the Virtual appliance.
Nakivo Backup and Replication Configuration
Now that we have deployed the appliance, we will go ahead with performing the configuration part so that we can start taking our first backup.
Power ON the Virtual machine from the vCenter Server.
Once the Nakivo appliance is up , you will get to the console to configure system systems. Just select “Network Settings” & press enter to modify the hostname & IP details.
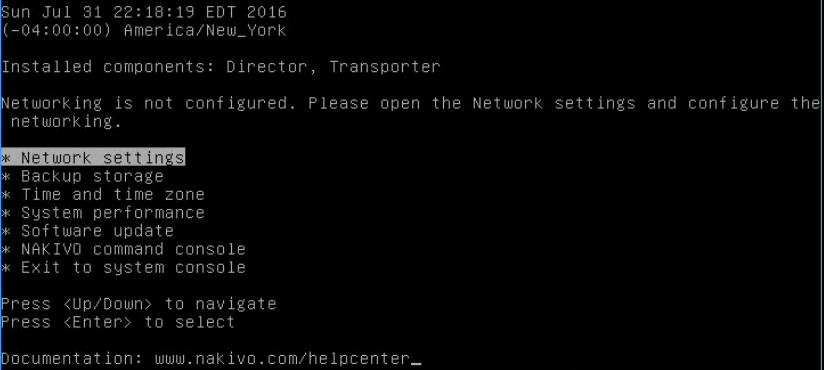
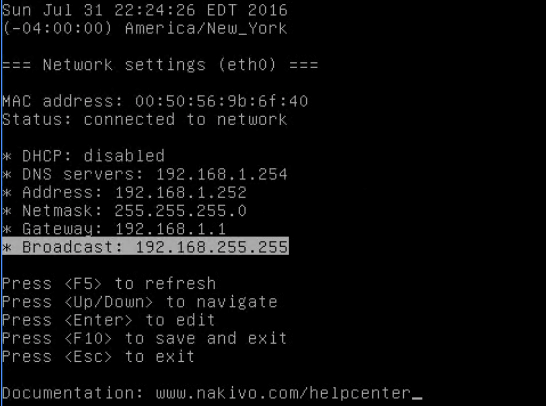
Navigate to the hostname and set the new hostname. You can also modify the network settings.
Since I don’t use DHCP server in my lab, I have disabled the DHCP and assigned static IP settings. Press <F10> to save and exit.
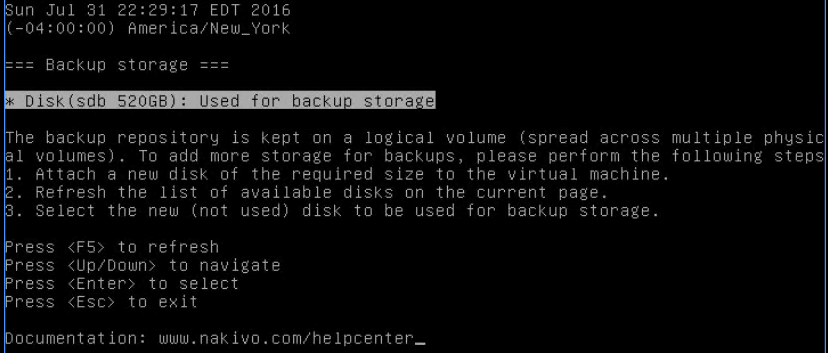
Next, from the main menu, we will select the Backup storage to configure the backup storage.
Remember, we talked about Backup Repository in the earlier section, in the Virtual Appliance, there is already a disk that is configured as a backup repository during the appliance deployment.
If you would like, you can add new repositories, but I will just leave it at one.
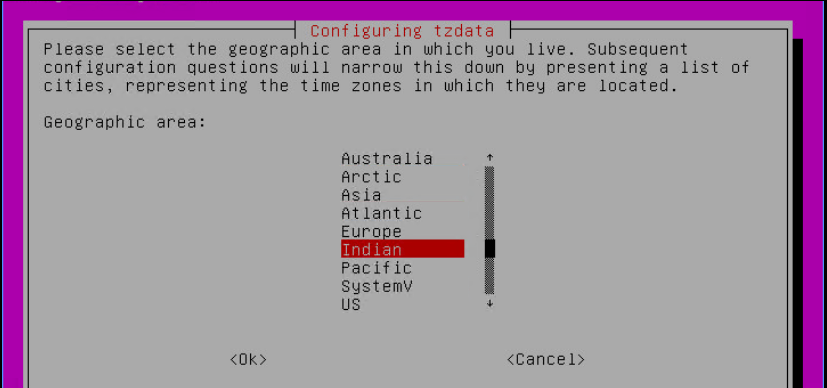
If you would like, you can change the time zone as per your deployment and needs. Click on “Change time zone” to modify the timezone.
You can find the NAKIVO’s System Performance. It provides the appliance’s performance statistics.
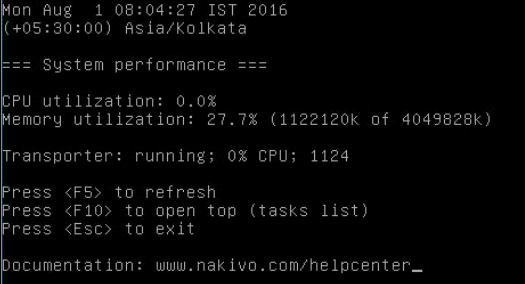
Now you can click on Exit to System console to finish the post-deployment tasks.
By default, NAKIVO’s web portal uses port 4443. (https://192.168.0.127:4443) .
The initial web page login will allow you to configure new username & password. Click on Configure credentials.
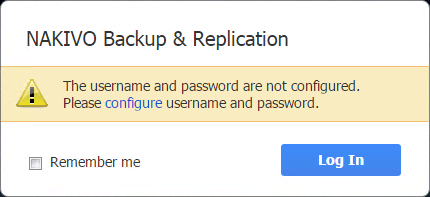
Enter the desired username and password to configure the credentials.Click on Done.

Now, we have successfully completed the configuration of the Nakivo Backup and Replication appliance. In the next section, we will take our first backup.
Creating the first Backup Job
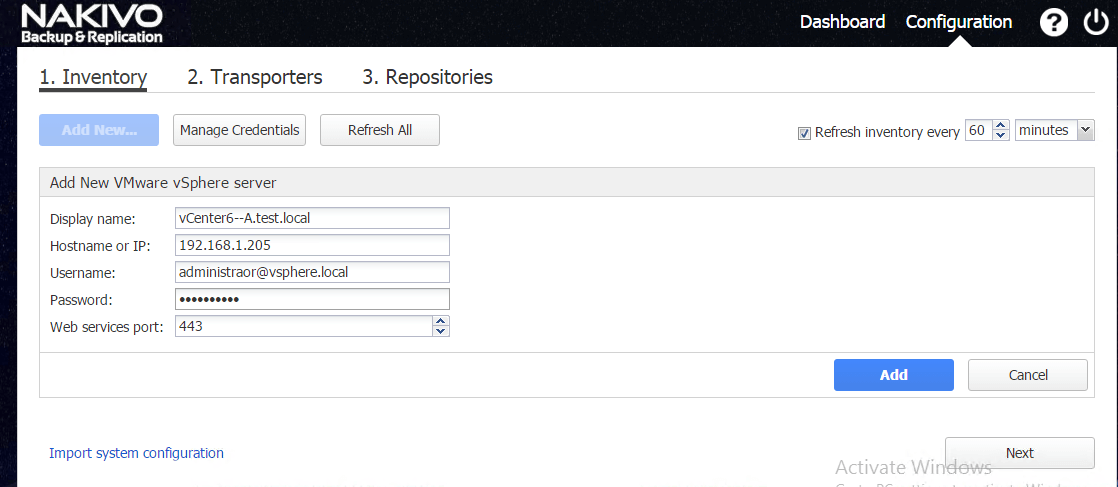
Before you start creating the first backup job, we will add the inventory to the appliance so that it can fetch information about the Virtual environment.
Add the vCenter Server as inventory target. The NAKIVO management server will locally cache the entire vCenter inventory making further configuration very fast.
The inventory is refreshed every 60 minutes automatically.
Once the vCenter Server is added, the Nakivo Backup and Replication appliance will fetch the information regarding the inventory.
Next, let us look at the Transporter. The Transporter is the component that does all of the work: it performs the backup, replication, and recovery, as well as data compression, deduplication, and encryption.
An instance of the Transporter (Onboard Transporter) is included in each installation to enable backup, replication and recovery out of the box. The Onboard Transporter is automatically configured.

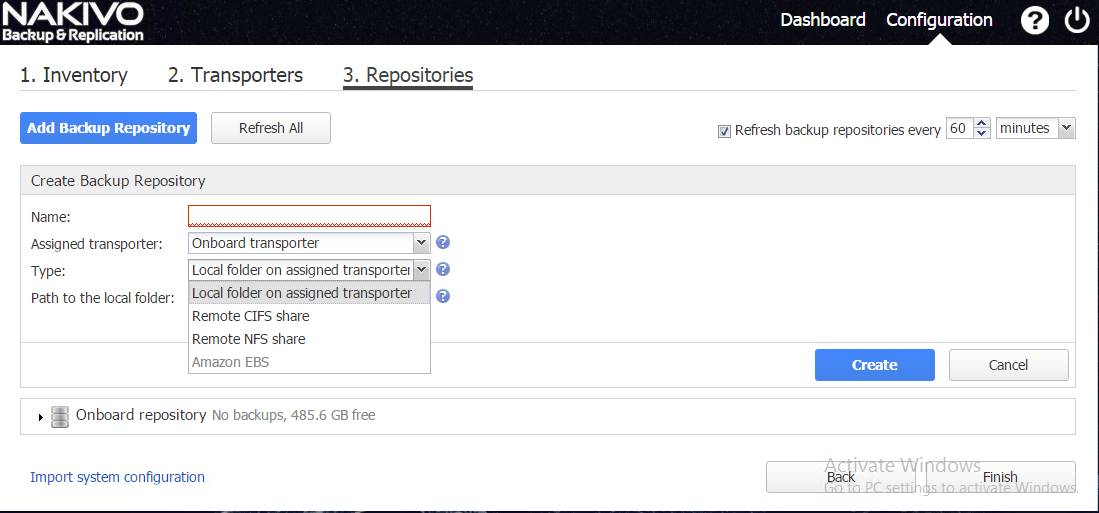
Next, we will get an option tp configure another repository as seen previously, but we will use the one that was created for us during the installation process.
If you would like to create a new one, just click on Add.
Now you will be redirected to the job creating wizard to configure the first backup job.
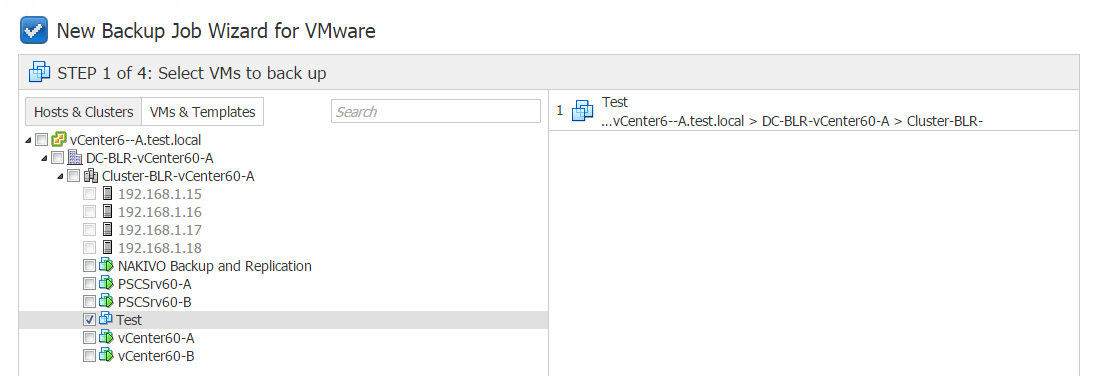
Select VMs to backup. You have the ability to group Virtual Machines in objects. Any VM added to the object later are automatically added to the backup job.
- vCenter Server
- Datacenter
- Cluster
- ESXi Hosts (When not in a Cluster)
- VM Folders
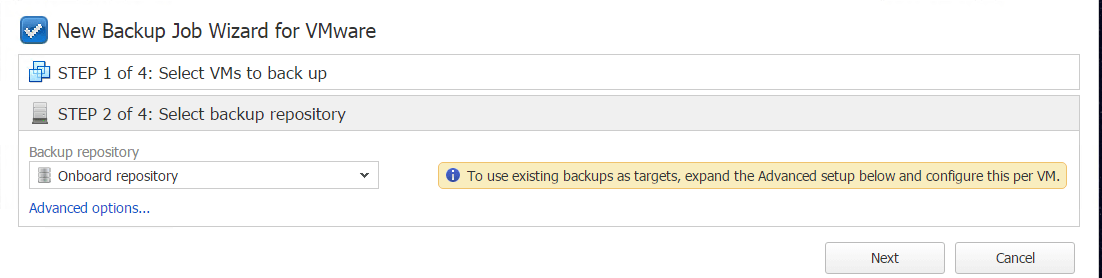
Select the backup repository used by the job.
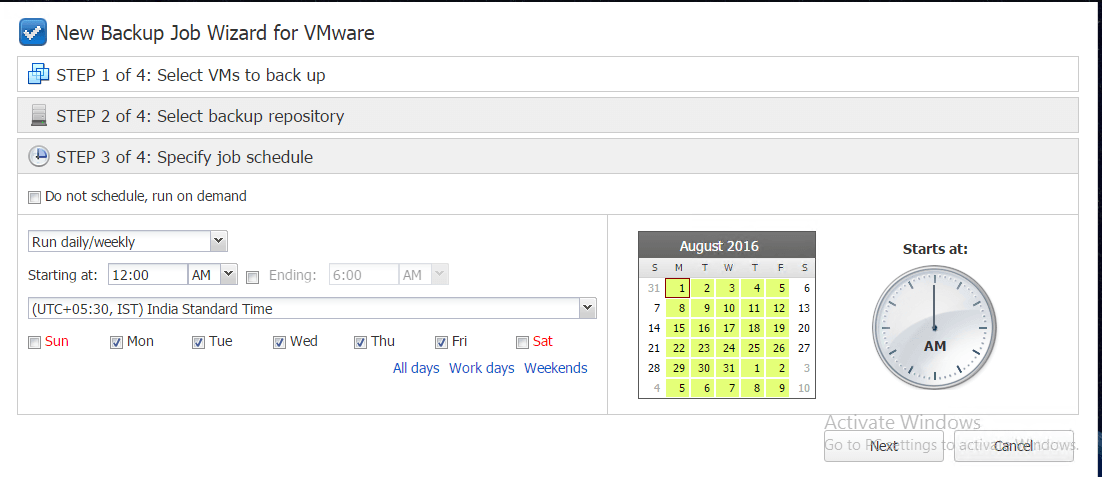
You can now specify job schedule. Backup jobs can be configured to run daily, weekly, monthly, yearly or periodically (eg. every hour).
You can also disable automatically backups and create an on-demand job, which requires starting the backup job with the Web Client or the API.
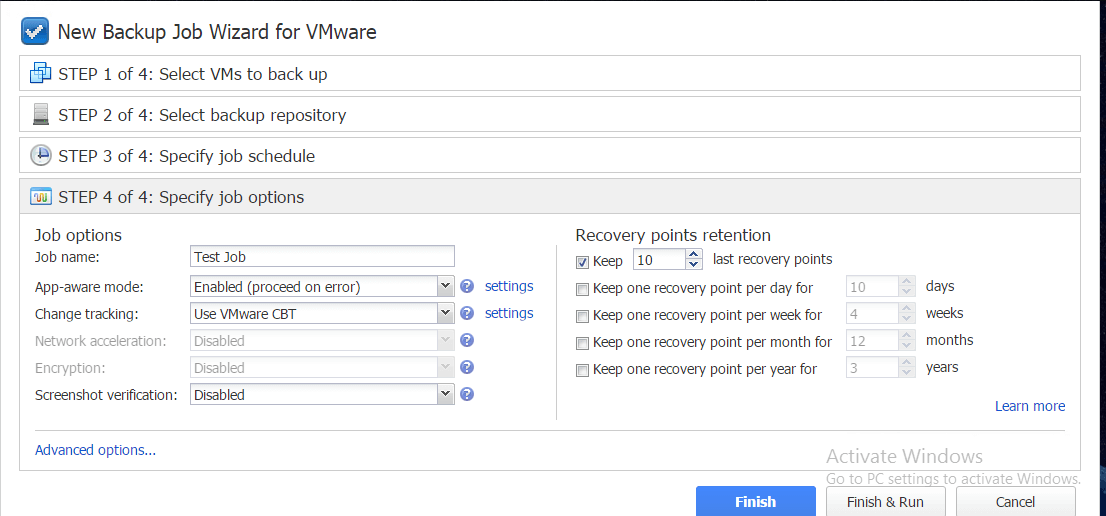
You can now specify a retention policy and job options. Like with most VMware-based backup products, backups are incremental forever. You can specify the number of recovery points.
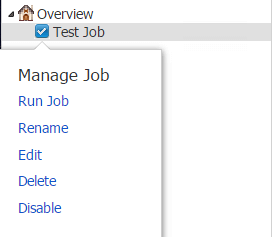
Now we will run the Test Job that we created by using the “Run Job” button.
While the backup is running, you can monitor the progress.
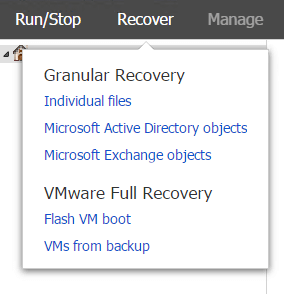
Recovering the backed up VM
There are two ways that you could perform a Full recovery of the VM in case there are issues with the original VM in the inventory.
- Flash VM Boot.
- VMs from backup
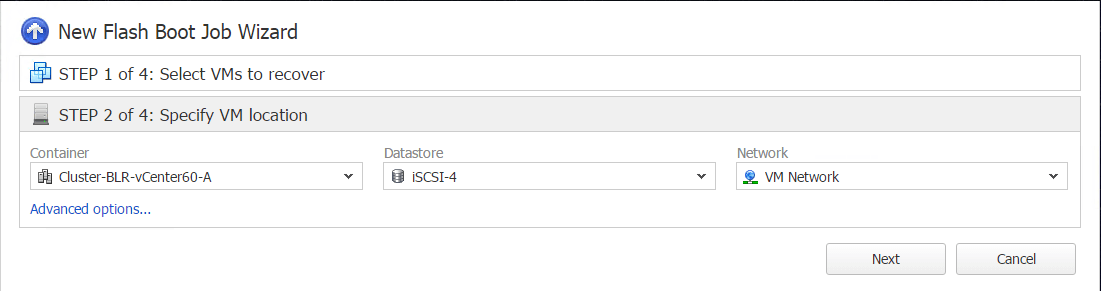
Flash VM Boot enables you to start Virtual Machines directly from the backup repository. This allows you to recover a VM within seconds.
Select the Virtual Machine to restore, and the recovery point. The default is to use the latest recovery point which makes sense for most cases.

Specify VM location and additional options like Datastore and the network settings for the VM.
The job will run and finish successfully. It takes only a few seconds to restore and boot the VM.
The only difference between the Flash VM Boot and the regular restore VM from backup is that in Flash VM Boot restore the disk is mapped as an RDM LUN from the backup repository by the Transporter.
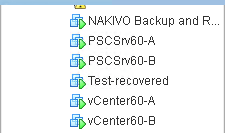
You will now be able to see the recovered VM in the inventory once the job is completed.
Conclusion
I have been using the Nakivo Backup and Replication for almost 15 days now and below are my findings and why would I recommend this to the readers.
- Simplicity: I have used a lot of tools, but the simplicity with Nakivo Backup and Replication is just awesome. From the time I downloaded the OVA file, to creating the first backup, I did not need to look at the documentation even once.
- Speed: The speed of the backups are really fast and the Web Interface is also very responsive.
- Error Handling: This is one of the major highlights if any one of the jobs fails, they point to a KB article along with the steps to troubleshoot.
- Multiple Deployment Options: This is where I think, they have performed a good job. Covering all the major deployment options gives them an upper hand. Although, I personally prefer the appliance because I do not have to bother maintaining the OS.
- Deduplication: Virtual Machine backups are deduplicated across the entire repository.
I have had fun evaluating the product, if you are interested to head over to their website and download the 15 day trial to see how it can help your present Virtual Infrastructure.


2 Comments
Nakivo is a young but with great future product.
Thanks for the good information!
Agreed!