
Welcome back Folks,
First of all, I would like to welcome and thank Nakivo Backup and Replication as one of the sponsors on the blog.
In today's post, I will be taking a look at Nakivo Virtual Appliance Deployment for vSphere. There are various ways that one can deploy Nakivo Backup and Replication:
- Windows installer
- Linux installer
- Pre-configured VMware virtual appliance
- Network Attached Storage (NAS) installer
- Pre-configured Amazon Machine Image (AMI)
What I have found is that the NBR Virtual Appliance is the easiest to deploy and configure in most cases unless there are specific requirements of an organization.
What is NBR Virtual Appliance?
Nakivo Backup and Replication Virtual Appliance is a pre-configured VMware Virtual Machine that is created by the Nakivo Team.
It can be easily downloaded from the Nakivo website as an OVA file. OVA is a tar file that includes the content of the OVF directory.
An OVF is a collection of items in a single folder. Most commonly this is a description file (.ovf) a manifest file (.mf), and virtual machine state files ( *.vmdk)
Nakivo Backup and Replication appliance has Ubuntu 12.04 Server preinstalled with the required software from the Nakivo Team.
Benefits of Virtual Appliance Deployment
I always prefer Virtual Appliances over typical installation procedures, which is why I want to further highlight the benefits of deploying Nakivo Virtual Appliance:
- Simplified and rapid deployment, approximately 15 minutes deployment time.
- Lower TCO by eliminating OS dependency and licenses. (Runs Ubuntu Server)
- NBR Virtual Appliance is easy to upgrade, just connect to the Web Interface and click on Upgrade.
Nakivo Virtual Appliance Deployment Process
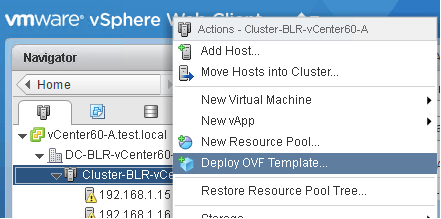
Log in to vSphere Web-Client to start the deployment of the NAKIVO virtual Appliance v6 on VMware vSphere Platform. Right click the vSphere cluster or ESXi host and Select “Deploy OVF Template”
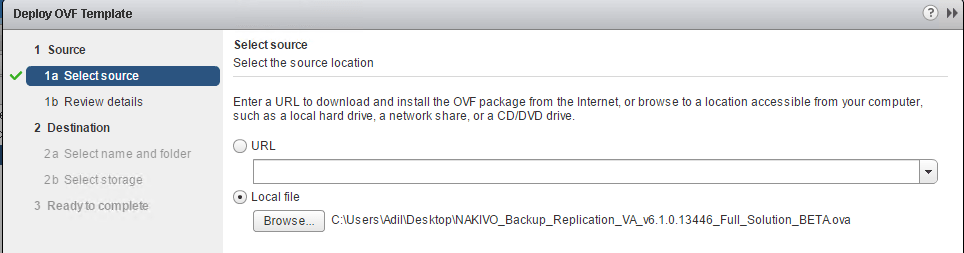
Browse the directory and select the downloaded file.
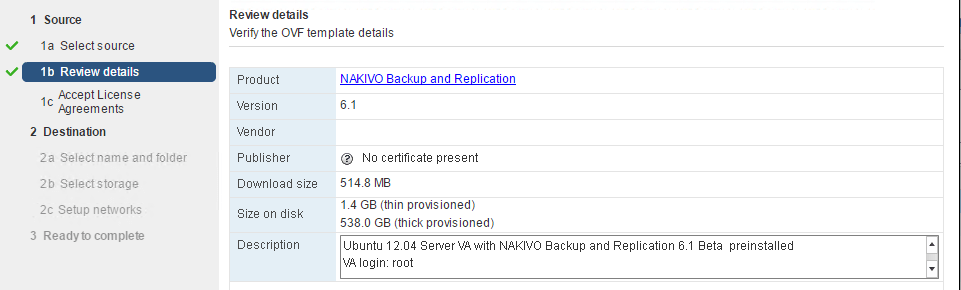
Review the OVF template details. In Description, you find the appliance OS information and login credentials.
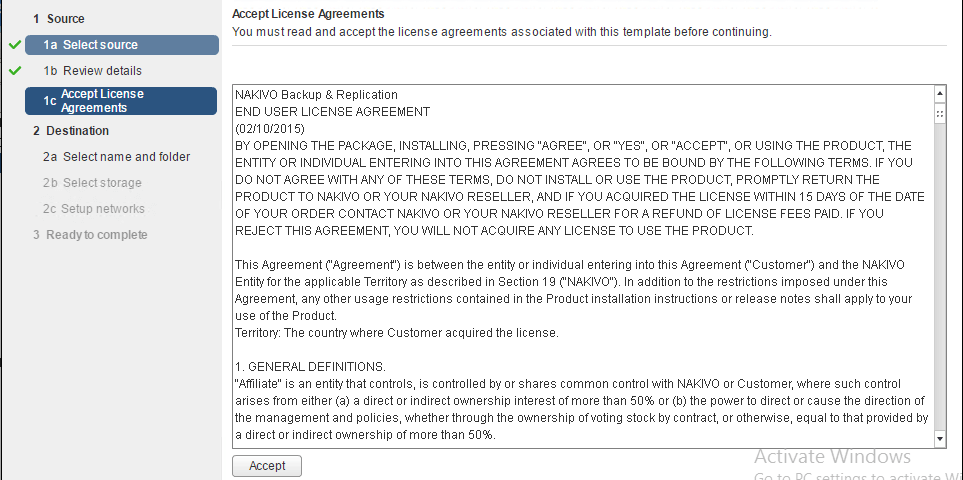
Accept the Nakivo backup license agreement.
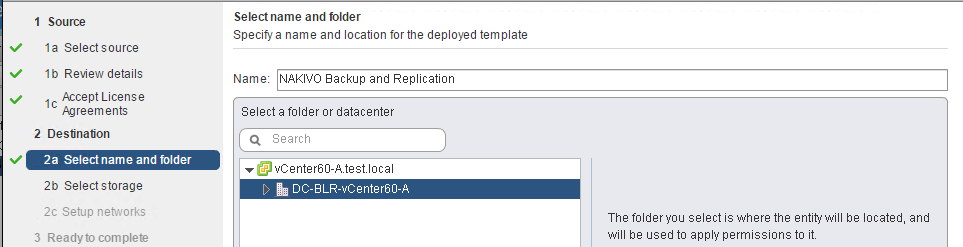
Provide the name for the virtual machine and Select the folder or datacenter location. Click Next.
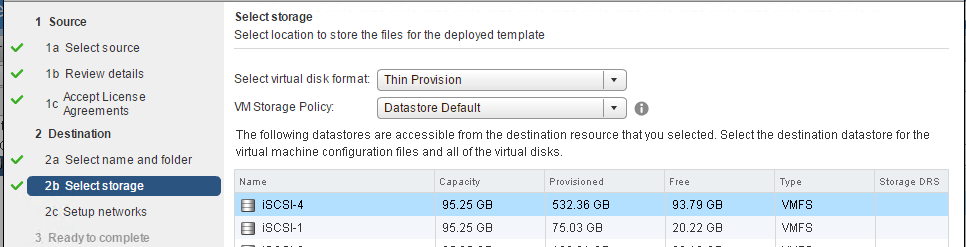
Select a datastore where you would like to keep the Virtual Appliance disk and click Next. If you deploy the Virtual Appliance disks using the Thin Provision option, then the disks will not reserve space on your datastore and will only consume space when actual data (such as your backups) is written to disks.
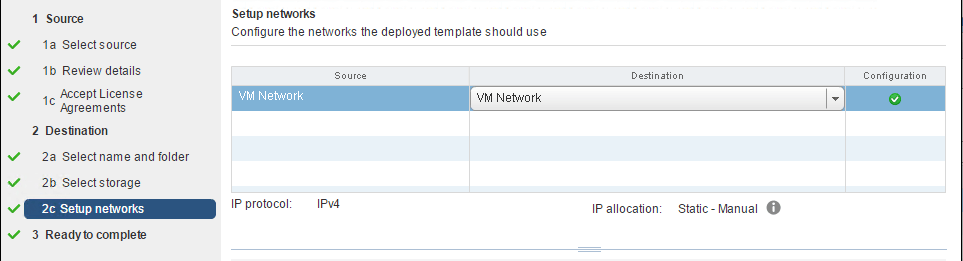
Select the Virtual machine port group from the drop-down to connect to the Nakivo Backup and replication virtual appliance. Click on Next.
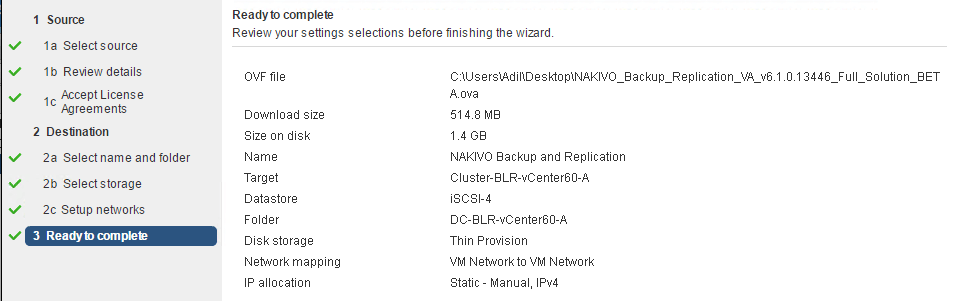
Click on Finish to complete the deployment of Nakivo Backup & Replication virtual appliance.
That's it! It was that easy to deploy the Nakivo Backup and Replication appliance.
Nakivo Virtual Appliance Configuration
Now that we have deployed the appliance, we will go ahead with performing the configuration part so that we can start taking our first backup.
Power ON the Virtual machine from the vCenter Server.
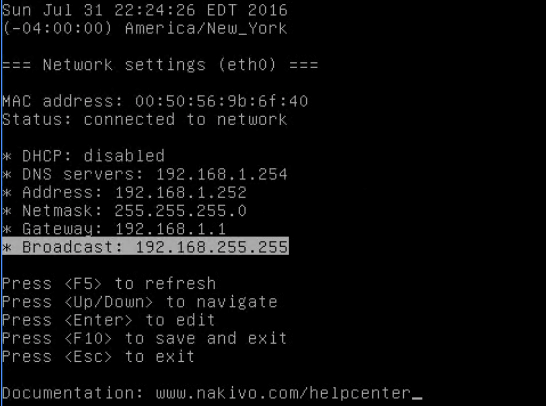
Once the Nakivo appliance is up , you will get to the console to configure system systems. Just select “Network Settings” & press enter to modify the hostname & IP details.
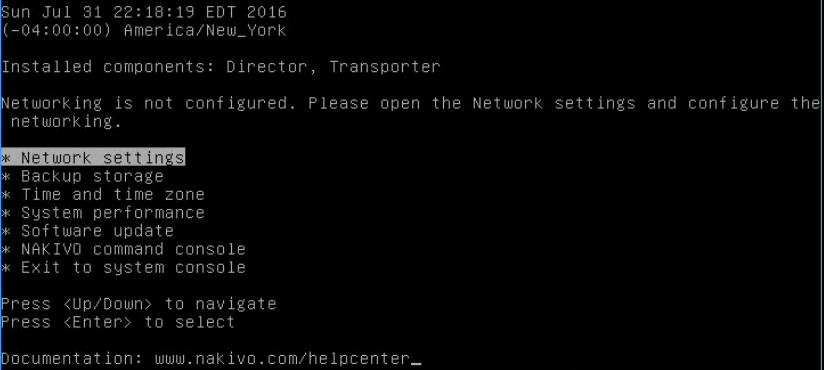
Navigate to the hostname and set the new hostname. You can also modify the network settings.
Since I don’t use DHCP server in my lab, I have disabled the DHCP and assigned static IP settings. Press <F10> to save and exit.
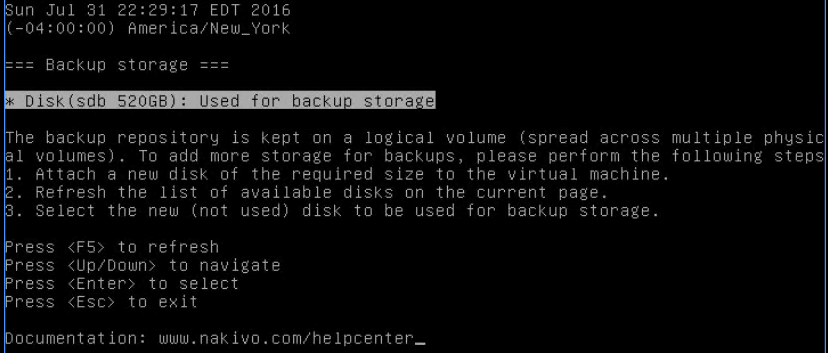
Next, from the main menu, we will select the Backup storage to configure the backup storage.
Remember, we talked about Backup Repository in the earlier section, in the Virtual Appliance, there is already a disk that is configured as a backup repository during the appliance deployment.
If you would like, you can add new repositories, but I will just leave it at one.
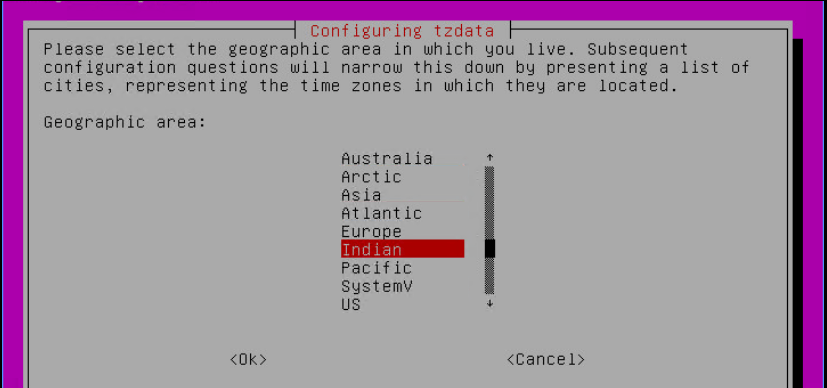
If you would like, you can change the time zone as per your deployment and needs. Click on “Change time zone” to modify the timezone.
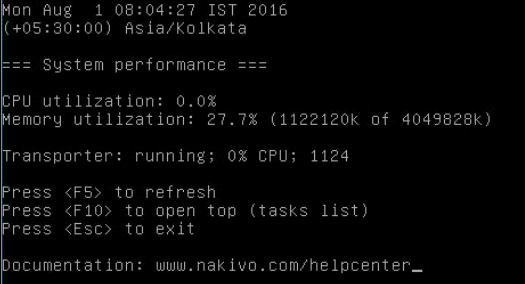
You can find the NAKIVO’s System Performance. It provides the appliance’s performance statistics.
Now you can click on Exit to System console to finish the post-deployment tasks.
Nakivo Virtual Appliance Details
Once the installation and configuration is completed, you might want to start the First backup job using the newly deployed Nakivo Virtual Appliance.
Below are some of the details that will help you with the first log on.
- OS Type: Ubuntu Server 12.04, 64-bit
- Username: root
- Password: root
If you plan to use the Nakivo Virtual Appliance over the internet, then I would highly recommend changing the default password.
How to login to the Web Interface
Well, you must be excited by now since we just finished installing and configuring the Nakivo Virtual Appliance and wondering how do I start my backing up my Virtual Infrastructure.
Nakivo Backup and Replication has a Web Interface wherein you can manage the Virtual Appliance and start creating the Backup and Replication jobs.
To access the Web Interface, use the URL https://<Appliance_VM_IP>:4443.
Well, that is all I have for today. Since I have started the new series for the Nakivo Team, expect more awesomeness on the blog about this product.
I hope you found this informative and thank you for reading!


