
One of the new features that were introduced back in the vSphere 6.0 release is the ability to use Layer 3 vMotion.
I was recently working with one of the customers wherein we had to configure Layer 3 vMotion as the requirement was to migrate VMs from one city to another 500 miles apart.
You might also be aware that VMware now supports long distance Motion as well. Below are the requirements.
- An RTT (round-trip time) latency of 150 milliseconds or less, between hosts.
- Enterprise plus License for the hosts participating in long-distance vMotion.
Another important thing to note is that the VMs will still require layer 2 connectivity between the hosts so that it can be migrated successfully.
Now let us actually get to the meat of the article and configure the vMotion vmkernel adapters and the vMotion TCP/IP stack.
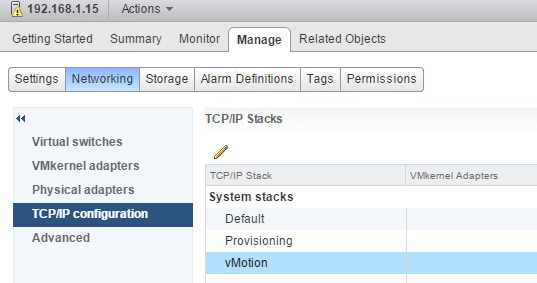
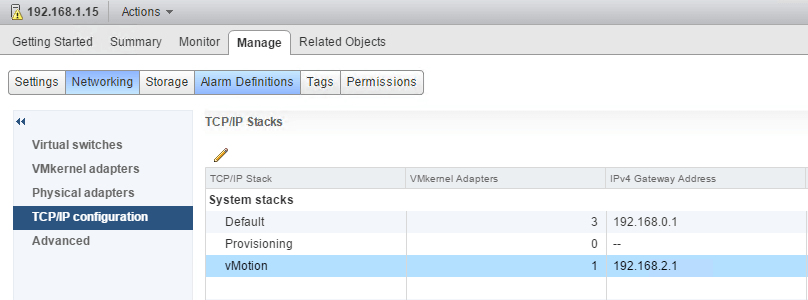
There are multiple TCP/IP available and they can be seen as below:
- Default
- Provisioning
- vMotion
vMotion VMkernel Adapter Configuration
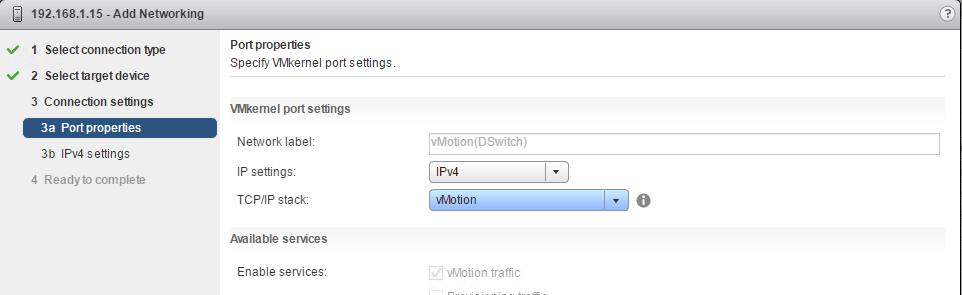
Configuring the VMkernel adapter is pretty straightforward. During the creation of the vmkernel adapter, you will need to choose the vMotion TCP/IP stack.
The vMotion service will become enabled, and other services will grey out and remain disabled.
In the next step, provide the IP address. In my case, I am using a static IP address as seen below on the summary page.
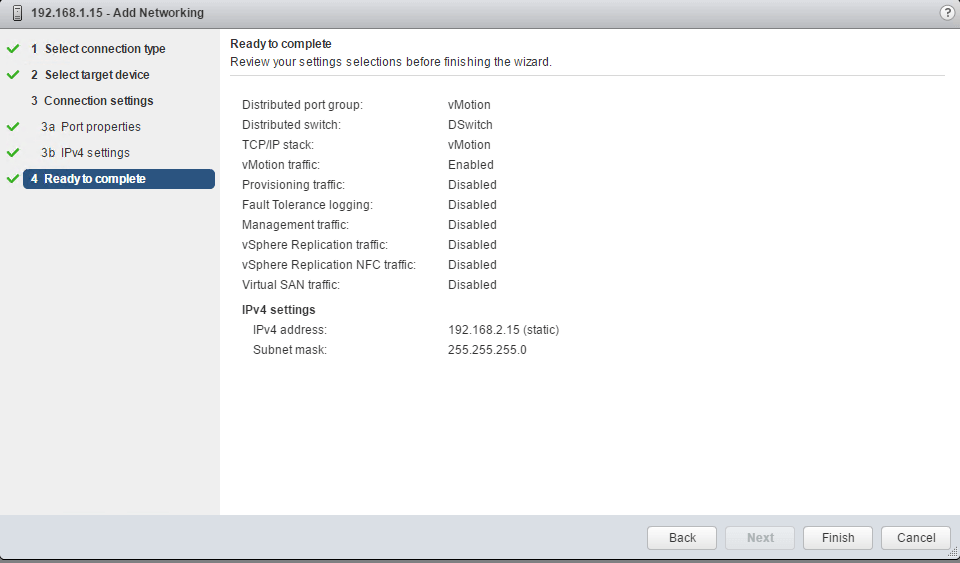
If you wish to create multiple VMkernel adapters for vMotion, repeat the process of creating VMkernel adapters and placing them on the vMotion TCP/IP stack for the host.
Now we will move on with configuring the vMotion TCP/Ip stack.
vMotion TCP/IP Stack
In order to successfully leverage the Layer 3 vMotion, you will first have to create a vMotion TCP/IP stack.
But first let us note down a few things before we proceed further here:
- You will have to create new vMotion VMkernel adapter(s) for vMotion. Existing VMkernel adapter configuration cannot be changed.
- The vMotion TCP/IP stack cannot be configured until at least one VMkernel adapter is added to the stack.
- Any VMkernel adapters that have vMotion enabled, but are not using the vMotion TCIP/IP stack, vMotion feature will be disabled.
- Other services like vSAN or FT cannot be used on the same vmkernel adapter.
Moving on, let us now configure the vMotion TCP/IP stack. The only major change that needs to be made is adding the default gateway.
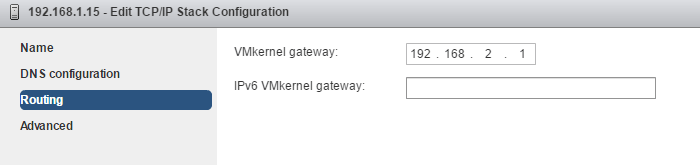
The final settings should look something like this. You can optionally set the DNS server if it is applicable in your environment.
Now, let us test the connectivity between the hosts using the vmkping or esxcli commands.
I have logged into the host 192.168.1.15 and testing the connectivity to the 192.168.1.16 host.
vmkping ++netstack=vmotion -I vmk3 192.168.2.16
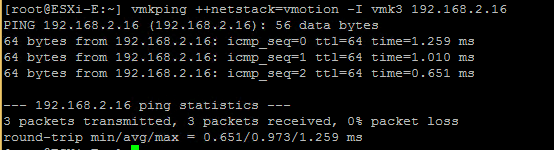
We have successful network connectivity using the newly vMotion TCP/IP stack and the vmkernel adapter.
I hope this has been informative and thank you for reading!


2 Comments
Excellent article, kindly keep the customer’s use cases coming so we can get some imagination of the scenarios out there, much appreciated.
Thank you for explaining how to use vmkping with vmotion netstack.