
While going through my feed and looking at the various posts online, I never saw anybody talk about installing the vCenter Server Appliance deploy/install using CLI.
So, I thought of making this post which will take you through installing the vCenter Server Appliance using CLI. We will be specifically making use of a utility called vcsa-deploy.
Once you download the VCSA 6.5 ISO and extract the contents, navigate to the vcsa-cli-installer directory. You will notice that there are four folders available for three different types of scenarios.
The same tool can be used to perform an install, upgrade and migrate. More on the other two types of deployment later.
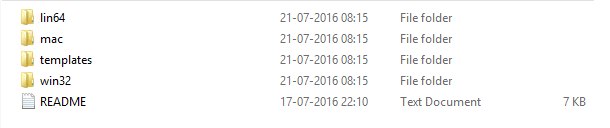
The amazing thing about this utility is that it is available for Windows, Linux, and Mac OSX. Big shout out to the vCenter Team to make this so simple.
You might also notice that templates directory, which is where the team has provided 8 templates which can be used to perform the installations.
Within the templates directory, we have three folders, each for Install, Upgrade, and Migrate.
Below is the screenshot from the install directory.
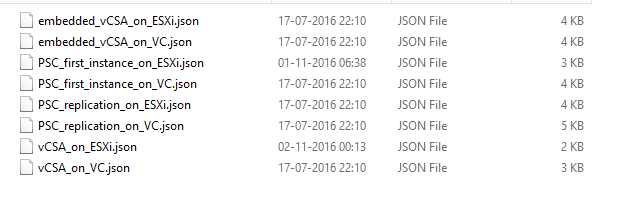
We have covered all grounds here, every possible deployment scenario of installations.
- Embedded VCSA
- First PSC instance
- Adding a second PSC in the SSO domain.
- vCSA with External PSC
Now, let me navigate back to win32 folder since I am running Windows. The steps would remain the same for both Linux and Mac OSX.
In my scenario, I am going to be deploying External PSC first and then register my VCSA to this PSC.
For External PSC, I will be making use of the PSC_first_instance_on_ESXi.json file. I recommend not to make any changes to this and make a copy of this to another location.
After the changes, the file should look something like this.
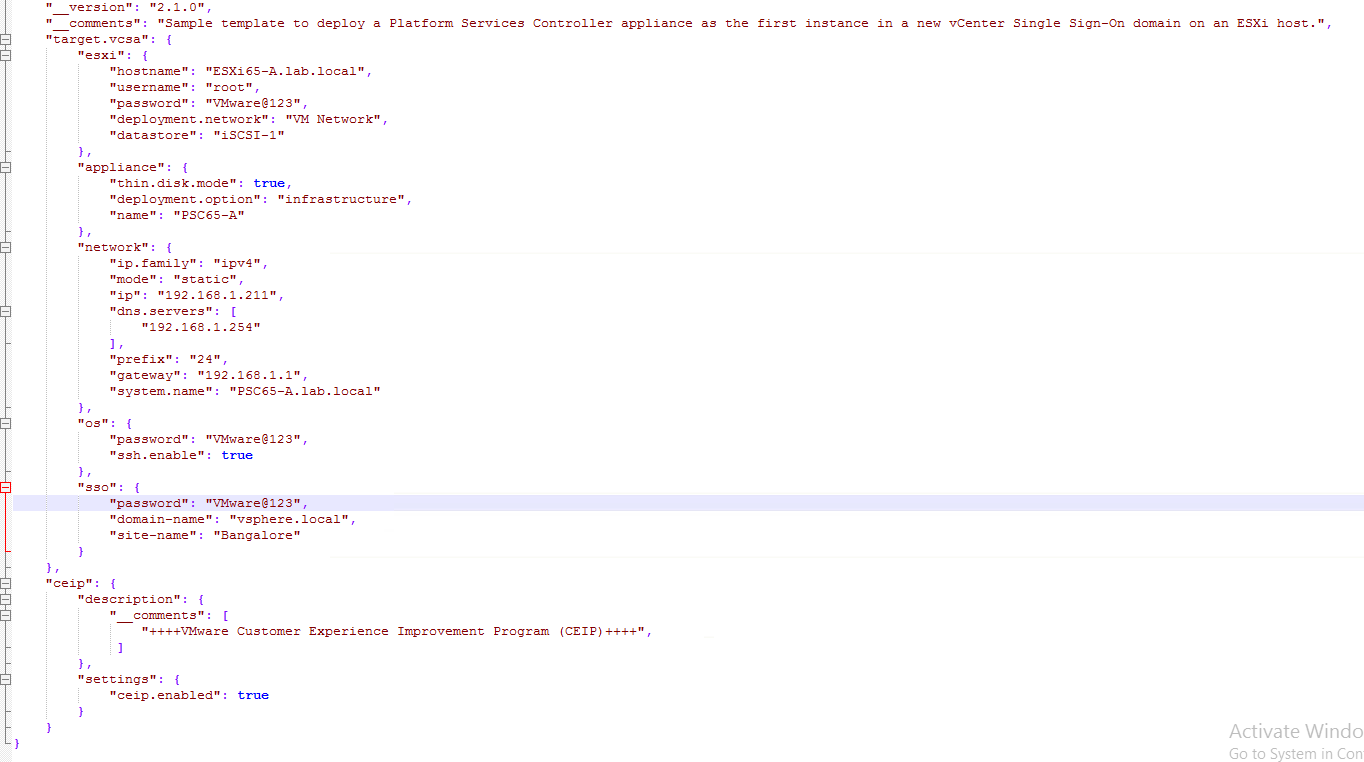
So, there are five important details that have to be provided as seen above:
- ESXi - Details about the destination ESXi host on which the VM will be deployed.
- Appliance - Information like disk provisioning type, deployment type, and the VM name.
- Network - Information about IP details and system name (important for certificates)
- OS - Password and SSH details
- SSO - SSO domain details.
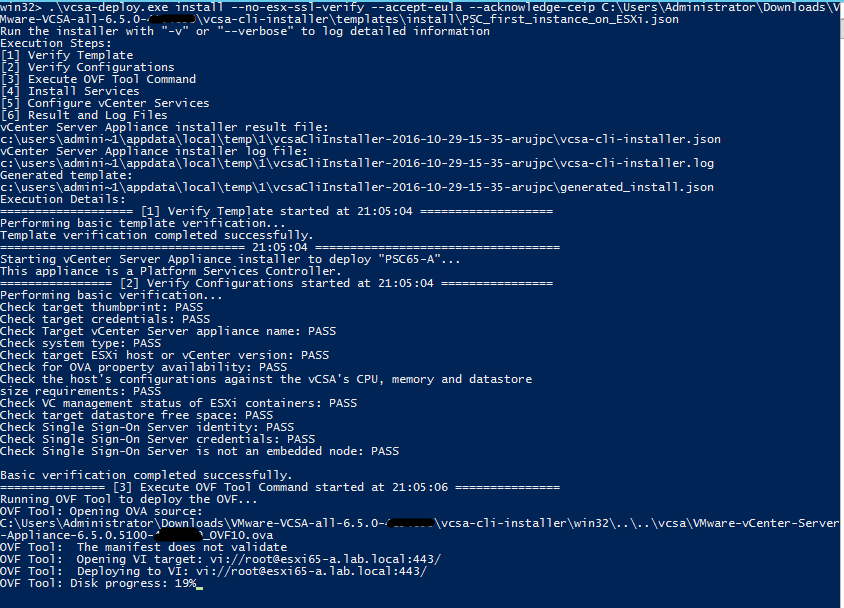
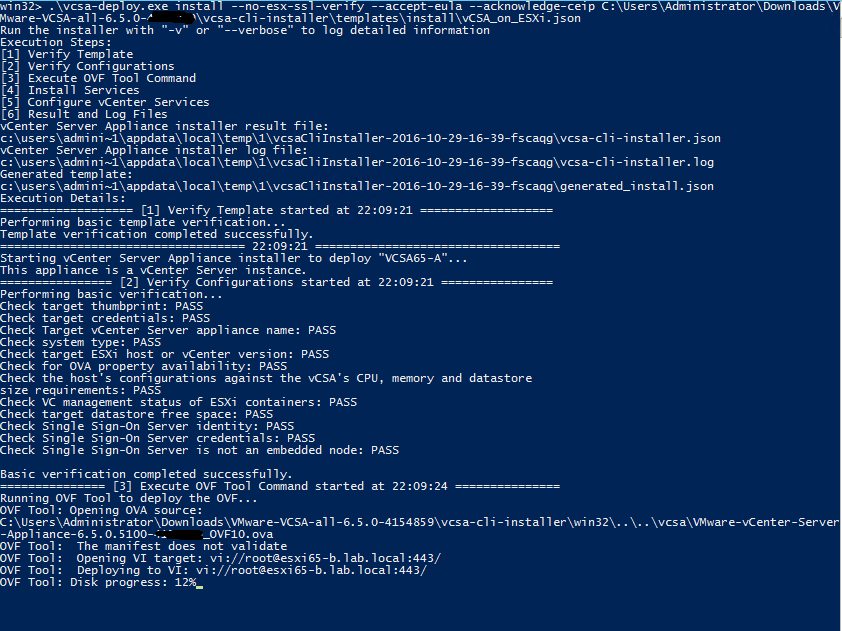
Once you have provided the details, save the file and run the below command to start deploying the appliance from either command line or PowerShell.
vcsa-deploy.exe install --no-esx-ssl-verify --accept-eula --acknowledge-ceip "Path to the json file"

The amazing thing is that it performs the pre-check and will try to let you know the exact cause for the failure until it can connect to the host and start creating the VM.
Assuming every detail was provided correctly, you should see a screen like below which shows the deployment progress.
Now, let us look at deploying our VCSA which will be connected to the External PSC that we just finished installing using the vcsa-deploy utility.
For, this I will be making use of the vCSA_on_ESXi.json file.
After providing the details as mentioned for the PSC, the file should look like below.
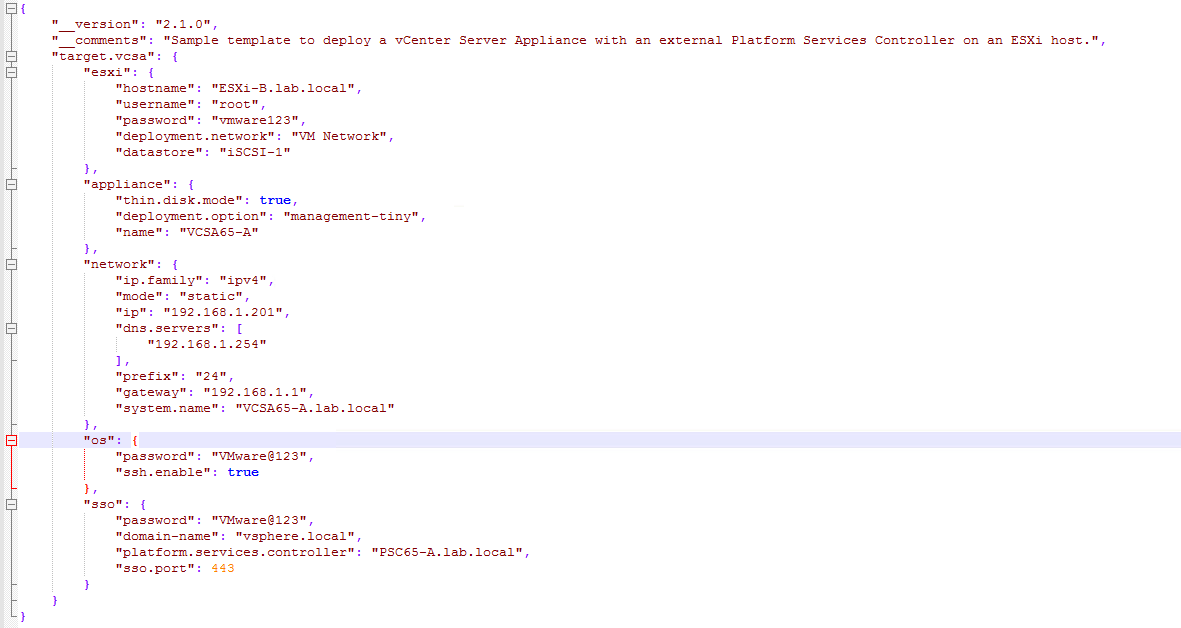
Exact same details as before but customized as per the deployment types. You would also notice that I am selecting the deployment type as Tiny management VCSA.
And in the SSO section, we are pointing to the newly deployed External PSC.
Run the same command as above to start the installation of the VCSA with External PSC.
vcsa-deploy.exe install --no-esx-ssl-verify --accept-eula --acknowledge-ceip "Path to the json file"
This should complete the installation of the VCSA and you should now be able to login to the VCSA using the Web Client.
I hope this has been informative and thank you for reading!


2 Comments
Love it thanks and worked perfectly. Made it a bat file to run the external PSC first then the VC so I can double click and come back in 3 hours.
Joining late to this conversation & would like to test this one lately as well. May I’ve the sample configuration files that are described in this blog?