
I was recently working with a customer who was having an issue backing up the Virtual Machine using one of the backup application which relies on snapshots.
We were unable to backup the Virtual Machine because the creation of snapshot used to fail with an error message stating that the VM could not be quiesced.
Now, there could be multiple issues behind this error message, but we figured that the issue has been resolved in the latest version of the VMware Tools.
You might wonder, then why are we talking about how to configure Shared ProductLocker if the VM just required an upgrade of the VMware Tools.
The part of the problem was that the customer was running ESXi 6.0 U2 and the VMware Tools version to be installed was 10.1.0.
You would tell me that you can just attach the downloaded ISO to the VM and perform an in-place upgrade of the VMware Tools.
The reason we chose to configure Shared ProductLocker is because the customer's VM was a Cisco Appliance and it only supported an Automatic Upgrade of the VMware Tools.
Therefore, we could not get attach the downloaded ISO and perform an upgrade using the Complier method which there is a KB article already available on VMware's KB website.
Now that we know the background of the issue, let us what can be done to mitigate the issue.
There are a couple of ways that you could perform this activity, one is from the Web Client and the other one using the esxcli command line.
We will look at both the methods so you can use the one that you are comfortable with.
First, let us at how to Configure Shared ProductLocker using the Web Client. Now, this needs to be performed on all the ESXi hosts that you want the VMs to look for the new ISO.
We will only be performing this on one of the ESXi hosts.
Once logged into the Web Client, select the ESXi hosts > Manage > Settings > Advanced System Settings
Search for the setting UserVars.ProductLockerLocation
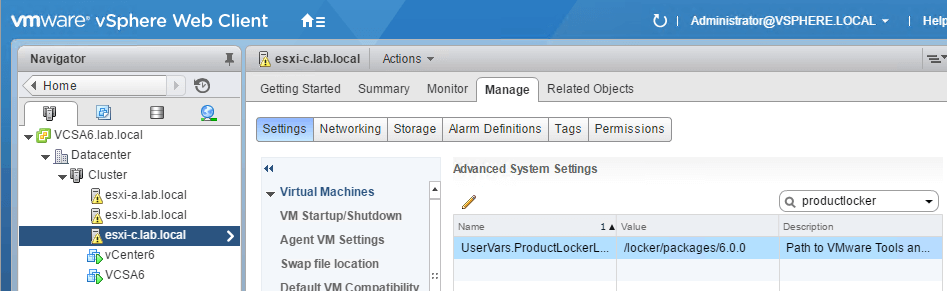
This will show you the current directory where all the VMware Tools ISOs for various OS types are stored.
Click on Pencil symbol to edit the value and change it to the location where you have stored the latest version of the ISOs downloaded from VMware's portal.
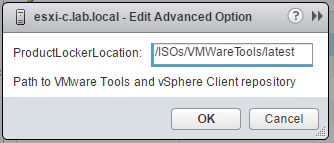
In my example, I have placed all the downloaded contents to the location /vmfs/volumes/ISOs/VMWareTools/latest
Now let us take a loot at how to perform this using the esxcli command line.
To list the current configuration of the ProductLocker, type the below command.
esxcli system settings advanced list -o /UserVars/ProductLockerLocation
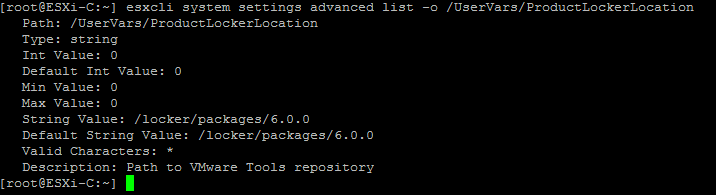
You would notice that the String Value output points to the current location. Type the below command to change it to our new location.
esxcli system settings advanced set -o /UserVars/ProductLockerLocation --string-value "/vmfs/volumes/ISOs/VMWareTools/latest"
Now to make sure that the changes that you have made take effect, you have to reboot the ESXi host. If you are unable to do so, apply the below workaround.
The workaround is to remove the current symlink to productLocker and change it to the new location.
rm productLocker
ln -s /vmfs/volumes/ISOs/VMWareTools/latest /productLocker
From now on when you try to perform an install or upgrade of the VMware Tools for any VM, it should be using the new Shared ProductLocker location to pick up the new ISOs.
I hope this has been informative and thank you for reading!


