If you are following along, you might be aware that I am covering all the new features that are part of the vSphere 6.5 release. Today we will look at vSphere 6.5 Auto Deploy on vCenter Server 6.5.
Auto Deploy in VCSA 6.5 is part of the appliance and does not need any additional installation steps as was before with the Windows vCenter Server.
We will first enable the Auto Deploy and the Image Builder services part of the vCenter.
Note: If you have external PSC to which the vCenter points to, then you will have to start these services on the vCenter Server.
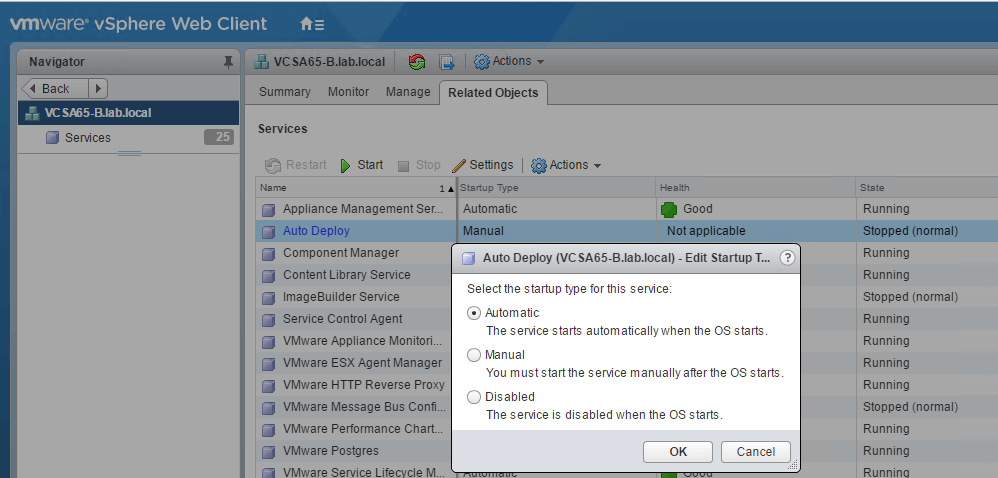
Navigate to this path to start the services. Home > Administration > System Configuration > Nodes > vCenter Server > Related Objects
Select the service, click on Actions tab and select Edit Startup Type and change it to Automatic and start the service.
Perform the same steps for the ImageBuilder service as well.
Now select the vCenter Server, click on Configure >Auto Deploy and Download the TFTP Boot Zip file which we will use later to set up the TFTP server.
You can download any TFTP server that you want. In my example, I am using SolarWinds's free TFTP server and installed in one of my Windows machines.
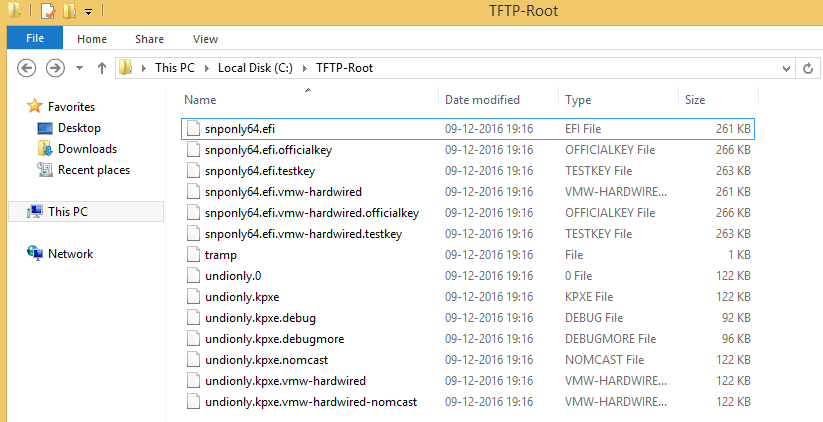
Once installed, start the TFTP service and navigate to the folder as seen below tp place the files which were downloaded previously after extracting them.
Next, you will need a server on which we have the DHCP role installed. I have installed this role on my AD server.
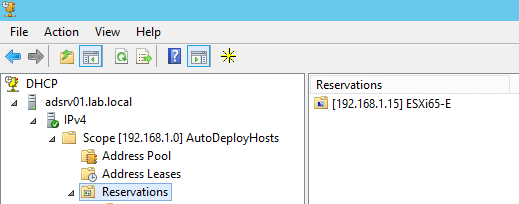
Create a new scope and set a reservation for the servers that will boot using Auto Deploy as seen below. You will need the MAC address of the Management Network adapter to set up the reservation.
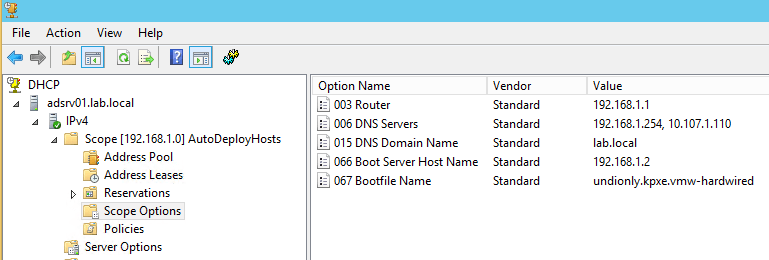
Set up the Scope Options as shown below for the 66 and 67 options pointing to the TFTP server and the Bootfile Name as seen below.
Great, so we have all the pre-requisites taken care for the ESXi hosts to boot using the Auto Deploy. Now log back into the Web Client and from Home select Auto Deploy.
VMware has made it amazingly intuitive when it comes to Auto Deploy with the tabs placed in such a way that you will know what needs to be done been if you are just starting off with vCenter.
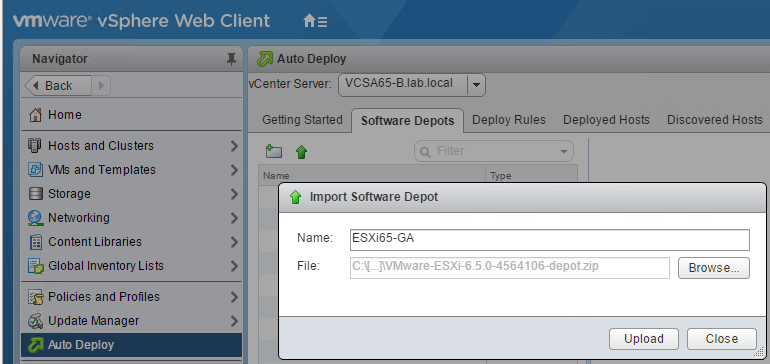
Click on Software Depots tab and import the Depot that had been downloaded from the VMware's portal.
Once uploaded, you should be able to see the Image Profiles that are part of the Depot which can be used to boot the ESXi from.
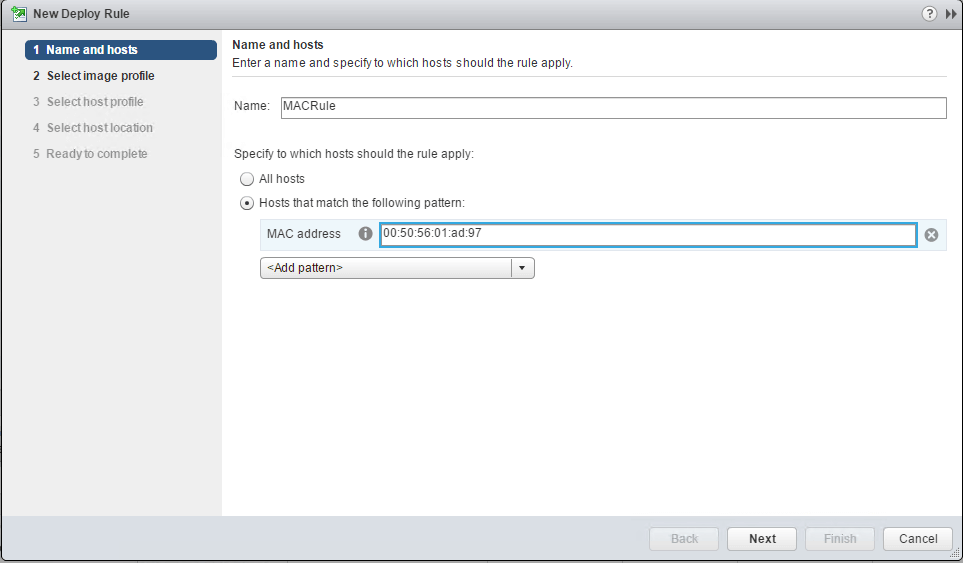
Next, click on Deploy Rules and select New Rule. Provide a name to the Rule and select the Second option to create the hooks that will be used to deploy the hosts.
In my case, I am selecting the MAC address of the host as seen below.
Next, select an Image Profile from the Depot that we uploaded in the last step.
Select a Host Profile that can be applied to the host. I had created a host profile from one of my ESXi hosts that had similar configuration and settings.
Select the Host location where the host will be deployed. I have provided the Cluster created in my vCenter Server.
Click Next to verify the options provided and click on Finish to set up the Rule.
In the next step, click on Activate/Deactivate Rules to Activate the Rule that we just created.
Now, start the ESXi host and it should start booting using the Auto Deploy configuration.
Once the host is deployed successfully, click on the Remediate host to apply certain unique settings.
In my case, I have two vmkernel ports created for the iSCSI connectivity, therefore I will be providing those details along with Management I details.
Click Finish Remediate the host.
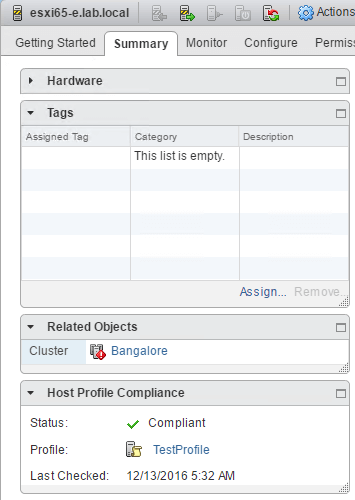
Once you rescan the adapters to detect the storage, you should see the host will show compliant as seen below.
With this, we have completed deploying our first host using the Auto Deploy feature.
I hope this has been informative and thank you for reading!







3 Comments
Great post! This was very helpful.
This host was booted, but not installed
Thanks man , very helpful