
In Part 1 of the Configure PSC HA in vSphere 6.5 series, we looked at how to configure certificates for the PSC appliances. We first generated the CSR, got it signed by a Microsoft Root CA and then replaced it on both the PSCs participating in the HA configuration.
In today's post, we will be taking a look at how to configure the Load Balancer for the Platform Services Controller High Availability solution.
For the demonstration purposes, I will be using Citrix's Netscaler Load Balancer. VMware officially supports only three Load Balancer as seen below.
- F5 BIG-IP Load Balancer.
- Citrix Netscaler Load Balancer.
- NSX Edge Load Balancer.
In my lab, I am using Netscaler VPX Express version which can be downloaded from here and you can also get a one-year free license which covers the Load Balancer as well.
Therefore, it is an amazing solution that can be used in your home lab if you are preparing for any of the VMware's certifications.
Once you complete the download of the Citrix VPX Express appliance, import it as an OVF, configure the appliance. It will ask you two IP addresses, one is the management IP address and the other is the Subnet IP Address.
In my case, the management IP address is 192.168.1.215/24 and the subnet IP address is 192.168.1.216/24. The Virtual IP address for the Load Balancer is going to be 192.168.1.217/24.
Bear in mind that the Virtual IP address is one that needs to be resolvable to the FQDN of the Load Balancer using the DNS server.
Therefore in my case, the FQDN is PSC-LB.lab.local is pointing to the IP 192,168.1.217.
To start configuring the Netscaler Load Balancer, login to the Web Browser using the Management IP address and the default username and password is nsroot.

Once logged in, we need to perform the below steps in the exact same order to make it easy and super fast without any hiccups.
- Add Platform Services controllers in the Load Balancer.
- Add Services for the Platform Services Controllers.
- Create Virtual Servers for the Services.
- Create a Persistency Group.
Note: Some of the Load Balancing features have to be enabled. If you see a yellow exclamation mark, right click on that feature and select Enable Feature.
Add Platform Services controllers in the Load Balancer for PSC HA
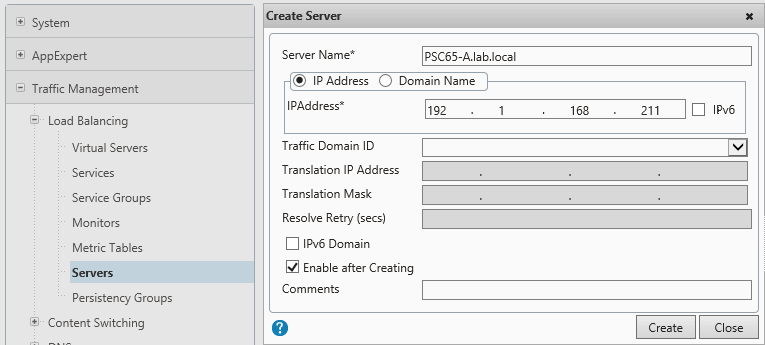
First navigate to Configuration > Traffic Management > Load Balancing > Servers.
Click on Add. Provide the FQDN of the first Platform Service Controller Node along with the IP Address and click on Create.
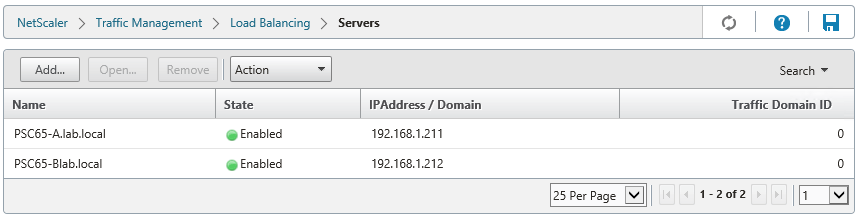
Similarly, add the second Platform Services Controller node as well.
The final result should be as seen below with both the PSCs added and enabled.
Adding Services for the Platform Services Controllers
There is a total of 6 services that we need to create for each Platform Services Controller node.
Navigate to Configuration > Traffic Management > Load Balancing > Services
Click on Add. Fill the details as shown below.
- Name: PSC65-A-443
- Server: PSC65-A.lab.local
- Protocol: TCP
- Port: 443
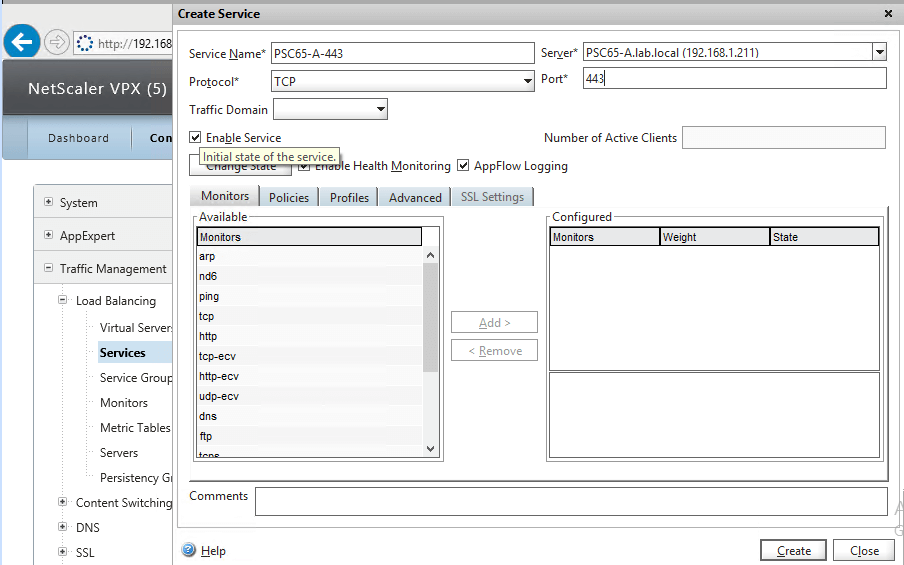
Click on Create to finish creating the service for that port.
Similarly create the services for the ports 389, 636, 2012, 2014 and 2020 for both PSCs. The final result should something like below.
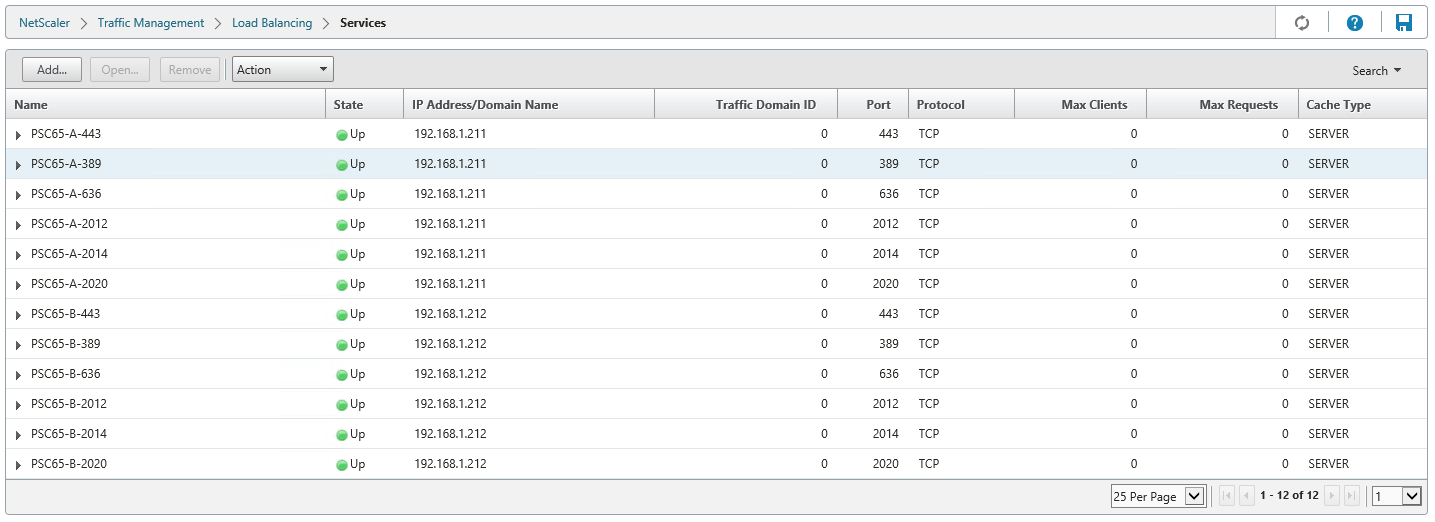
Note: Make sure that you have a total of 12 services created for both the PSCs.
Create Virtual Servers
The nest step is to create Virtual Servers for the services that we added in the previous step.
Navigate to Configuration > Traffic Management > Load Balancing > Virtual Servers. Click Add.
Provide a Name, IP Address of the Load Balancer, select the Protocol as TCP and Port as 443. Select both the services related to port 443 created earlier.
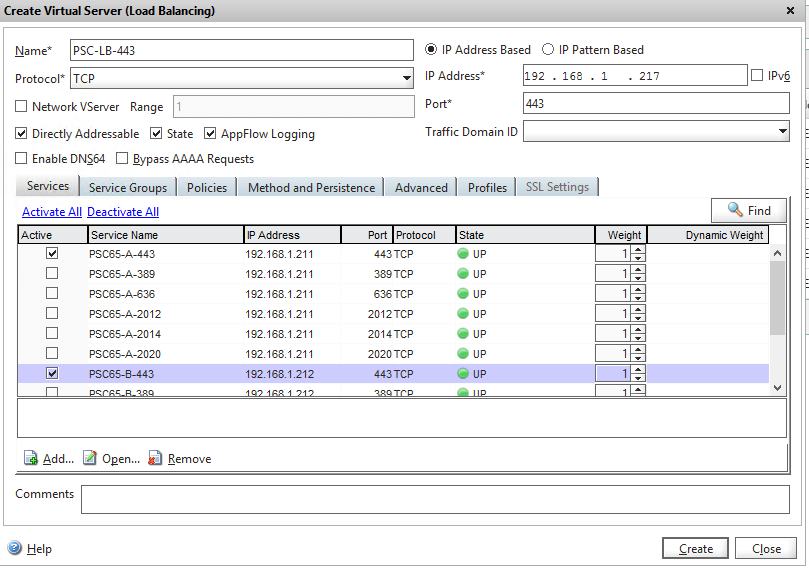
Click on Create to finish creating the Virtual Server.
Follow the exact same steps and create Virtual Server for ports 389, 636, 2012, 2014 and 2020.
Create a Persistency Group
Navigate to Configuration > Traffic Management > Load Balancing > Persistency Groups. Click Add.
Provide a Group Name, select the Persistence as SOURCEIP, select Time-out as 1440.
In the Virtual Server Name and then click the + button. Click the > button to move all six PSC VIPs to the Configured pane.

This completes the Netscaler Load Balancer configuration for PSC HA in vSphere 6.5.
In the next post, we will look at how to configure the PSC appliances to apply the changes and add/repoint the vCenter Server appliances to the load balancer.
I hope this has been informative and thank you for reading!


2 Comments
Thank you very much for informative post. Extremely helpful. One question. Does the cert that was created and applied to psc’s also need to be added to load balaancer?
No, the cert has to be replaced on the PSC nodes.