In the previous two posts, we looked at the introduction of VMware vSphere Integrated Containers and installation vSphere Integrated Containers Engine.
In this post, we will look at how to Install VMware Harbor, which is an enterprise-class registry server that stores and distributes Docker images.
Harbor is deployed as several Docker containers, and, therefore, can be deployed on any Linux distribution that supports Docker.
Since we already know the features and the reason for using Harbor from our previous posts, we will directly dive into how to install this on a Photon OS.
Before we start the installation, we need to take care of the prerequisites that are required to install VMware Harbor. The prerequisites are:
- Python should be version 2.7 or higher. (This is already preinstalled with the Photon OS Full image).
- Docker engine which should be version 1.10 or higher. (This is already preinstalled with the Photon OS Full image).
- Docker Compose which needs to be version 1.6.0 or higher.
Since the first two prerequisites are already taken care of, let us install Docker compose of the Photon OS that we have created for this article.
Type the below commands on the Photon OS and it should install the Docker Compose component.
curl -L https://github.com/docker/compose/releases/download/1.12.0/docker-compose-`uname -s`-`uname -m` > /usr/local/bin/docker-compose
chmod +x /usr/local/bin/docker-compose
At the time of writing this article, the version of Docker Compose is 1.12.0.
To check the version of Docker Compose, type
docker-compose version
Alright, we have taken care of the prerequisites, now let go ahead with installing the Harbor registry.
Harbor can be installed by one of three approaches:
- Online installer: The installer downloads Harbor's images from Docker hub.
- Offline installer: Use this installer when the host does not have an Internet connection.
- Virtual Appliance: IThis is a prebuild appliance that can be deployed as an OVA.
In our post, we will be using the offline installer. To download Harbor OSS code, head to https://github.com/vmware/harbor/releases
Right click on the latest version of the offline installer and right click to copy link information. Type the below line on the Photon OS where we will be installing Harbor.
wget https://github.com/vmware/harbor/releases/download/0.5.0/harbor-offline-installer-0.5.0.tgz
The version of Harbor at the time of writing this article is 0.5.0.
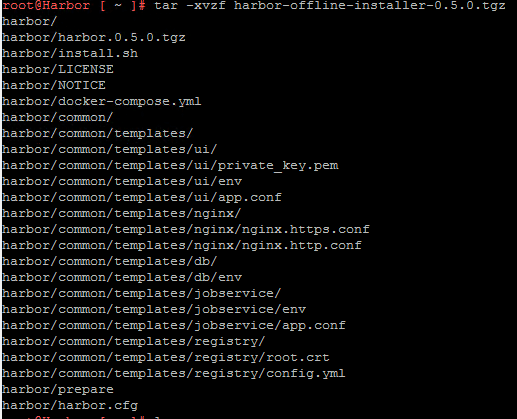
Once the download completes, the uncompress the tgz file by typing
tar -xvzf harbor-offline-installer-0.5.0.tgz
Next step will be to configure the harbor.cfg file. There are several parameters that can be changed in the configuration file. Feel free to take a look at it and make changes as per your requirements.
At the very least, we need to modify at least one parameter which is the hostname parameter. I will be changing to hostname to an FQDN which is harbor.lab.local. The parameter also accepts IP address.
The final step to run the install.sh script which will load the harbor images, prepare the environment and start the harbor registry.
./install.sh
In my environment, I received this error message stating that the port 80 was already in use.
" Error starting userland proxy: listen tcp 0.0.0.0:80: listen: address already in use"
To resolve, I just stopped the httpd service that was running by default on the Photon OS Full install by typing
systemctl stop httpd
And if everything goes fine without any errors, you should see the below screen.
You should be able to login to the Harbor registry by opening a browser and typing the FQDN or the IP Address of the Photon OS running harbor registry.
Log in with the default user that is created which is admin and the password is Harbor12345
That's it for today! I hope this has been informative and thank you for reading!


