
In my previous post, we looked at various subscriptions that are available to get started with the Azure platform. In this post, we will look at how to install Azure PowerShell.
The reason this is the second post in the Azure 101 Series is that nobody likes to get work on the GUI anymore and we need to make ourselves proficient with command line tools that are more easier and faster way of working with Azure.
This article will contain three steps to make sure that you have installed and configured Azure PowerShell for a Windows environment, which is:
- Install PowerShellGet.
- Install Azure PowerShell.
- Load the AzureRM Module.
- Log in to the Azure Portal.
Install PowerShellGet
PowerShellGet is a PowerShell module with commands for discovering, installing, updating and publishing the PowerShell artifacts like Modules, DSC Resources, Role Capabilities, and Scripts.
PowerShellGet module is also integrated with the PackageManagement module as a provider, users can also use the PackageManagement cmdlets for discovering, installing and updating the PowerShell artifacts like Modules and Scripts.
Since I am running a Windows 10 machine, I do not have to Install PowerShellGet, it is part of the Windows Management Framework (WMF) 5. If you are running any version of PowerShell below 5, I would highly recommend installing the latest version of WMF.
Assuming PowerShellGet is not installed, this would be the command to do so:
Install-Module –Name PowerShellGet –Force
Run the following command to see if you have PowerShellGet installed on your system.
Get-Module PowerShellGet -list | Select-Object Name,Version,Path

Install Azure PowerShell
The next step is to install Azure PowerShell module from the PowerShell Gallery. This will require you to open PowerShell using elevated privileges:
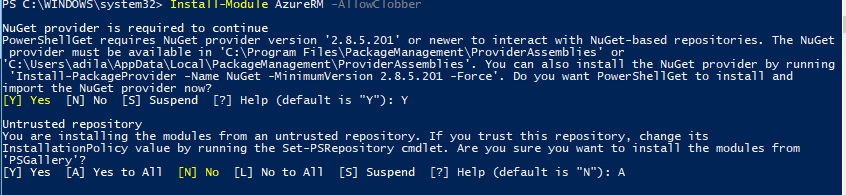
Install-Module AzureRM -AllowClobber
By default, the PowerShell gallery is not configured as a Trusted repository for PowerShellGet. The first time you use the PSGallery you see the following prompt: Press A.
The AzureRM module is a roll-up module for the Azure Resource Manager cmdlets. When you install the AzureRM module, any Azure PowerShell module not previously installed is downloaded from the PowerShell Gallery.
Load the AzureRM module
Next step is to load the AzureRM module using the Import-Module cmdlet like below:
Import-Module AzureRM
Log in to the Azure Portal
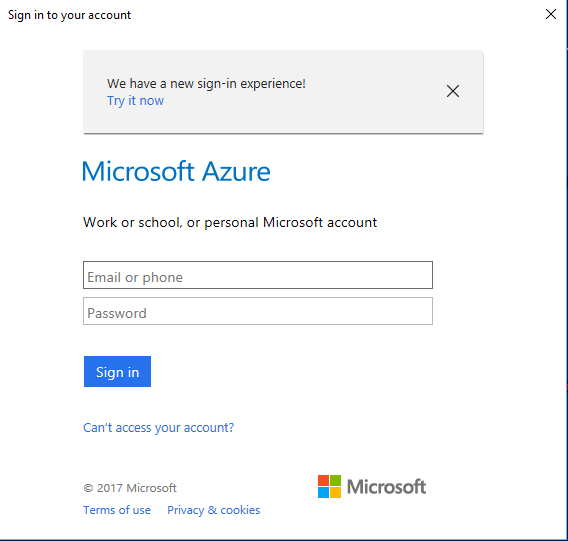
Now that we have installed and imported the AzureRM module, let us log in to your Azure resource manager using the cmdlet Login-AzureRMAccount.
When you enter this command, it brings up a page to enter your account and password. Type the email address and password associated with your account. Note that you should have an Azure subscription with the account that you have entered.
As you can see below, this will list the Account Details like the Email Address, Subscription Name, Subscription ID etc.

We have successfully installed Azure PowerShell and authenticated to our Azure Subscription using the same. In the upcoming posts, we will look at how we can interact and create various resources using this tool.
I hope this has been informative and thank you for reading!


