
In my previous post, we spoke about what is VMware vSphere Virtual Volumes (vVOLs) and what are the prerequisites, benefits, and components to use vVOLs.
In this post, we will take a step further and try to configure vVOLs in the lab environment. I was looking for options on how to test vVOLs since many vendors do not make this available for lab purposes.
I happily stumbled upon UnityVSA and to my surprise, they had a Virtual Appliance that can be used to configure vVOLs.
First, let us look at the requirements of the appliance as it requires quite a bit of RAM and also supports only certain versions of vCenter and ESXi hosts.
Keep in mind, you can use the same appliance to even configure iSCSI and NAS server and can be used to create both traditional VMFS datastores and NFS datastores.
You do have an option to configure Fibre Channel, but that's only available with the physical UnityVSA, the virtual appliance does not support it at this time.
Requirements:
- vCenter version: 5.5 update 2 or later
- ESXi: 5.5 – 6.5
- Web-Browser: Chrome v57, IE v10, FireFox v52, Safari v6 or later.
- RAM for each Dell EMC UnityVSA VM: 12 GB
- vCPU for each Dell EMC UnityVSA VM: 2 vCPU
- Physical Server Requirements: Dual Core CPU 64-bit x86 Intel 2GHz+ (SSE4.2 or greater)
You can download the UnityVSA appliance from here and here is the installation guide, I am not going through to show you on how to deploy an OVA file, I am sure you know this! 😉
Note: Deploy the OVA using a vCenter Server. The Manual configuration like the hostname and IP do apply correctly when deployed on the ESXi host directly.
Once the deployment is completed, add a Virtual DIsk to the appliance which we will use to create storage that can be presented to a vSphere environment in one of the forms.
In my case, I have added a 400 GB disk to the appliance.
Once the UnityVSA appliance is deployed and the disk is added, connect to the Management IP from a Web Browser and log in using the admin account.
Ideally, you will be presented with an Initial Configuration Wizard which will ask you to configure a lot many things but I am going to do it manually so that we understand the steps correctly.
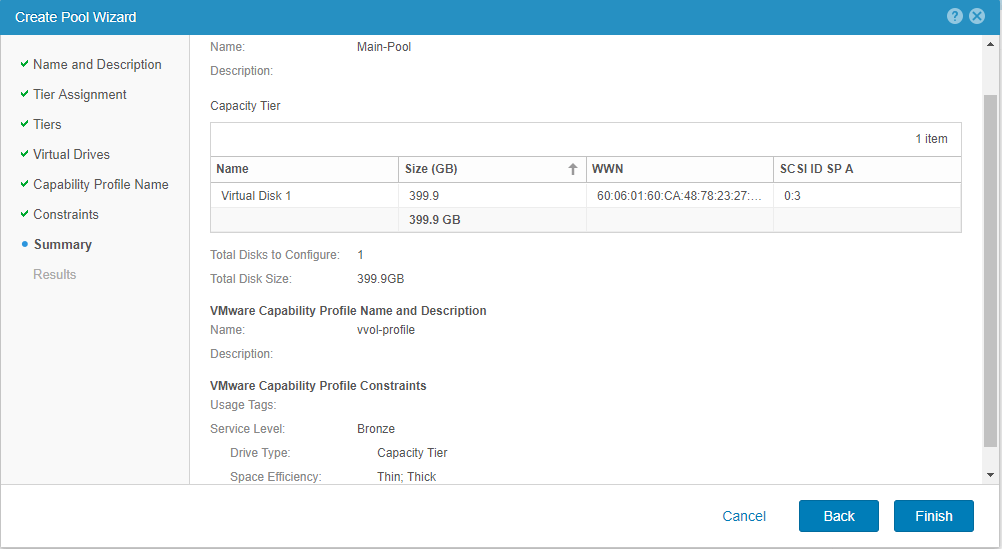
The first and the foremost thing that the administrator should do is to create a Storage Pool. The storage pool can be created under Storage > Pools.
Click on the + symbol to bring up the Wizard, give it a name and select the disk that was added in the previous step, and create a capability profile.
Note: To be able to use a pool for VMware VVols based storage provisioning it is necessary to expose a Capability Profile for the pool.
The final page of the Wizard should look like below:
Once the pool is created, the next step is to create the iSCSI Interfaces.
From the UnityVSA console, navigate to Storage > Block > iSCSI Interfaces.
Click on the + symbol to create a new interface and provide the details as seen below.
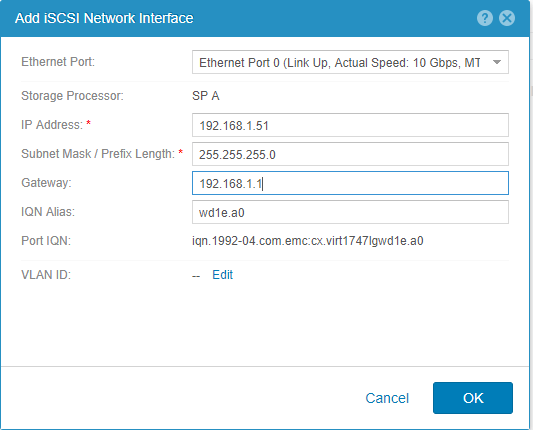
For redundancy purposes, I will be creating two interfaces and the final result should be as below.

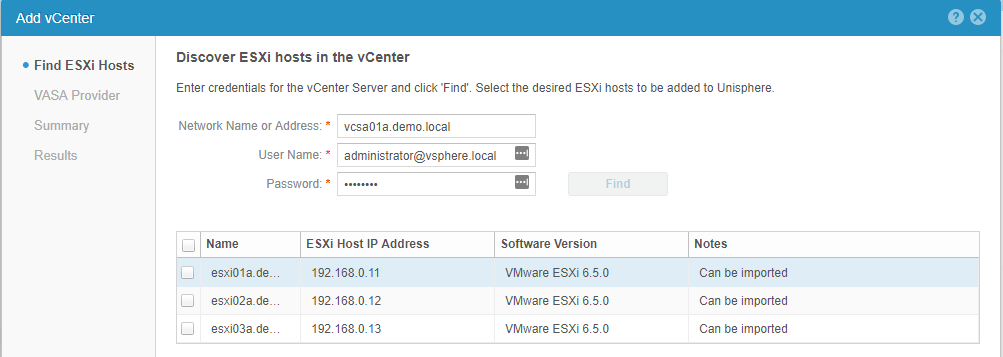
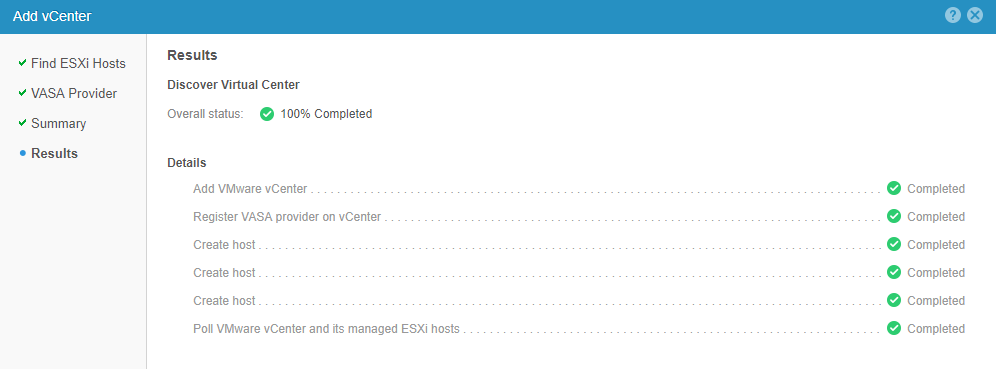
Now, we need to go ahead and add the vCenter Server and the ESXi hosts to the UnityVSA so that the ESXi hosts can access the storage container and the protocol endpoints.
On the console, under Access > VMware > vCenters, click on + symbol to add the vCenter Server.
Provide the vCenter Server FQDN or the IP Address and the appropriate credentials and click on Find, which will discover all the ESXi hosts and select them as seen below.
Next step is to register the VASA provider to the vCenter Server. We will do this from the console itself.
Another method would be to go to vCenter and then register but the UnityVSA has this cool feature of performing from the console.
Click the Checkbox "Register VASA Provider" and provide the UnityVSA credentials.
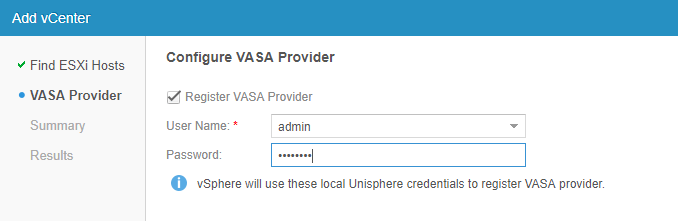
Go through the Summary and the Final result will be somewhat like this.
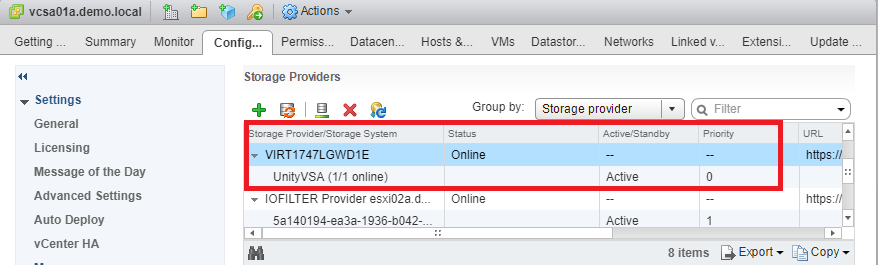
If you go to the vCenter Server, click on Configure > Storage Providers, we should be able to see the VASA Provider registered and online.
Next step is to create the vVOL datastore in the UnityVSA console. Under Storage > VMware > Datastores, click on + symbol to create the vVOL datastore.
Select the Type as VVol (Block), provide a descriptive name, select the capability profile we created in the pool creation process and the hosts that need to access this datastore and the final result should be like below.
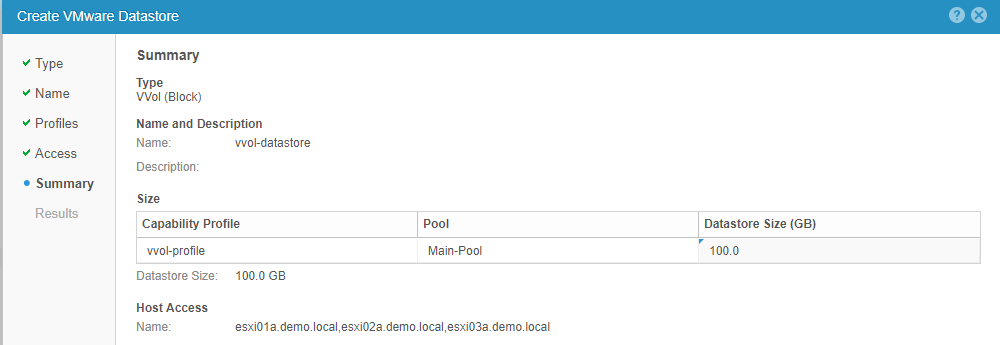
I have a created a 100GB vVOL datastore.
Click Finish and this will create the datastore and should be visible to all the hosts in the vCenter Server.
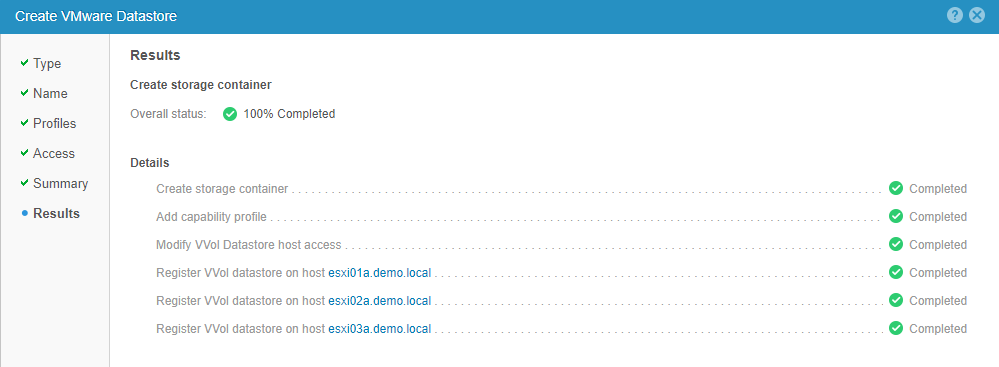
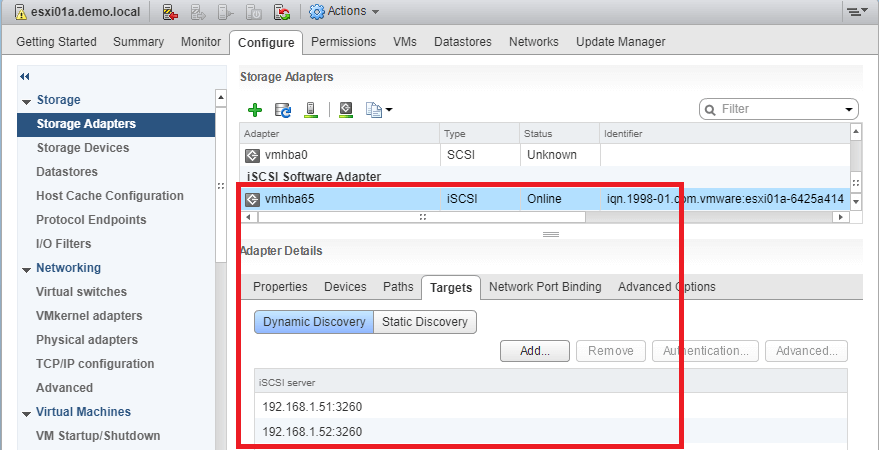
The only thing to note is that make sure that you have configured the targets correctly in the software iSCSI adapters of the hosts so that they can talk to the iSCSI interfaces on the UnityVSA box.
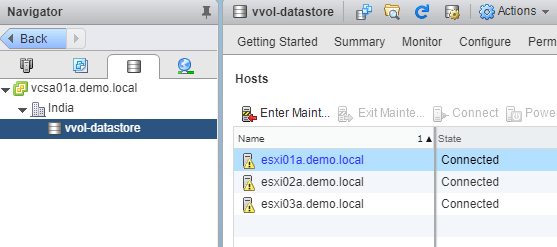
The datastore is successfully connected to all hosts and we can now start deploying VMs on our newly created vVOL datastore.
I hope this has been informative and thank you for reading!


2 Comments
Great article!
I’m new to VVols so have a silly question I need to ask. I have a two node vSphere 6.5 cluster which uses FreeeNAS for my shared iSCSI storage in my lab.
If I deploy the EMC UnityVSA appliance to my ESXI host which uses iSCSI FreeNAS storage, does that mean my VMs are actually stored IN the EMC UnityVSA appliance? So if the appliance fails or goes offline then all my VMs using VVols go down with it?
In other words: VM is stored in EMC UNityVSA which in turn is stored on shared iSCSI storage in FreeNAS?
Having said that, are there any options for installing a free SAN product on physical hardware in a home lab with VVol support rather than using an appliance?
Great site!
Yes, if the appliance goes down, the VMs would go down as well.
I have not come across any free software that can run on physical hardware. EMC UnityVSA is one awesome appliance as it can do many things that can be tested in the lab for free.