
In this post titles, Objective 2.4 - Monitor ARM VMs of the Azure 70-533 exam, we will be discussing on how to monitor various aspects on the Azure Virtual Machines, both Windows, and Linux.
The sub-objectives of this section are:
- Configure ARM VM Monitoring.
- Configure Alerts.
- Configure diagnostic and monitoring storage location.
So let's dig right in.
Configure ARM VM Monitoring
There is a slight difference in the way that you would monitor Windows and Linux Virtual Machines. We will look at both of them separately and steps require to configure them.
Windows Virtual Machines provide an interactive interface to monitor the statistics related to the performance of the VM. The five key statistics are:
- CPU percentage
- Disk Bytes
- Disk Operations/sec
- Network
All of that data is immediately available once you select a Windows Virtual Machine and click on the Overview tab.
The data can be easily viewed for up to 30 days. In the below screenshot, I am seeing the last 7 days statistics for my Windows VM.
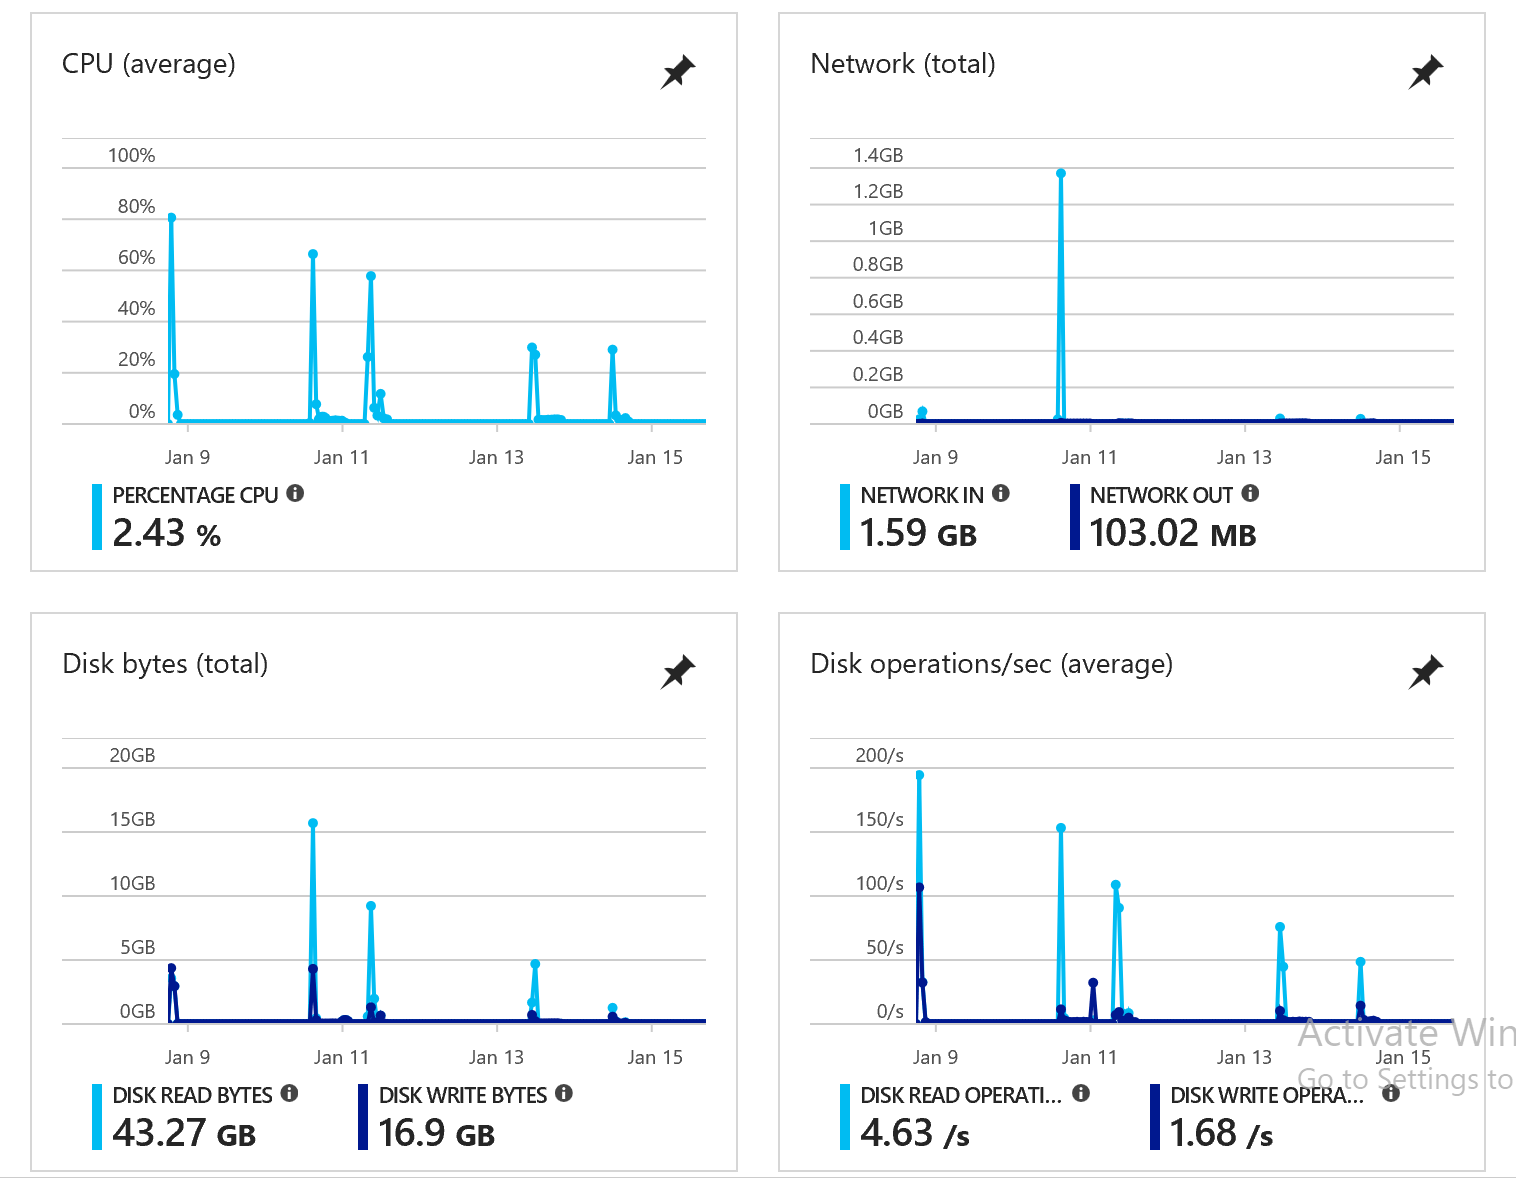
And if you were to click on any of the above dashboards, it will get take you to another page where you can get customized information about that metric.
I do not want to delve too much into this as it is pretty intuitive in terms of what you can find for each of the metrics and you would want to perform this steps yourselves to get some hands-on experience.
The next thing you have to know is on how to enable Boot diagnostic on a Virtual Machine. You can set this option at the time of creation of the VM as well.
In our example, we will do this for an existing Windows Virtual Machine. Select the VM > Boot Diagnostics > Settings.
Select the storage account, I would recommend creating a new General Purpose storage account for collecting the boot diagnostics for the VMs.
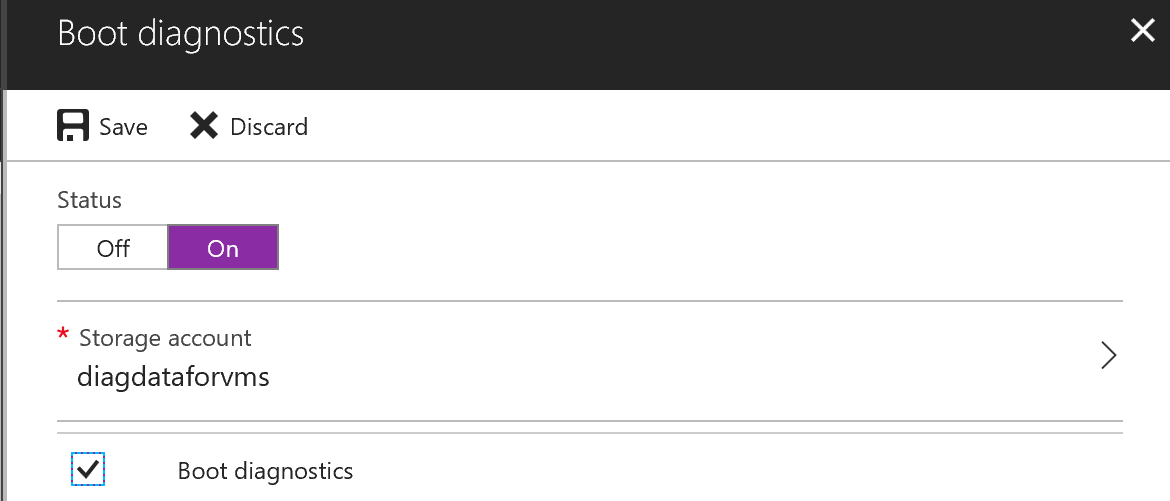
Click on the Save button to make the change. Going forward, everytime this machine is booted, the boot logs will be captured in the new storage account.
Similarly, we can do the same for Linux VMs as well.
The only difference is that you can also collect Basic metrics for the Azure Linux VMs along with the Boot Diagnostic data.
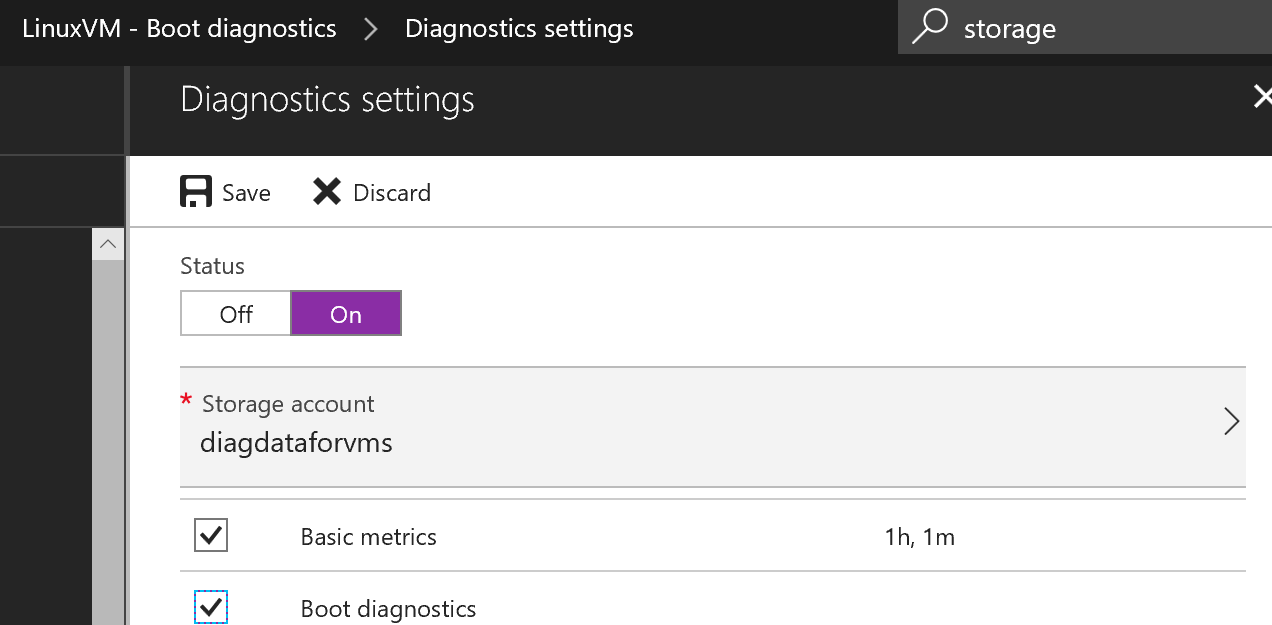
On Linux VMs, this will only allow you to collect basic metrics, however, if you are interested in Advanced metrics, then you would have to install diagnostics extension for the VMs.
The Linux Diagnostic Extension helps a user monitor the health of a Linux VM running on Microsoft Azure. It has the following capabilities:
- Collects system performance metrics from the VM and stores them in a specific table in a designated storage account.
- Retrieves log events from syslog and stores them in a specific table in the designated storage account.
- Enables users to customize the data metrics that are collected and uploaded.
- Enables users to customize the syslog facilities and severity levels of events that are collected and uploaded.
- Enables users to upload specified log files to a designated storage table.
- Supports sending metrics and log events to arbitrary EventHub endpoints and JSON-formatted blobs in the designated storage account.
Below is a handy guide to installing the extension and how to configure it.
Use Linux Diagnostic Extension to monitor metrics and logs
Configure Alerts
The next topic is discussion is setting up alerts once you know what metric can be monitored for the Virtual Machines.
There are a couple of ways that you can trigger alerts for Azure services which are:
- Metric values: The alert triggers when the value of specified metric breaches a threshold you assign in either direction.
- Activity log events: An alert can trigger on every event, or, only when certain events occur.
And you can configure the alert to do one of the below when it triggers:
- Send email notifications.
- Call a webhook.
- Start execution of an Azure runbook (only from the Azure portal).
Let us create a simple for CPU monitoring for a Windows VM. Keep in mind, the same principles for any alert that you can create from the list of metrics available.
To create a Metric, select the VM > Alert Rules > Add Metric Alert.

Provide a name for the Rule, select the Metric, condition, threshold and the period and Click OK to create the Alert.
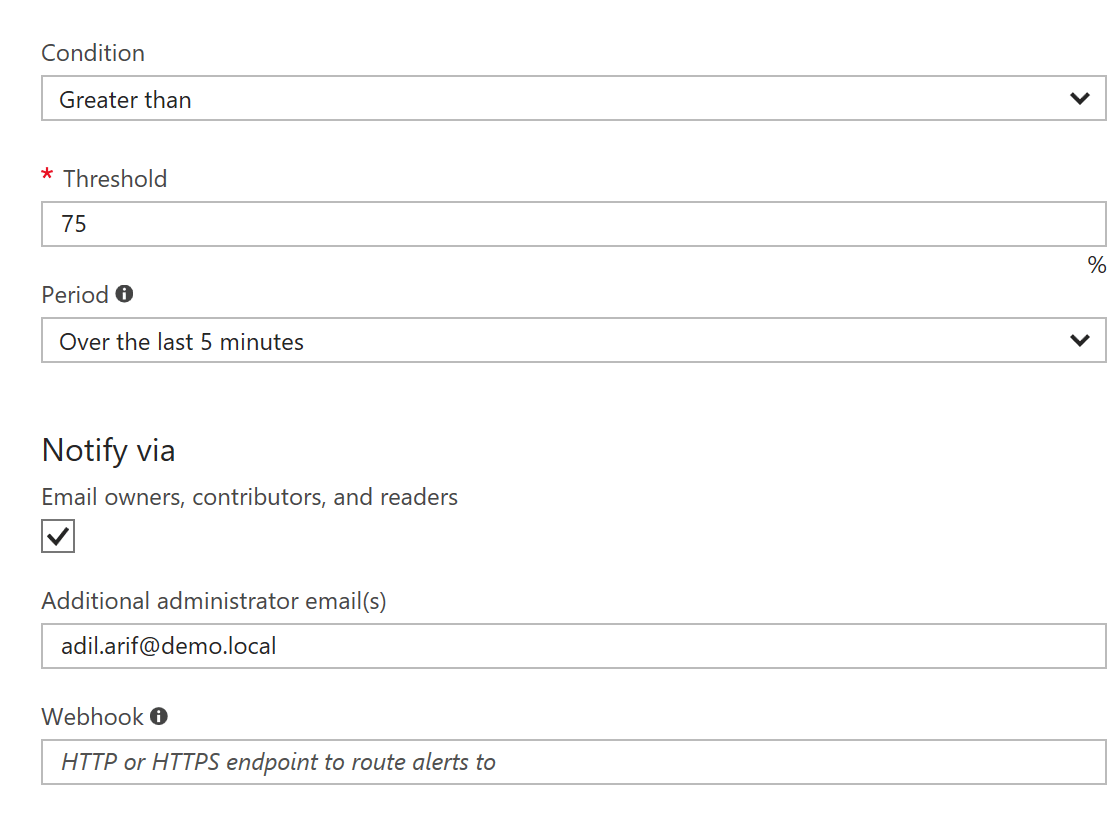
Once it is successfully created, you should be able to see it in the Alerts with the status being Active.

Configure Diagnostic and Monitoring storage location
In the Azure portal, select Storage accounts, then the storage account name to open the account dashboard. Select Diagnostics in the MONITORING section of the menu blade.
Change the Status to On. Select the type of metrics data for each service you wish to monitor and the retention policy for the data.
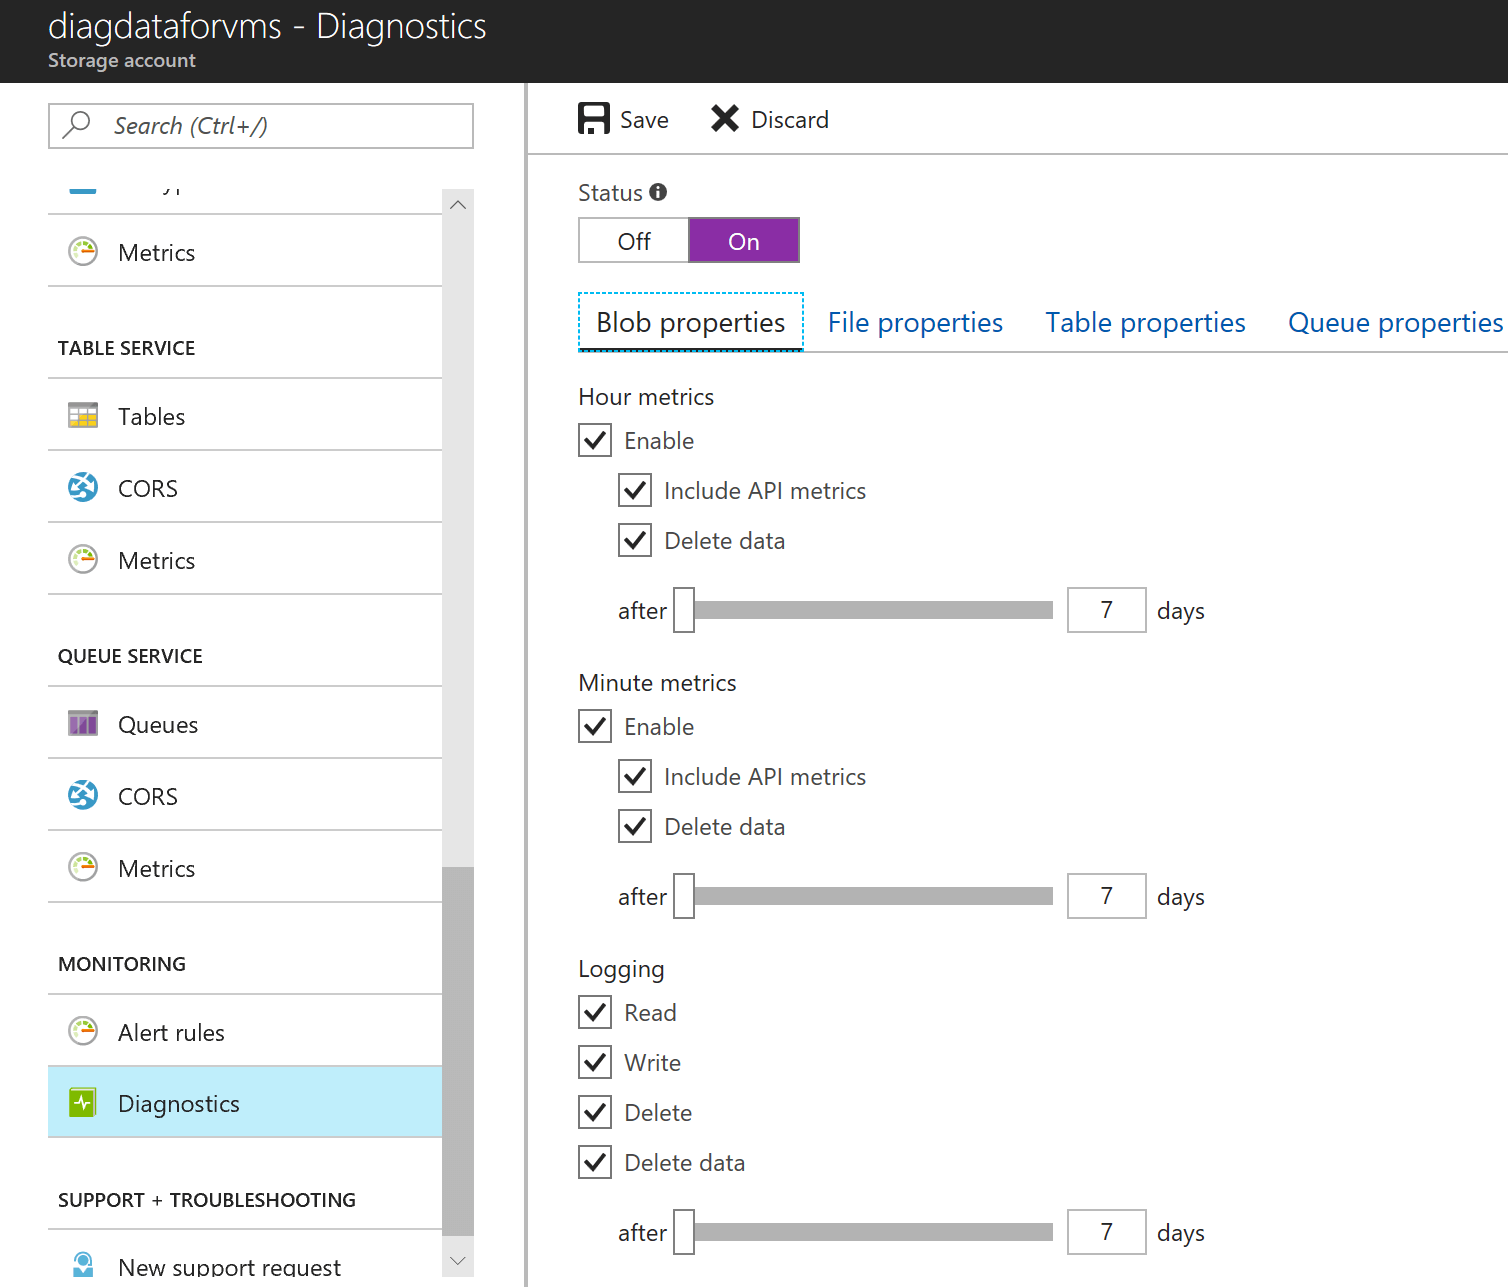
Click on Save to enable the diagnostics.
Retention (days) is the number of days the data needs to be retained, from 1 to 365. The default for new storage accounts is seven days. If you do not want to set a retention policy, enter zero. If there is no retention policy, it is up to you to delete the monitoring data.
By default, we will be collecting the API metrics and the logs for different types of storage services.
Similar to a Virtual Machine, you should also be able to see the Metrics for different parameters for the storage account and can be viewed under Metrics of each storage service type.
You can also similarly configure Alerts for each of the service type can monitor the Metrics and take appropriate action when the threshold is breached.
I hope this has been informative and thank you for reading!


