
In this post titled Objective 2.6 - Scale ARM VMs of the 70-533 Microsoft exam, we will be discussing things like how to change the VM size, scale sets and how to perform auto-scale using Scale sets.
The sub-objectives that we will be covering are:
- Scale up and scale down VM sizes.
- Deploy ARM VM Scale Sets (VMSS)
- Configure ARM VMSS auto scale
The first sub-objective we will be dealing with is regarding the size of the VMs.
Scale up and scale down VM sizes
A virtual machine size decides the number of resources such as CPU, GPU, and memory that is allocated to it. You need to create Virtual machines according to the expected workload.
The Virtual Machine can be scaled up or down once it is created. Before we go about the process of resizing the VMs, let us first understand the different series of VMs that are available in Azure.
| Type | Sizes | Description |
|---|---|---|
| General purpose | DSv2, Dv2, DS, D, Av2, A0-7 | Balanced CPU-to-memory. Ideal for dev/test and small to medium applications and data solutions. |
| Compute-optimized | Fs, F | High CPU-to-memory. Good for medium traffic applications, network appliances, and batch processes. |
| Memory-optimized | GS, G, DSv2, DS, Dv2, D | High memory-to-CPU. Great for relational databases, medium to large caches, and in-memory analytics. |
| Storage optimized | Ls | High disk throughput and IO. Ideal for Big Data, SQL, and NoSQL databases. |
| GPU | NV, NC | Specialized VMs targeted for heavy graphics rendering and video editing. |
| High-performance | H, A8-11 | The powerful CPU VMs with optional high-throughput network interfaces (RDMA). |
To list the VM sizes available in a particular location, you can run the below command.
Get-AzureRmVMSize -Location southindia
To get the VM sizes available for your VM, type the below command.
Get-AzureRmVMSize -ResourceGroupName MyResourceGroup -VMName WebVM1
This will list all the sizes available for this VM. My VM is an Ubuntu VM running version 16.04 LTS.
To get the current size of the VM, type the below command.
Get-AzureRmVM -Name WebVM1 -ResourceGroupName MyResourceGroup | select -ExpandProperty HardwareProfile
The output will be as below.

In order to change the VM size, we will be using the Update-AzureRmVM cmdlet. In my case, I am changing the VM size from Standard_A1 to Standard_A0 which is a smaller size.
$vm = Get-AzureRmVM -ResourceGroupName MyResourceGroup  -VMName WebVM1
$vm.HardwareProfile.VmSize = "Standard_A0"
Update-AzureRmVM -VM $vm -ResourceGroupName MyResourceGroup
You could also perform all these steps using the Azure CLI 2.0. Read my article here to install Azure CLI 2.0.
To list the VM sizes available, type:
az vm list-vm-resize-options --resource-group MyResourceGroup --name WebVM1 --output table
To resize the VM, type:
az vm resize --resource-group MyResourceGroup --name WebVM1 --size Standard_A1
Deploy ARM VM Scale Sets (VMSS)
Virtual machine scale sets are an Azure compute resource that you can use to deploy and manage a set of identical VMs.
VM Scale Sets are available at no additional cost over the compute resources being used and are available in all regions that support Azure Resource Manager. At the time of this writing, you can have up to 100 VMs in a VM scale set.
For more information on Scale Sets, you can go through the below video from Mark.
Typical use cases of Azure Virtual Machine Scale Sets are:
- Hyperscale workloads.
- Stateless Web Frontend machines.
- Container orchestration.
- Microservices clusters.
Without further ado, let's go ahead and deploy a Scale Set using the Azure Portal.
Once logged into the Azure Portal, click on New and start typing scale on the search bar. Virtual machine scale set is listed in the results. From there, you can fill in the required fields to customize and deploy your scale set.
The fields that you need to fill are:
- Name: Provide a unique name to the Scale set.
- Operating System Disk Image: Provide the Operating system type that will part of this scale set.
- Subscription: Select the subscription from the available list.
- Resource Group: Select the resource group where the scale set will reside.
- Location: Select the location for the scale set.
- Username: Provide a username for the Virtual Machines that will part of this scale set.
- Password: Provide a valid password.
- Instance Count: Provide the number as to how many VMs are part of the initial VMSS configuration.
- Instance Size: Select the VM size.
- Public IP address Name: The name of the public IP address for the load balancer in front of the scale set.
- Domain Name Label: Domain name label for the load balancer in front of the scale set.
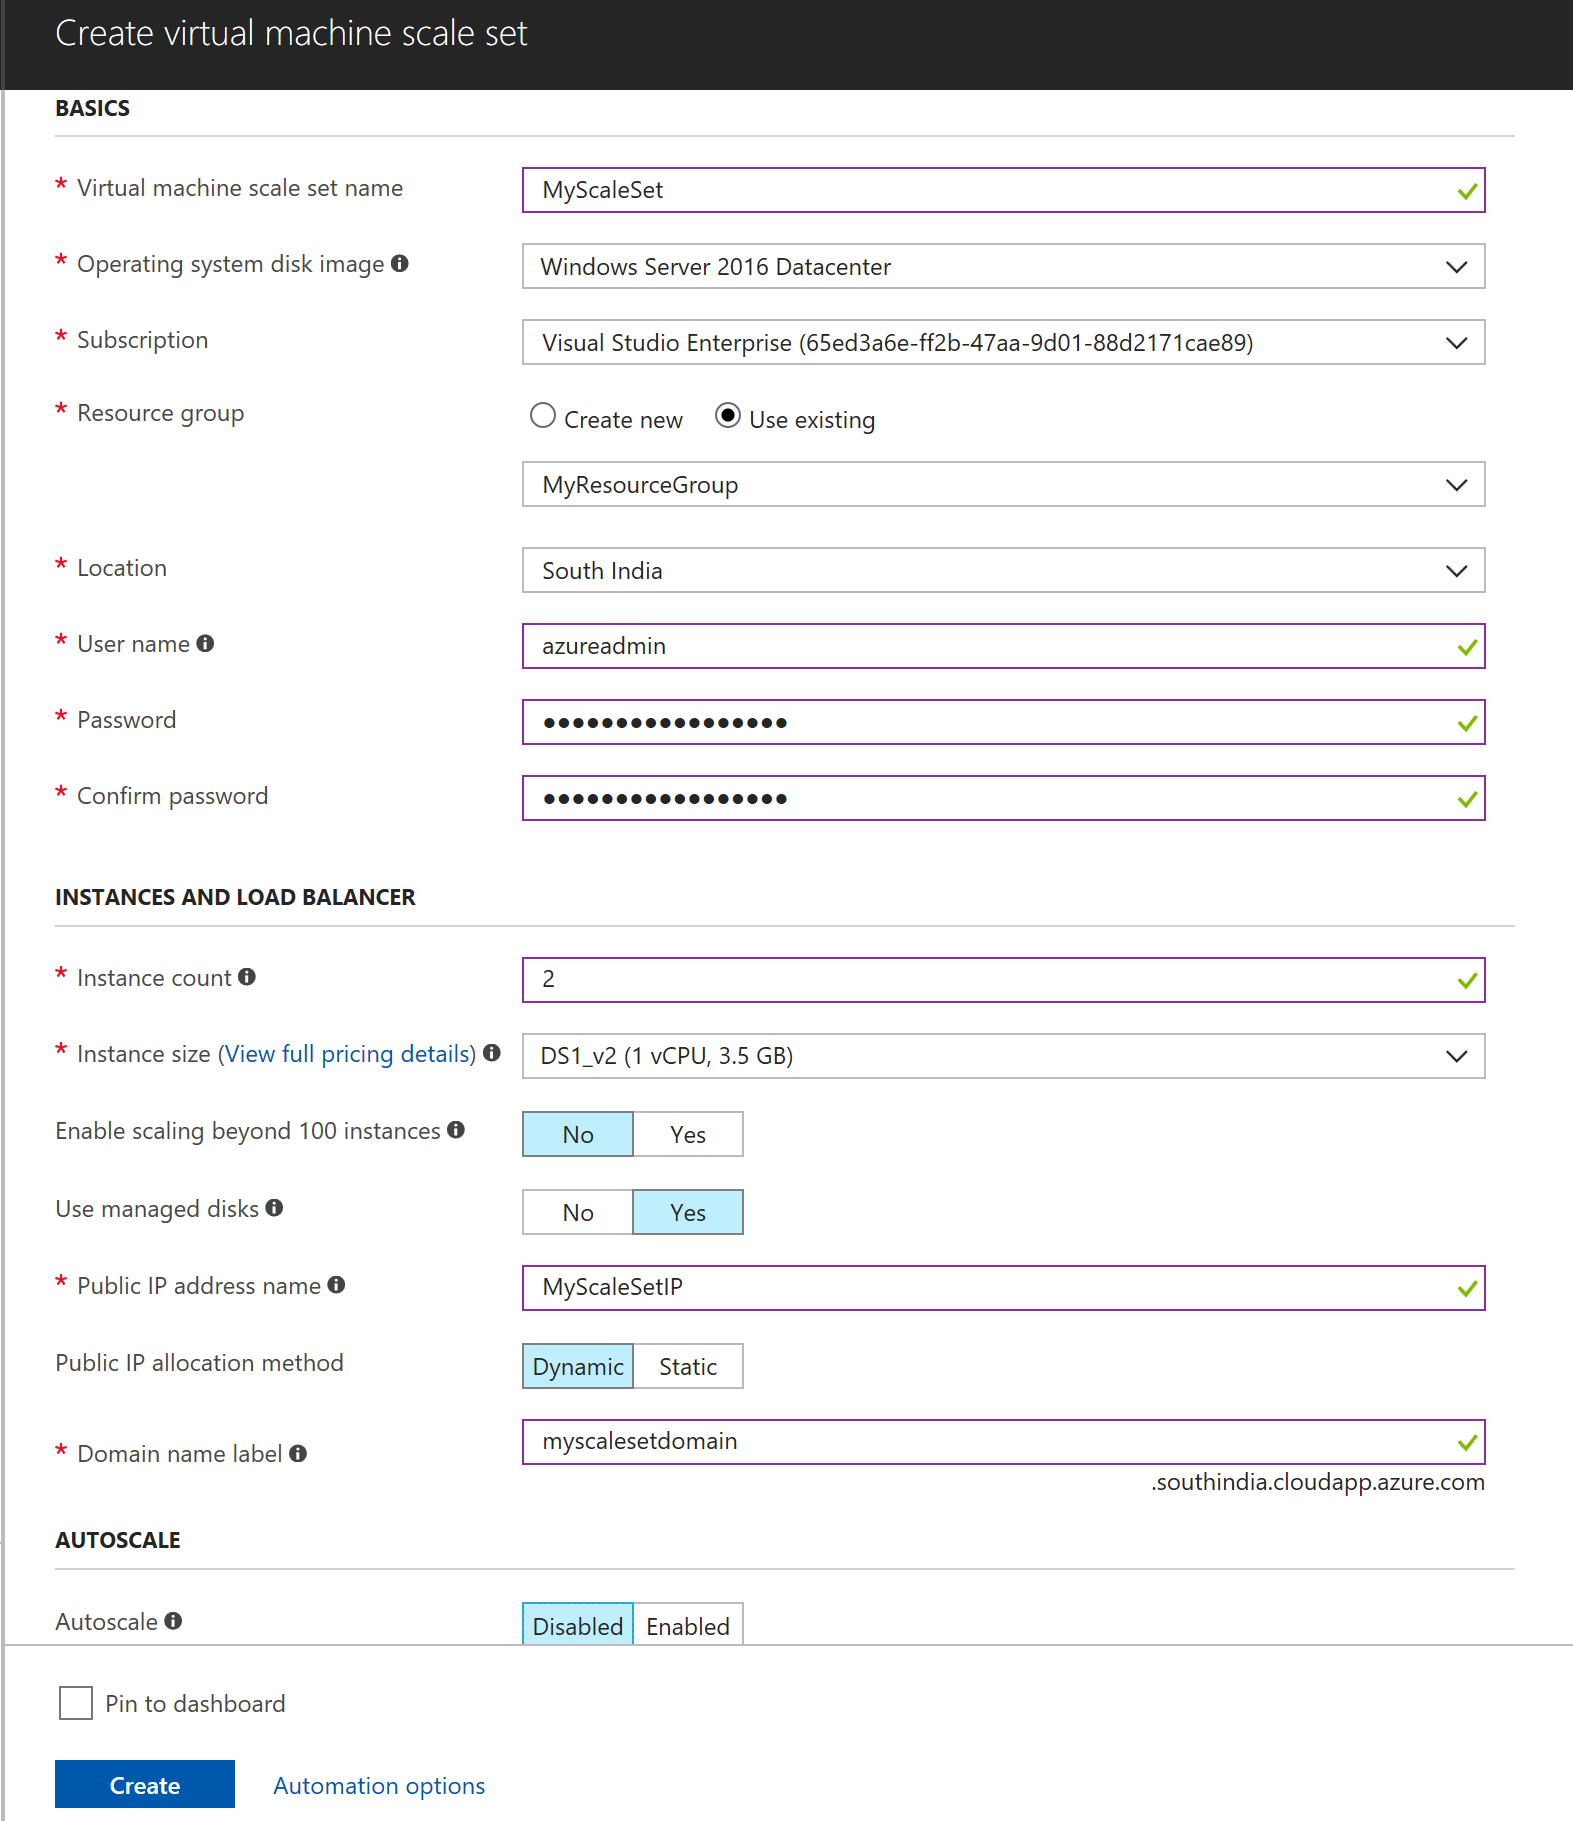
Click on the Create button to deploy your first scale set.
It should be noted that when working with VMSS, there is no data disk available (as you may have with a regular Azure VM). Data should be stored on either the OS disk or an external data store such as Azure Table, File, or Blob storage; Azure SQL Database; Azure DocumentDB, and so on.
Configure ARM VMSS Autoscale
An Azure Virtual Machine Scale Set can automatically increase or decrease the number of instances that run a particular application within the scale set.
This is similar to the Auto scaling feature of AWS. This automated and elastic behavior reduces the management overhead to monitor and optimize the performance of your application.
There are four ways that either increase or decrease options that can be applied to the scale set.
- Host-based metrics.
- In-guest VM metrics with the Azure diagnostics extension.
- Application-level metrics with App Insights.
- Scheduled autoscale.
The first and fourth method is something that I can show as a demo at this time, the others will an article of their for the configuration part.
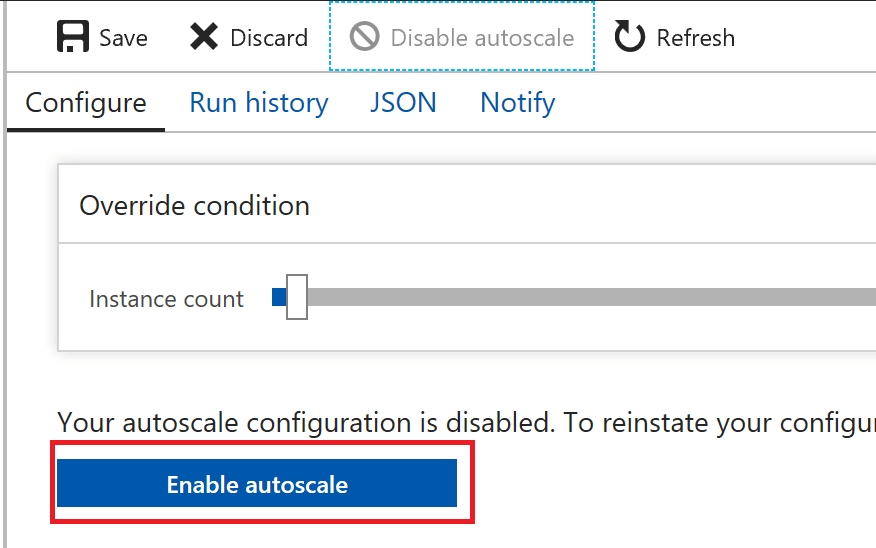
To enable Autoscale, select the Scale Set in the Azure Portal and select Scaling.
Click on Enable Autoscale as seen below.
This will bring up the scale conditions that you can modify. There will be a deafult scale condition where you can specidy a number of instances that will be part of the scale set when no conditions match.
You can now either create a new condition or add rule to an existing condition as seen below. Note that the scale mode that we have chosen is based on a metric.

This will be bring up another wizard where you need to specify to below options to create a rule.
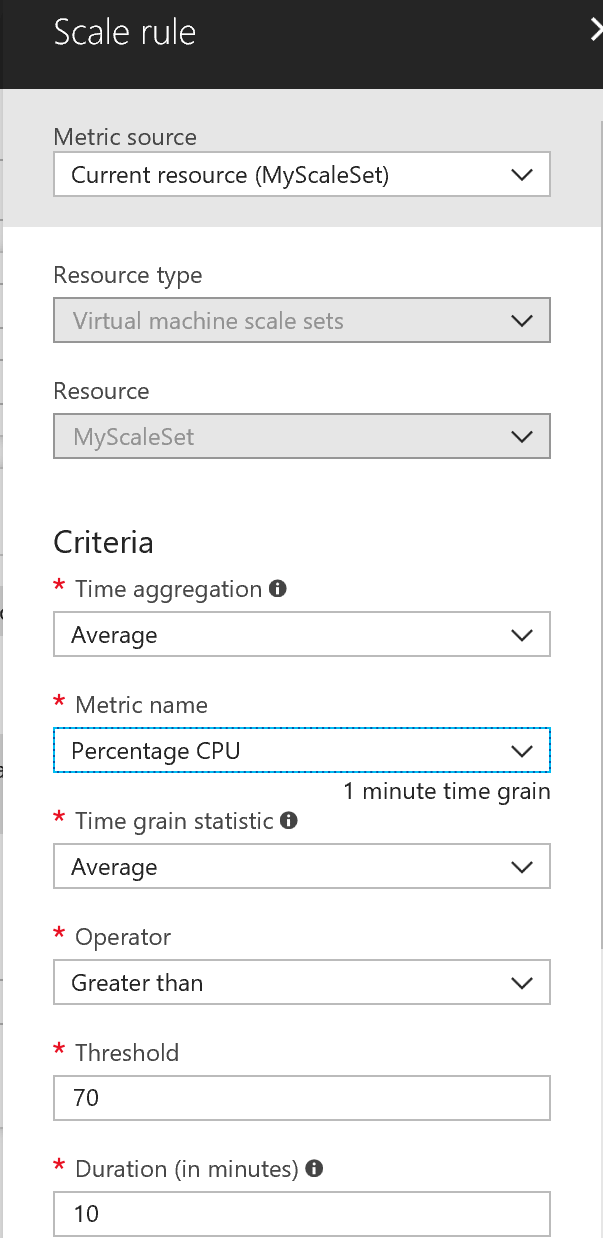
- Metric Name: The performance metric to monitor and apply scale set actions on.
- Time Grain: How often the metrics are collected for analysis.
- Time Aggregation: Defines how the collected metrics should be aggregated for analysis.
- Operator: Operator used to compare the metric data against the threshold.
- Threshold: The value that causes the autoscale rule to trigger an action.
- Direction: Defines if the scale set should scale up or down when the rule applies.
- Type: Indicates that the number of VM instances should be changed by a percentage amount.
- Value: How many VM instances should be scaled up or down when the rule applies.
- Cool Down: The amount of time to wait before the rule is applied again so that the autoscale actions have time to take effect.
Click on Add to finish creating the Scale Rule.
The second type of Scale condition that can be created is using Scheduled autoscale.
In the below example, we are scaling the number of instances at a particular time on weekdays.
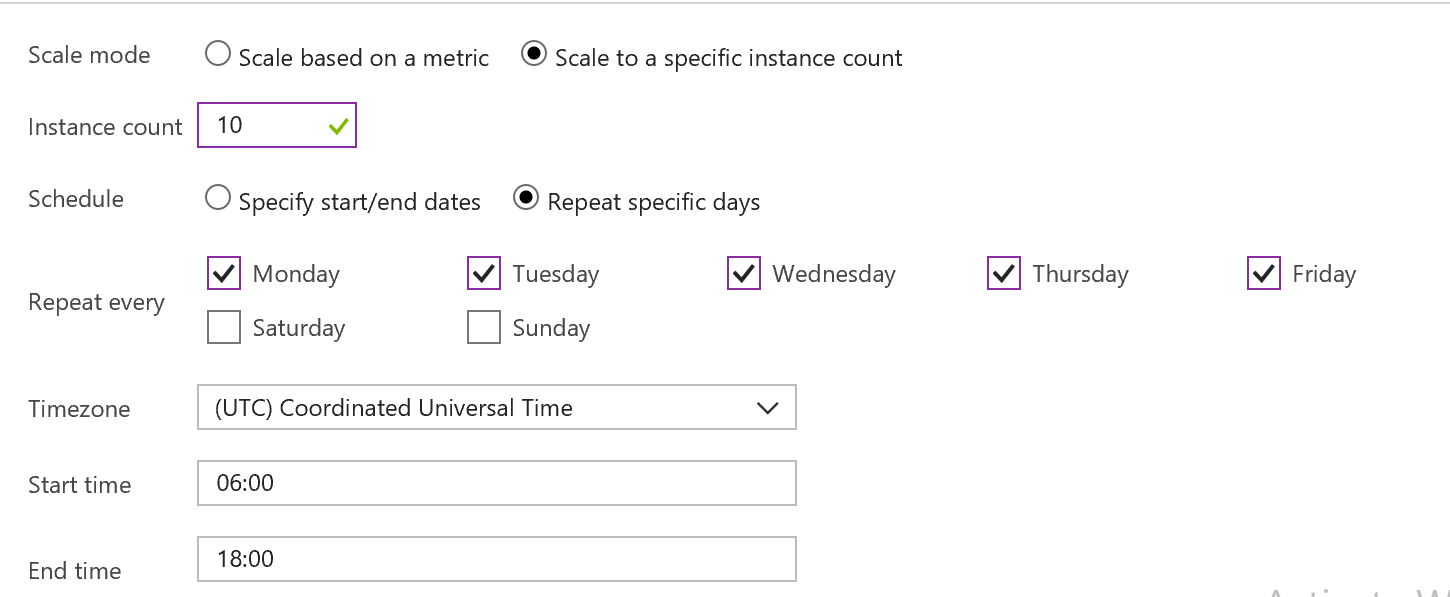
Click on Save to save these changes and this will start working in the background based on the metrics and also the scheduled autoscale at a given time.
I hope this has been informative and thank you for reading!


