
This is is second post of 3rd Objective in the 70-533 Exam series and these objectives deal with Azure Storage. In this article titled Objective 3.2 - Manage Access we will looking how to secure the different services provided by the Azure Storage.
The different sub-objectives that we will be covering in this post are:
- Create and Manage shared access signatures
- Use stored access policies
- Regenerate keys
- Encrypt keys by using Azure Key Vault integration
As you can see, the sub-objectives clearly talk about how to manage the access to your Azure Storage account and also the security aspect of it.
Create and Manage Shared Access Signatures
In this section, we talk about security and how to control access to containers and blobs using shared access signatures (SAS).
Shared Access Signature (SAS) is basically a URI with query parameters that specify options such as the expiration time, permissions, and a signed signature.
Before we proceed further, let us first understand the default container permissions.
- Private – No public access to blobs or containers.
- Blob – Public read access for blobs.
- Container – Public read access to blob containers and blobs.
As you would see, the permissions are granular in mature. If I set the container's permission to Container, I am giving anybody the access the read the container and all the blobs within it.
Similarly, if I set the container's permission to Blob, then I am only allowing read access to anybody with the URL to a blob in the container can read the blob and the blob properties and metadata.
And if I set to Private, only the storage account owner can access the container and the blobs.
Setting up on the Shared Access Signature is a lengthy procedure is outside the scope of this article, which is why I am attaching an excellent two-part blog series which covers all this stuff in detail.
- Using Shared Access Signatures
- Shared Access Signatures, Part 2: Create and use a SAS with Blob storage
Use Stored Access Policies
This section is an extension of the previous section and deals with Stored Access Policies.
There are two ways that one would create the Shared Access Signatures, which are:
- Adhoc SAS.
- Using Stored Access Policy.
As the same suggests, Adhoc SAS is created manually for the blob or the container wherein you would specify the duration and the permissions to access the blob or container.
This method is obviously not recommended as anybody knowing the SAS URI can access the contents and is very dangerous from a security standpoint.
The second way of creating the SAS URI is to set up a stored access policy for the container and specify a name, start time, expiration time, permissions, etc.
And once when you need a SAS URI, you can create it and specify the name of the stored access policy instead of all of the parameters required for the ad hoc version of the URI. The information is retrieved from the stored access policy when authorization takes place.
Also, another differentiator between these methods is when you want to revoke access to the SAS URI. When using the Adhoc SAS URI, the only way to revoke access is by changing the storage account key which you can imagine can be a nightmare depending on what the storage account is used for.
Whereas the revocation method of a SAS URI using stored access policy is to simply change the stored access policy for that object.
For more detailed information, head to the below article.
Establishing a Stored Access Policy
Regenerate Keys
When a storage account is created in Azure, there are two 512-bit storage access keys, which can be used for authentication when the storage account is accessed.
The reason there are two storage keys is that in case you want to regenerate the new key, there should not be any service disruption.
Microsoft recommends that you change the access keys to your storage account periodically to help keep your storage connections secure.
Below is a high-level overview of regenerating the keys:
- Update the connection strings in your application code to reference the secondary access key of the storage account.
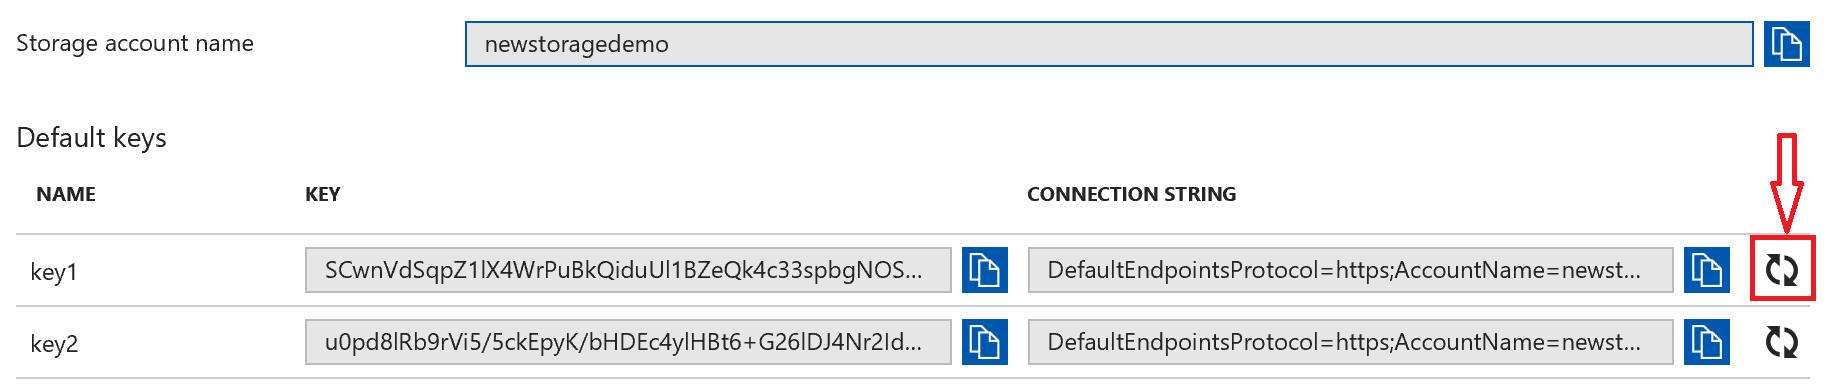
- Regenerate the primary access key for your storage account. On the Access Keys blade, click Regenerate as shown below, and then click Yes to confirm that you want to generate a new key.
- Update the connection strings in your code to reference the new primary access key.
- Regenerate the secondary access key in the same manner.
There is also a PowerShell cmdlet that you could use to get the current keys called Get-AzureRmStorageAccountKey. The default parameters that are mandatory are Resource Group and the storage account name.
And to regenerate the keys, you could use the New-AzureRmStorageAccountKey cmdlet. You will also need to specify which key out of the two that you want to regenerate.
Encrypt keys by using Azure Key Vault Integration
As explained above, up until recently, the Azure Storage Account (ASA) keys had to be rotated manually or through an external automation.
Now, Key Vault Storage Account Keys are implemented as Key Vault secrets for authenticating with an Azure Storage Account.
Key Vault performs various tasks so that everything is automated when you use Managed Storage Account Keys.
Below are some of the tasks that the Key Vault performs with respect to the Storage Account Keys:
- Azure Key Vault can list (sync) keys with an Azure Storage Account.
- Azure Key Vault regenerates (rotates) the keys periodically.
- Key values are never returned in response to a caller.
- Azure Key Vault can be used to manage keys of both Storage Accounts and Classic Storage Accounts.
For complete information on setting this up, refer to the below article.
Azure Key Vault Storage Account Keys
I hope this has been informative and thank you for reading!


