
In today's post, we will look at how to install Windows Server 2019 Tech Preview Azure. As most of you are aware, Microsoft announced the Windows Server 2019 Tech Preview and it will be generally available in the second half of the calendar year 2018.
Windows Server 2019 is built on the strong foundation of Windows Server 2016, which is the fastest adopted version of Windows Server in the history of Microsoft and that is because of some of the great features that it is packed with.
There are four major themes that Microsoft is focusing on with Windows Server 2019 Tech Preview and they are:
- Hybrid
- Security
- Application Platform
- Hyper-converged infrastructure
We will dig deeper into all of these when I get to spend some time with the OS, so expect more posts in this regard.
Getting back to our topic, Azure is one of the most convenient ways to learn a new topic and it allows you to create and destroy resources at your wish.
To follow this post, you will need two things at the very least.
- Windows machine running Hyper-V (I talk about installing Hyper-V role on Windows 10 here)
- An active Azure Subscription.
- Windows Server 2019 Tech Preview ISO.
To download ISO, you need to join the Windows Insider program, which you can read here.
Once I had the ISO, I created a VM in Hyper-V and installed the Operating System which is very straightforward, no need to get into that.
Azure supports only generation 1 VMs that are in the VHD file format and have a fixed sized disk. Therefore, I have to convert the vhdx file that I ended up having after deploying the VM from Hyper-V Manager.
There are multiple ways that you can convert the disk, we will go through the steps from Hyper-V Manager.
Open Hyper-V Manager and select your local computer on the left. In the menu above the computer list, click Action > Edit Disk
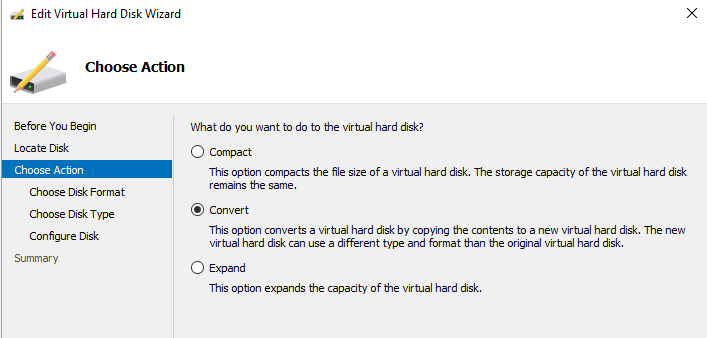
On the Choose Action screen, and then select Convert and Next
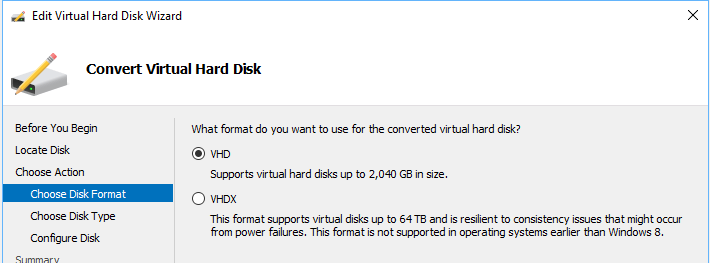
Select VHD and then click Next.
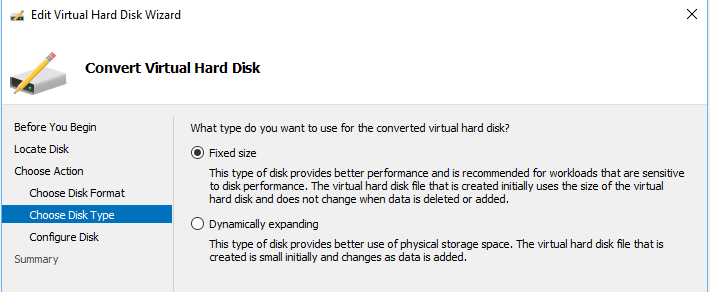
Select Fixed size and then click Next.
Locate and select a path to save the new VHD file to.
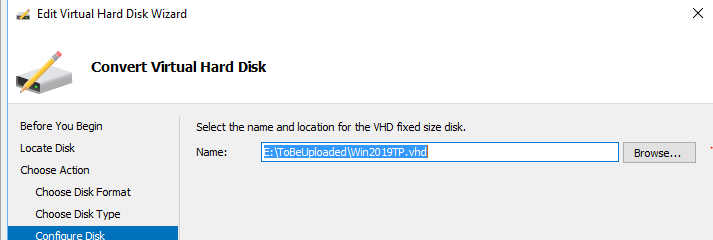
Click Finish and wait for the conversion to happen.
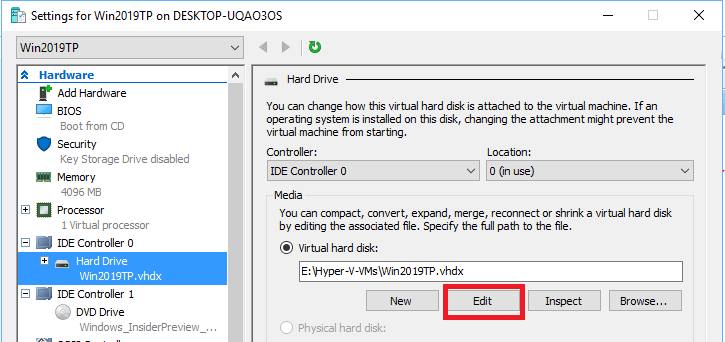
Once the vhd is created, attach the vhd to the Hyper-V Virtual Machine by going to the settings of the VM and browsing the location of the newly converted disk.
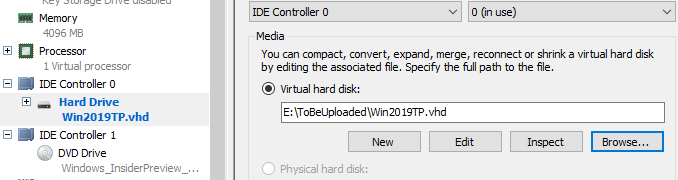
Click OK and Power ON the VM.
Once the VM is powered on, carefully follow the steps mentioned in the Microsoft post here to be able to upload this to Azure.
Next step is to generalize the VM using Sysprep so that we can use this vhd file to create multiple VMs in Azure.
Sysprep removes all your personal account information, among other things, and prepares the machine to be used as an image.
- Open the Command Prompt window as an administrator. Change the directory to %windir%\system32\sysprep, and then run
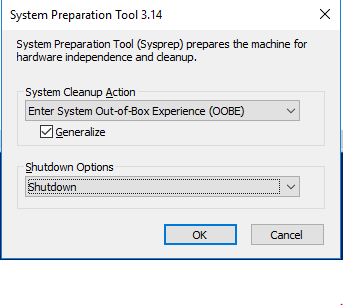
sysprep.exe. - In the System Preparation Tool dialog box, select Enter System Out-of-Box Experience (OOBE), and make sure that the Generalize check box is selected.
- In Shutdown Options, select Shutdown.
- Click OK.
 When Sysprep completes, it shuts down the virtual machine. Do not restart the VM.
Now comes the step where we need to upload this vhd file to a storage account in Azure. I will be doing this using PowerShell.
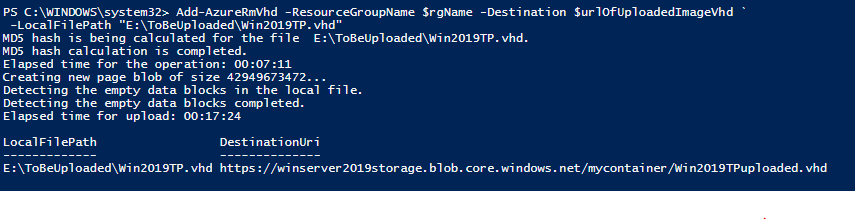
Import-Module AzureRM
Login-AzureRmAccount

$rgName = "WinServer2019"
$urlOfUploadedImageVhd = "https://winserver2019storage.blob.core.windows.net/mycontainer/Win2019TPuploaded.vhd"
Add-AzureRmVhd -ResourceGroupName $rgName -Destination $urlOfUploadedImageVhd `
 -LocalFilePath "E:\ToBeUploaded\Win2019TP.vhd"
We are first importing the Azure PowerShell module, logging into the Azure account. I have a Resource Group created called WinServer2019 and a storage account called winserver2019storage and a container called mycontainer.
Add-AzureVhd is the actual cmdlet which will be doing the heavy lifting of uploading the files. Once initiated, you should see a progress bar as below.

You should see an output similar to below once the upload is completed.
 The next step is to convert the uploaded vhd to an image so that it can be reused multiple times to create Azure VMs out of it.
We will use a bit of PowerShell to create an Image and the commands can be found below.
$location = "southindia"
$imageName = "Win2019TPImage"

$imageConfig = New-AzureRmImageConfig -Location $location
$imageConfig = Set-AzureRmImageOsDisk -Image $imageConfig -OsType Windows -OsState Generalized -BlobUri $urlOfUploadedImageVhd
$image = New-AzureRmImage -ImageName $imageName -ResourceGroupName $rgName -Image $imageConfig
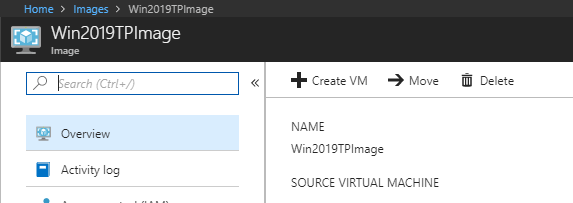
That bit of code will create an image called Win2019TPImage in the specified Resource Group.
Now comes the final step where we will create an Azure VM using this image. Log in to the Azure Portal, search for the image and select it.
Click on Create VM as seen below which will bring up the Create Virtual Machine Blade.
Fill in the details like Computer Name, Username, password, etc and review blade should like below.

Click OK to start creating the Azure VM.
Give it a few minutes and you will have Windows Server 2019 Tech Preview up and running in Azure.
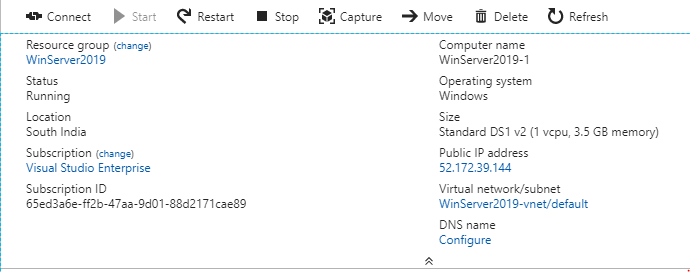
You can now connect to your VM using the Public IP address and start exploring the new features that it has to offer.
I hope this has been informative and thank you for reading!


