
In my previous post, we looked at how to install Windows Server 2019 Tech Preview in Azure and in this post, we will see how to install Project Honolulu on Windows Server 2019 Tech Preview.
What is Honolulu?
As per Microsoft's definition:
Honolulu is a locally deployed, browser-based, management toolset that enables on-premises administration of Windows Servers with no Azure or cloud dependency. Honolulu gives IT Admins full control over all aspects of their Server infrastructure and is particularly useful for management on private networks that are not connected to the Internet.
The Honolulu app runs in a Web Browser. The app can manage Windows Server 2016, Windows Server 2012 R2, and Windows Server 2012 nodes through the Honolulu gateway that you can install on Windows Server 2016 or Windows 10.
The gateway manages servers via Remote PowerShell and WMI over WinRM.
What does Honolulu do?
Think of Honolulu is a reimagined Server Manager and MMC console in a new modern design which can be used to manage target Windows machines.
IT Admins can perform many server management tasks directly from Honolulu, like Windows Updates, creating VMs if it is a Hyper-V server, etc.
The best part is there are no extra steps required to manage target Windows Server as long the gateway server can is reachable to them. You can simply add by using the FQDN or IP Address.

Image Source: Microsoft
Deployment Options available with Honolulu
There are three different deployment options available while installing Project Honolulu.
- Install on a Local Windows 10: Any Windows 10 client that has connectivity to managed servers. A typical use case would be testing or small-scale deployments.
- Install on a designated gateway server: You can use a dedicated server to install the gateway server and can use a web browser to connect and manage servers from any machine that can access gateway server.
- Install directly on Managed Server: This method can be used to manage itself.
Install Project Honolulu on Windows Server 2019
The first thing that you will have to do is download the msi file which will install both the gateway server and also the Web Server.
To download head over to the URL https://www.microsoft.com/en-us/evalcenter/evaluate-windows-server-honolulu
Once the file is downloaded, run the below command to install Project Honolulu on Windows Server 2019 Tech Preview.
msiexec /i HonoluluTechnicalPreview1802.msi /qn /L*v log.txt SME_PORT=8080 SSL_CERTIFICATE_OPTION=generate
This will install Project Honolulu on Windows Server 2019 and can be accessed locally from Chrome browser on port 8080.
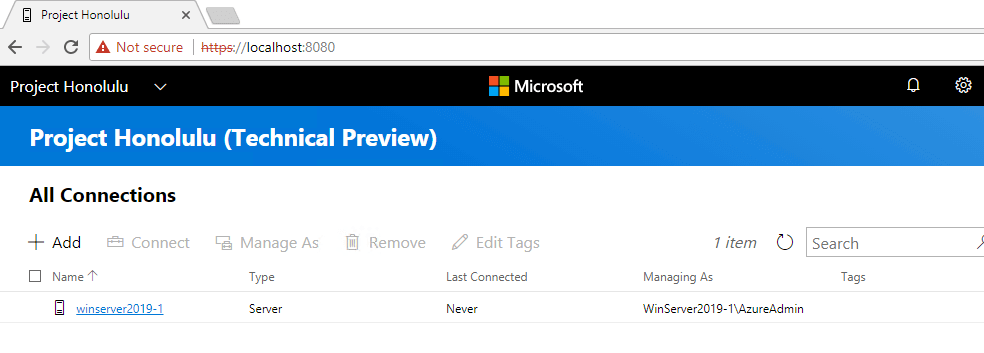
Select the managed server and you can see the below options available:
- Overview: Basic Information about the machine like Computer Name, OS, etc. You can also Restart or Shutdown the machine from this view.
- Certificates: You can view the certificate store for the managed server.
- Devices: All the peripheral devices can be managed from here.
- Events: This is the event viewer information for the managed server.
- Files: This is the explorer view for the managed server.
- Firewall: All the firewall rules, incoming and outgoing can be managed from this view.
- Local Users and Groups: Create or manage existing users and groups.
- Network: All the network adapters can be managed from here.
- Processes: This is similar to what you would see in Task Manager for processes.
- Registry: The Registry can be created or managed from here.
- Remote Desktop: You can manage remote desktop configuration from here.
- Roles and Features: You can install or remove Roles and Features from this view.
- Services: Start or stop the services of the managed server.
- Disks: Information about disks, volumes, and shares of the managed server.
- Updates: You can configure Update settings on the managed server.
I hope this has been informative and thank you for reading!


1 Comment
Cool, This is awesome!!!