
In this post, we will be looking Azure Public IP Prefix. This feature allows you to reserve a range of Public IP addresses for your Public endpoints in Azure.
I came across this feature recently and I think it has some good use cases since there are a lot of resources that use Public IP addresses in Azure and having them within a range helps with keeping a track on the IP addresses assigned to them.
Additionally, Azure Public IP Prefix helps in managing your resources more effectively since a contiguous range of IP addresses that are reserved. For example, applying firewall rules to a subnet that is assigned to the Public IP Prefix instead of individual IP addresses.
Also, from a cost perspective, it's not a lot expensive compared to using regular Public Addresses if there is a need for using multiple IP addresses in your use case.
An important thing to note is that the Azure Public IP Prefix is available only with the Standard SKU. You can learn more about the Basic and Standard SKU here.
Now that we understand what Azure Public IP Prefix is, let us go ahead and create one from the Azure Portal.
Once you are logged in, select + Create a resource. And start typing public IP prefix, and then select Create.
Start entering the below details shown in the diagram.
- Subscription: Information about the subscription where this resource should be deployed.
- Resource Group: Name of the resource group.
- Name: Name of the instance.
- Region: Region where this resource should be deployed.
- Prefix Size: Number of IP addresses to be reserved.
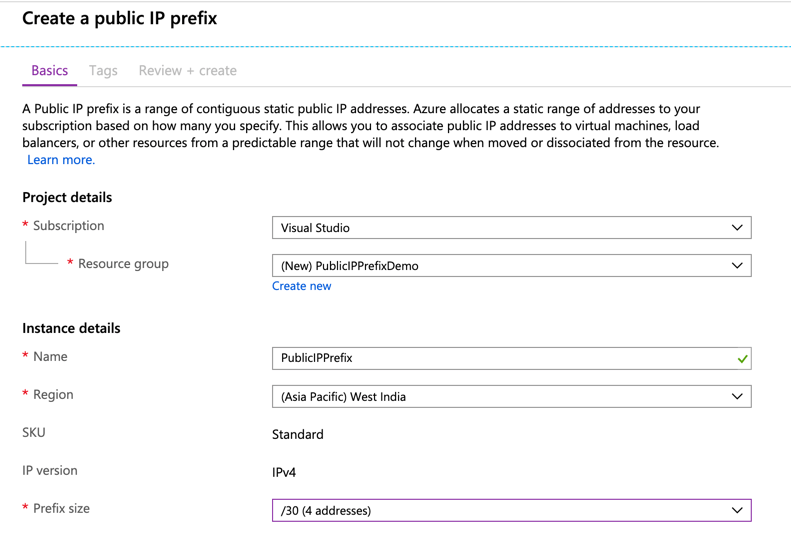
Note that this is available only for the Standard SKU and IPv4 only.
Once the resource is created, you should be able to see it like below.
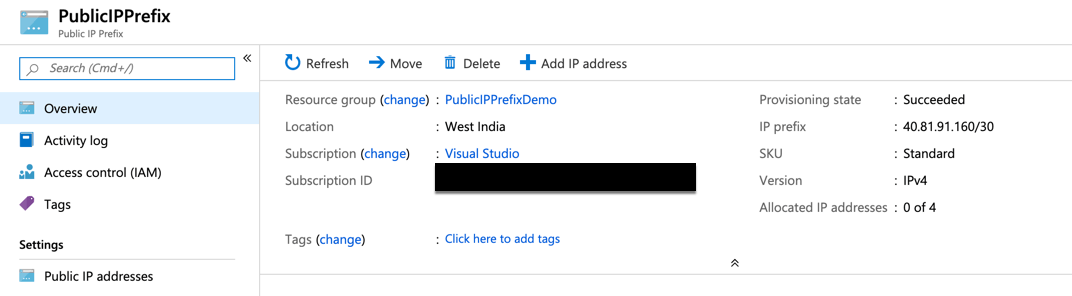
That's it. We can start creating the Public IP Addresses by clicking on Add IP Address sign shown above and Azure will create an IP address from the above range that we have selected.
You could also create this resource using Azure CLI.
az network public-ip prefix create --length 28 --location westus2 --name MyPublicIPPrefix --resource-group MyResourceGroup
And using PowerShell.
New-AzPublicIpPrefix -Name MyPublicIPPrefix -ResourceGroupName MyResourceGroup -PrefixLength 28
That's it. In the next post, we will discuss how to assign these IP addresses to various Azure resources. Thank you for reading and I hope this was informative!


