
In this post, we will discuss how to download a Report using Rubrik PowerShell module. In the previous post, we looked at how to create and manage SLA Domains using Rubrik PowerShell.
I was recently working with a customer and they had a unique ask of being able to store the Rubrik Reports on a regular basis to a shared folder.
Out of the box, Rubrik CDM offers a scheduling mechanism for the reports to be able to be emailed to certain recipients based on schedules, which can be seen below.

Once you click on the Schedule button, it brings up the below window which allows you to create a schedule as to when this report should be emailed to the required recipients.
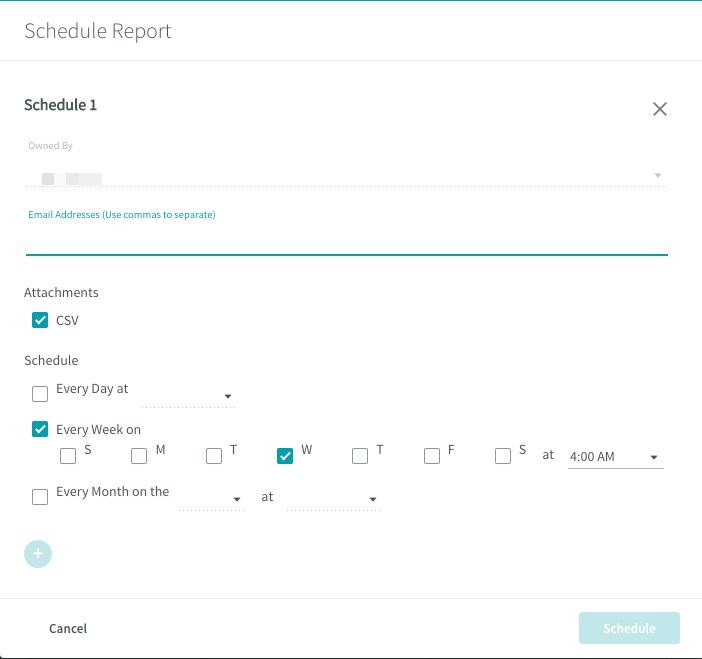
The cool thing is that you can have multiple schedules for the same report by clicking on the '+' symbol.
This is all good. But remember, this post is to understand how we can download the report in a CSV format.
Well, this can be achieved each time by simply clicking the CSV button shown in the first screenshot. Understandably, this is not scalable and requires a person to login to the cluster each time and download the report to his/her desktop.
The answer to all of this Rubrik PowerShell, which can generate the report using Rubrik PowerShell, and using one of the native PowerShell cmdlets, we can download it.
Get-RubrikReport -Name "Name of the Report" | Export-RubrikReport
This will generate a unique one time usable URL which we will use below the download the report using the Invoke-WebRequest cmdlet.
Invoke-WebRequest -Uri https:/<nodeip>/report_dir/72c91631-3015-460c-9d90-493a08ef2582_5ff9b089-aa2a-4ab8-99ce-bb2f899bbc54.csv -OutFile /Users/adilarif/Downloads/test.csv -SkipCertificateCheck
This can now be scripted into a .ps1 file and can be run on a Windows machine using the task scheduler or a Linux machine using a cronjob.
In my example, I ran it on my MacBook running the latest stable version of PowerShell core. You can also use a UNC path to store it to a shared folder which the Invoke-WebRequest cmdlet supports.
I hope this has been informative and thank you for reading! 🙂


")