
Welcome back, this post covers Exam 70-410 Objective 1.2 – Configure Servers.
In the previous post, Exam 70-410 Objective 1.1 - Install Servers, we dealt with installing the Windows Server 2012 R2 and the various options that are available to us along with the planning and various other concepts.
Once the server is ready after installing the operating system, typically it is not yet ready to perform the tasks that you intend it to do. Hence in this objective, we will deal with the various configurations that are required after installing the OS.
This objective covers how to:
- Configure NIC Teaming.
- Delegate Administration.
- Configure Services.
- Configure Server Core.
- Convert Server Core to/from Full GUI.
- Deploy Roles on Remote Servers.
- Add and Remove Features in Offline images.
- Install and configure Windows PowerShell Desired State Configuration.
Configure NIC Teaming
NIC Teaming is a feature of Windows Server 2012 R2 that enables administrators to combine the bandwidth of multiple network interfaces, providing increased performance and fault tolerance.
NIC Teaming, also called bonding, balancing and aggregation is a technology that has been available for quite some time, but it was always tied to specific hardware limitation.
With Windows Server 2012 R2, the NIC Teaming feature is hardware independent.
There are two modes of NIC teaming in Windows Server 2012 R2:
- Switch Independent Mode: All the network adapters are connected to different switches, providing alternate routes through the network. There are two configurations available with this method.
- Active/Active
- Active/Standby
- Switch Dependent Mode: All network adapters are connected to the same switch, providing a single interface with their combined bandwidth. You can choose from two configurations with this mode.
- Static Teaming.
- Link Aggregation Control Protocol (LACP) - This method required help from the network team.
You can create and manage NIC teams by using Server Manager or Windows PowerShell.
Open Server Manager, Enable NIC Teaming first.
Click on New Tasks, Add to New Team.
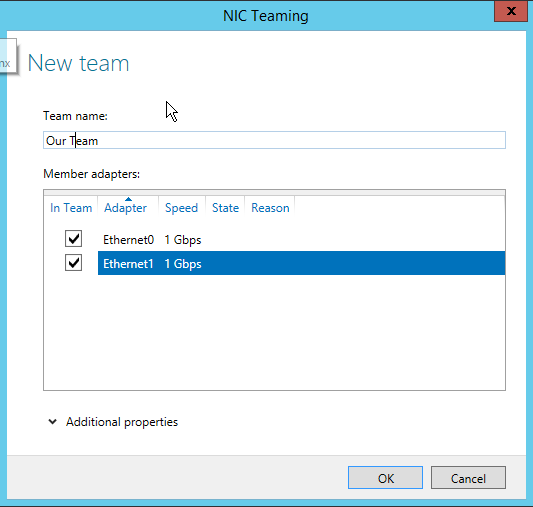
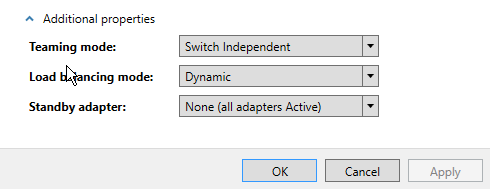
Once you click on Additional properties, you will able to see options that we just discussed above.
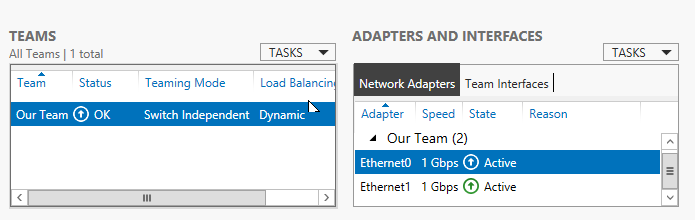
You can see below that we have successfully created a Switch Independent Dynamic NIC team. So now the traffic flowing to/from the network adapters is equally shared between each other.
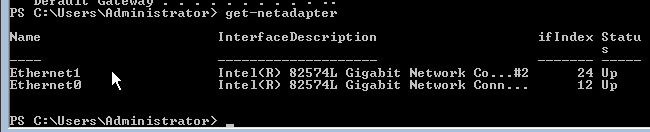
If suppose you had to do the same on a Server Core machine, we will perform the same steps using Powershell.
First log into the Server Core machine, open up a Powershell session. Type Get-NetAdapter
At first, we will disable the DHCP on both the network adapters. Assign a new static IP Address and set the DNS Servers.
Set-NetIPInterface Ethernet0 -DHCP disabled
New-NetIPAdress Ethernet0 -IPAddress 192.168.0.104 -DefaultGateway 192.168.0.1 -Prefixlength 24
Set-DNSClientServerAddress -Interface Ethernet0 -ServerAddress 192.168.0.100
New-NetLBFOTeam -Name "Our Team" -TeamMembers Ethernet0, Ethernet1 -TeamingMode SwitchIndependent -LoadBalancingAlgorithm Dynamic
Get-NetAdapter "Our Team" | Set-NetIPInterface -DHCP disabled
Get-NetIPAdapter "Our Team" | Net-NetIPAdress -IPAddress 192.168.0.104 -DefaultGateway 192.168.0.1 -PrefixLength 24
Set-DNSClientServerAddress -InterfaceAlias "Our Team" -ServerAddress 192.168.0.100
Delegating Server Administration
One of the most important things that the server administrator must know is how to delegate his work to his subordinates.
As the network grows, the administration of various things becomes a tedious job.
Most of the times, you would do this from a group policy. But if you have to perform the task on a single server, kindly follow the below steps.
Open Server Manager
Tools > Local Security Policy > User Rights Management
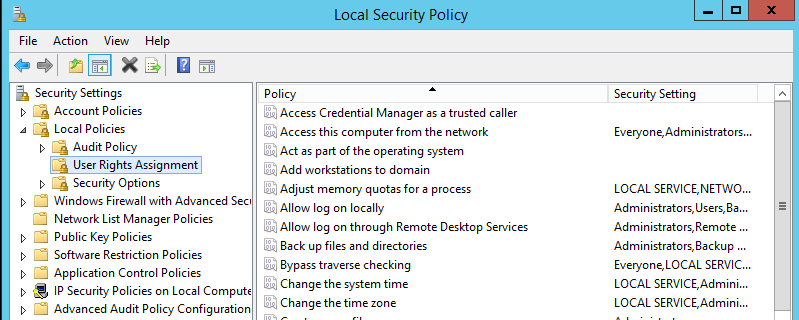
You can now assign users to the respective policies.
Configure Services
Most Windows Server Roles and many of the features include services, which are programs running in the background, typically waiting for a client process to send a request to them.
When you first look at the Local Server home page in Server Manager, one of the tiles you
find there is the Services tile, shown in Figure below.
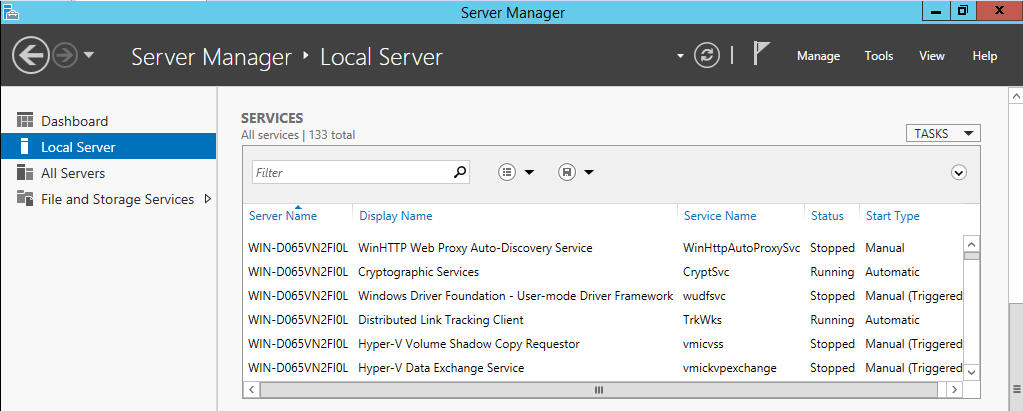
You may now manage services from the Server manager console as well. same as the services MMC console.
The only difference being that the Start type cannot be modified from the Server Manager.
You could, however, change that using the Windows PowerShell cmdlet called Set-Service.
Read Also: Powershell - Find the Start mode and Startup account for services
Configure Server Core
In this section, I just want to make you aware of the common tasks that you would perform on the Server Core once it is installed.
We will deal with most of these PowerShell cmdlets in our upcoming objective.
To set the resolution of the computer screen.
Set-DisplayResolution <width> <height>
To update or adjust the clock.
timedate.cpl
If you wish to Rename the computer name.
If you want to the computer to an Active Directory Domain.
There is a very cool text-based menu to perform the basic tasks called sconfig.
Read Also: Configure Hyper-V Core Server using sconfig
To install and remove Windows Roles and Features.
Install-WindowsFeature
Uninstall-WindowsFeature
To manage the servers remotely using Powershell Remoting
Read Also: How to enable PowerShell Remoting via Group Policy
Convert Server Core to/From Full GUI
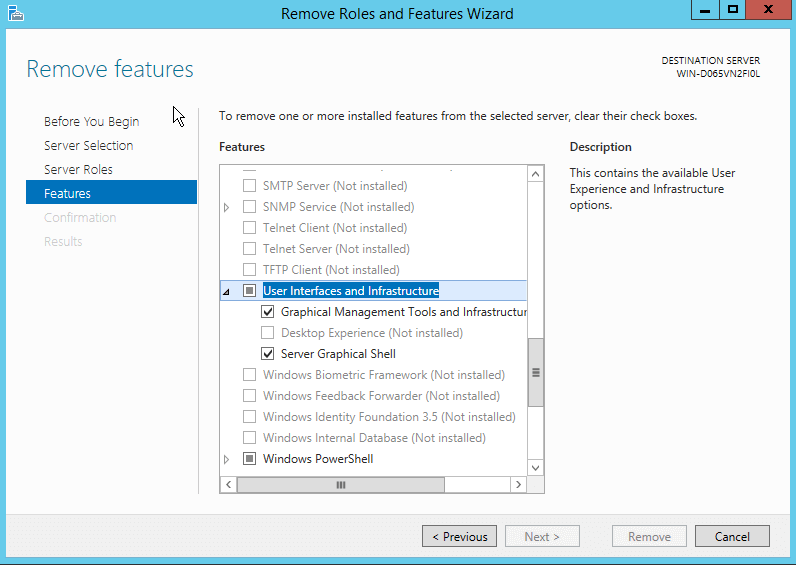
To convert a full GUI installation of Windows Server 2012 R2 to Server Core by using Server
Manager, you must run the Remove Roles And Features Wizard and uninstall the following
features, as shown in Figure below.
- Graphical Management Tools And Infrastructure
- Server Graphical Shell
The equivalent Powershell command would be as below.
Remove-WindowsFeature Server-GUI-Shell, server-gui-mgmt-infra -Restart
To add the full GUI to a Server Core computer, you must use Windows PowerShell to install
the same features you removed in the previous procedure. To convert a Windows Server 2012 R2
Server Core installation to the full GUI option, use the following Windows PowerShell command:
Install-WindowsFeature Server-Gui-Mgmt-Infra,Server-Gui-Shell –Restart
Deploy Roles on Remote Computers
It is now very easy to deploy Roles on Remote Computers both using Server Manager and using Powershell.
If you are using Server Manager, you just have to provide the Remote Computer while Adding/Removing Roles.
There is a tool called Configure-SMRemoting, which is enabled by default on all Windows Server 2012 R2 which helps in the above.
You can more about it here in the TechNet article.
Using Powershell, you would most likely use the below syntax to install Roles on Remote Computers.
Install-WindowsFeature <Role/Feature Name> -ComputerName <Name of the computer>
Read Also: How to install SNMP on Remote Computers using PowerShell
Add and Remove Features in Offline images
There are various ways of achieving this, let us see the old method using the DISM utility.
Assume that we have mounted the install.wim file from the ISO image of the Windows Server 2012 R2 on the C:\mount path on the local computer.
dism /image:C:\mount /get-features
The above command will list the roles and features that enabled or disabled on the Windows image.
dism /image:C:\mount /get-featureinfo /featurename:dhcpserver
The above command will fetch the details regarding the DHCP Server Role on the Windows image.
dism /image:C:\mount /enable-feature /feature-name:dhcpserver
The above command will enable the DHCP Server Role on the Windows image.
dism /unmount-image/commit
The above command will write the changes to the Windows image and the unmount the image.
Configure PowerShell Desired State Configuration
Powershell was introduced way back in 2006 as a Windows component as Powershell 1.0. It has seen a lot of improvements over the period of time and added more and more functionality in every new iteration.
PowerShell 3.0 brought a whole new list of cmdlets with which it was possible to administer a server from the command line as much as you could from Server Manager.
With PowerShell 4.0, DSC provides a new scripting model that enabled Administrators to create modules called "configurations", which consists of "nodes" representing computers and "resources" that define elements that administrators want to define a part of the configuration for a particular node.
Let us see an example of the DSC
Configuration Server1
{
Node "Server1"
{
WindowsFeature InstallIIS
{
Ensure = "Present"
Name = "Web-Server"
}
}
}
As you can see how easy it is to define configurations. In the above example, we are stating the Web-Server Role needs to be present on the computer Server1.
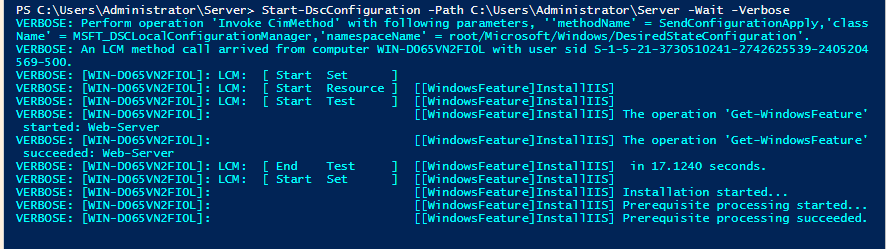
To enable the above Configuration, we would run the following command.
Start-DSCConfiguration -Wait -Verbose -Path .\Server1
To test if the configuration is applied
Test-DSCConfiguration

That is all we have in this section. I hope you found this informative and thank you for reading!


