
Hi All,
Welcome back to the series, How to setup VMware vSphere Lab in VMware Workstation.
This is the fourth part of the guide, where we will be installing the Domain Controller using the template that we created in the previous post. As a recap, in the first part we dealt with the prerequisites and in the second, we designed the network using Virtual Network Editor.
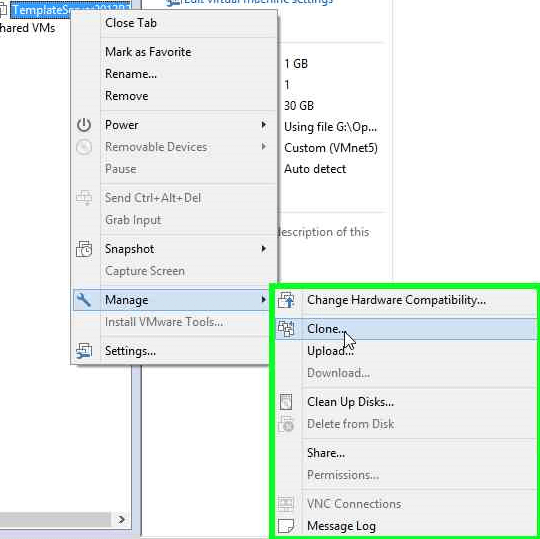
Moving on, let us create the clone from the TemplateServer2012R2 template by following the path Right click > Manage > Clone.
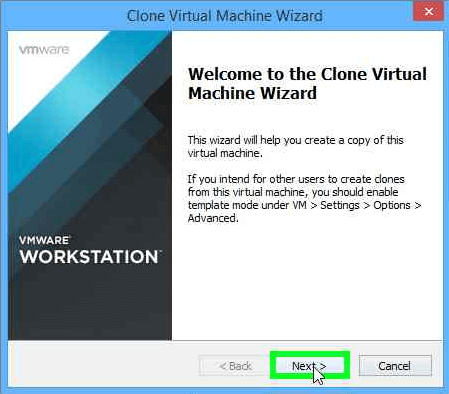
Next you will be presented with the Clone Virtual Machine Wizard, click on Next.
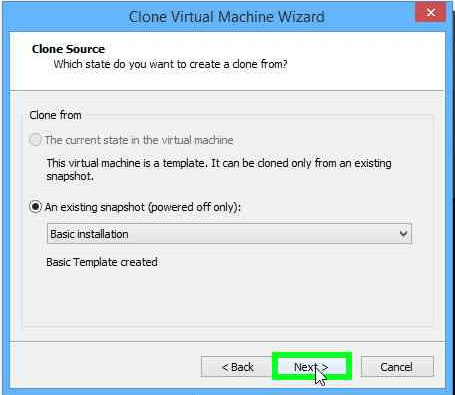
Select clone from an Existing snapshot, which we had taken in our previous post.
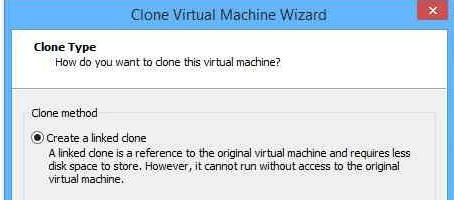
Select create linked clone as we want to save as much space as possible.
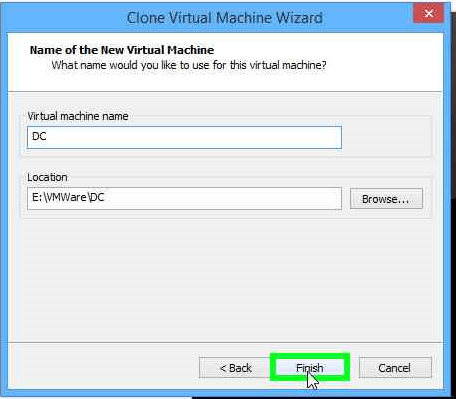
Next you will need to provide the Name for the virtual machine. Click on Finish.
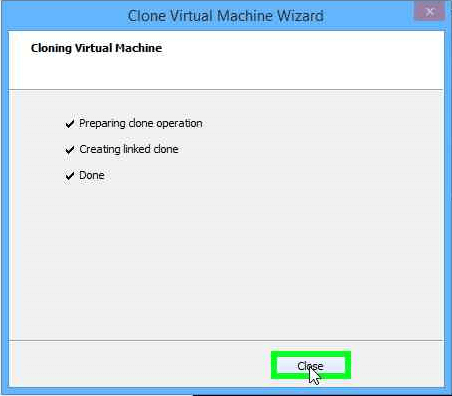
Once the cloning is complete, click on close.
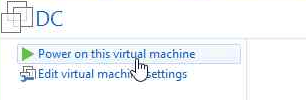
Next you will need to power up the Virtual Machine and provide Administrator password for the newly built VM.
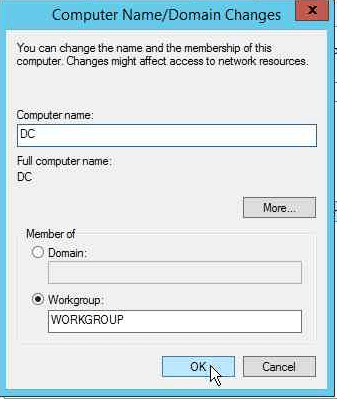
Once done, we will go ahead and change the name of the computer to DC. You can do so from Computer properties > Advanced Settings
This will require a reboot. After the reboot, we give this VM an IP address of 10.10.2.4 and the subnet mask of 255.255.255.0.
Next using Server Manager, we will install the ADDS and DHCP role on this server.
I am not showing any screenshots as this is a fairly simple task of going through the wizard.
You will next need to promote the VM to a Domain Controller which is again an easy task of going through the configuration settings from Server Manager.
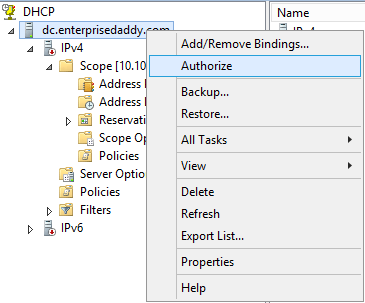
Next up we will create and activate a DHCP scope so our VMs can get an IP address on the internally isolated network. The DHCP will stay active only on the VMNET6 network.
You will also need to authorize the DHCP server to start releasing the IP addresses. Below you can see how to authorize and also the scope that we need to create.
That's it. Look at the size of the size of the linked clone VM, 1.58GB only - that’s the power of linked clones. It uses the base image and creates only the deltas which are different.
The deltas represent all the configuration changes and AD, DNS, DHCP roles that we added.
This is the fourth part of the VMWare vSphere Lab using VMWare Workstation. Links to the rest of the articles can be found below.
- What do you need to build VMWare vSphere Lab?
- The network design of VMWare vSphere lab in VMware Workstation.
- Preparing Windows Templates for VMWare vSphere Lab
- How to create the Domain Controller Virtual Machine
- Installing of Nested ESXi hosts in our VMware vSphere Lab
- Installing the vCenter Virtual Machine for VMWare vSphere Lab
- Designing the Shared Storage for VMWare vSphere Lab


17 Comments
I had a question on this particular article(DHCP config on the DC).
You state :
“Next up we will create and activate a DHCP scope so our VMs can get an IP address on the internally isolated network. The DHCP will stay active only on the VMNET5 network.”
(DC is on the MGmt network 10.10.2.0)
As per you documentation VMNET5 is designated as the vmotion network.
Should it say VMNET6 network? (10.10.6.0) as that is designated for the VM network?
Or am I not understanding this correctly?
Hello Bobby,
If you read the second article of the series, you will see that the VMNET5 is designated for VM network.
Thanks for the great tutorial. What adapter did we attach to the DC? I assume it is “VMnet6 10.10.6.0 VM Network” from the Part 2 tutorial – network design. Correct?
Please ignore my question, sorry.
David, could you please elaborate how did you set this up?
His directions are not clear at all.
Hello Dan,
I believe I answered Pat’s question which should clarify the confusion here. Do let me know if I can be of any help.
Regards,
Adil Arif
VM Network is VMNET6 not VMNET5
I think Bobby is right here, VMNet5 (10.10.5.0) is for vMotion but vmnic5 is for VM Netword which is associated with VMNet6 so according to the second article (vmware workstation network design and Nested ESXi Properties) :
VMNet5 = vmnic4 = vMotion = 10.10.5.0
VMNet6 = vmnic5 = VM Network = 10.10.6.0
Going from VMNet# to vmnic# is a little confusing i think
I must admit that I do find the network confusing. When following the guide I added VMNet2 to the D.C. (10.10.2,4), then you talk about the dhcp network on VMNet6 (10.10.6.x). So how many nicks does the D.C. have? How do you get the DHCP server to use VMNet6?
Thank you,
Pat
Hello Pat,
There are two NICs attached to the DC. I realized that I haven’t made that very clear in the post.
Once is VMnet2 which is used for Management and VMnet5 used for VM Traffic.
I hope that clarifies the confusion.
Regards,
Adil Arif
This guide is definitely not for dummies. I am a dummy, so to speak. A lot of the things you say are simple and that you won’t show are not actually simple. Is there any resource you can point me to that will help me understand servers and VMs better. I am having a problem trying to promote ADDS to domain controller. It keeps telling me DNS server and DC (my server that we built from template) are not active. And then it won’t let me do anything more with adds.
Adil,
Can you add a table that shows what the DHCP scope is supposed to be? The image / screenshot you took is blocking all of the information. Also when setting up the DNS server, what is the IP address supposed to be on the .6 network?
Hi, following the guides and comments, I added VMnet2 and VMnet5 to the DC. I put the static IP and subnet on the Windows settings for VMnet5, but it’s not working and I am getting a warning when trying to roll out the ADDS and DHCP roles. Settings: https://i.imgur.com/AhMAIQk.png https://i.imgur.com/IlULs7n.png https://i.imgur.com/xcqMbK5.png Any tips?
Figured it out I think, but now I wonder how to configure the scope. The screenshot is not showing all the info.
https://i.imgur.com/sKFCsDY.png
Hello,
I’ve tried to follow the post and comments but am still missing the scope configuration. I have the 2 NICs set up. One on VMnet2 and one on VMnet5. Is the scope in the 10.10.1.x, 10.10.5.x or 10.10.6.x range?
Hi,
Great article. Can you provide the settings for DNS and DHCP, please..
Thanks