
Hi All,
Welcome back to the series, How to setup VMware vSphere Lab in VMware Workstation.
This is the third part of the guide, where we will preparing Windows Server 2012 R2 template so that we can utilize linked clones for efficient use of disk space. In the first part, we dealt with the prerequisites and in the second, we designed the network using Virtual Network Editor.
Before we move any further, let us set the preference for the working directory so that we don't have to do this every time we create a virtual machine.
Go to Edit > Preferences
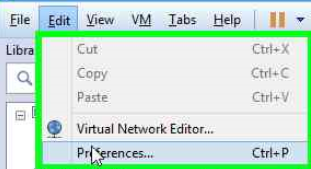
Go to Workspace, and change the working directory to your preference.

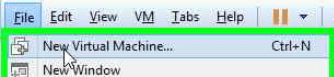
Now, we will create a new virtual machine which is going to be our base template to install all other Server Operating Systems.
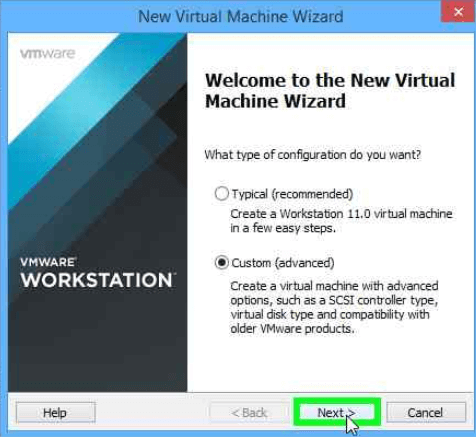
A wizard comes up, choose the custom radio button.
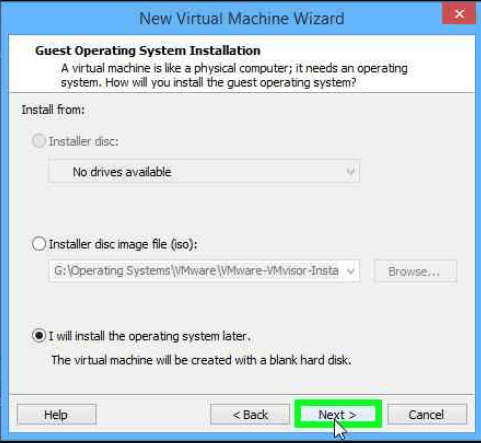
Choose to install the OS later, since we’ll need to personalize the virtual hardware of this VM first.
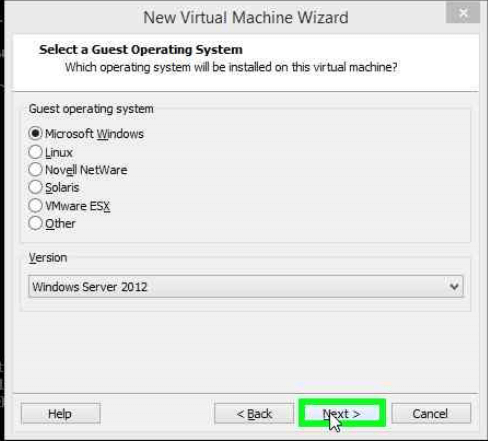
We choose Microsoft Windows and as a family the Windows Server 2012.
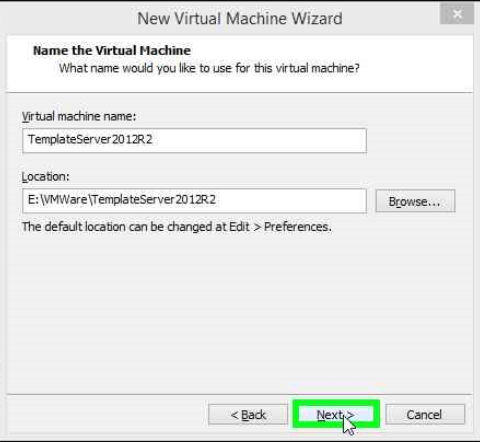
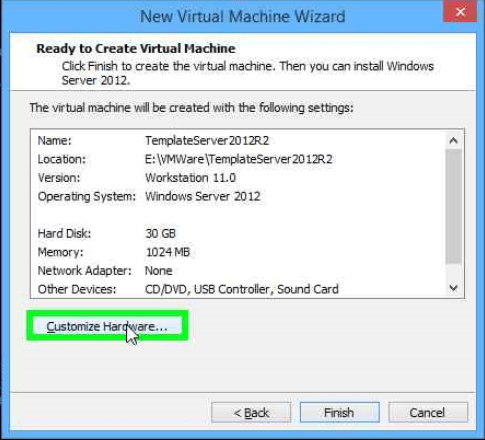
Name it in the way you would like, I am naming it TemplateServer2012R2
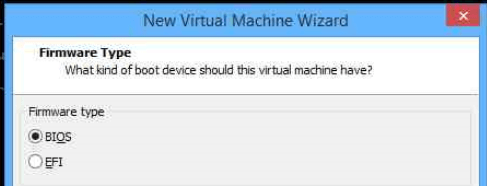
Choose the firmware type as BIOS
Choose one CPU, you can change that later when working with linked clones.
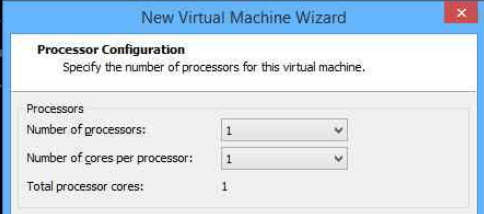
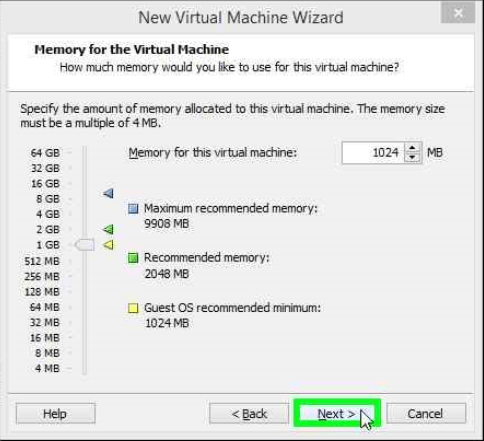
Give the virtual memory as 1GB.
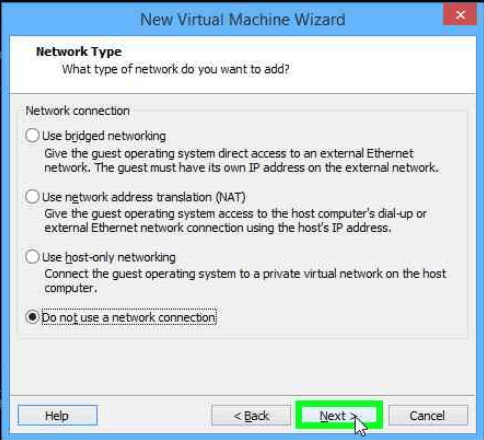
Concerning the network, choose not to connect for now, since we’ll be able to choose the network.
Afterward when we’ll be working with linked clones.
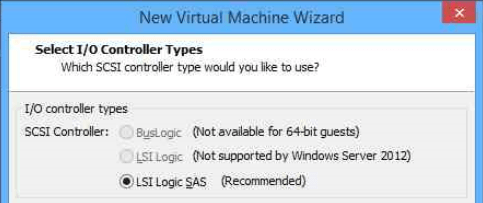
Accept the default values for the rest.
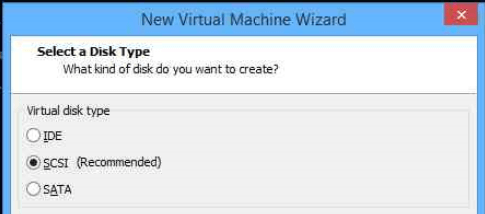
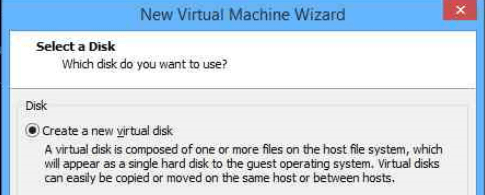
Select Create a new Virtual Disk.
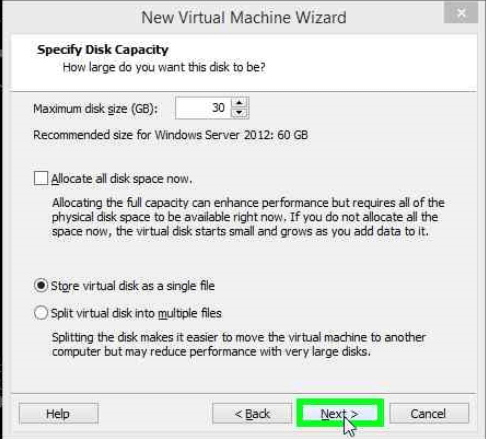
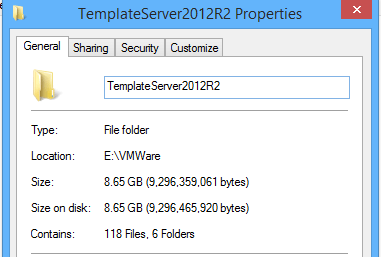
We are selecting the disk size as 30GB, but you will notice later on that because on selecting single virtual disk and thin provisioning our VMDK file will be just over 8GB only.
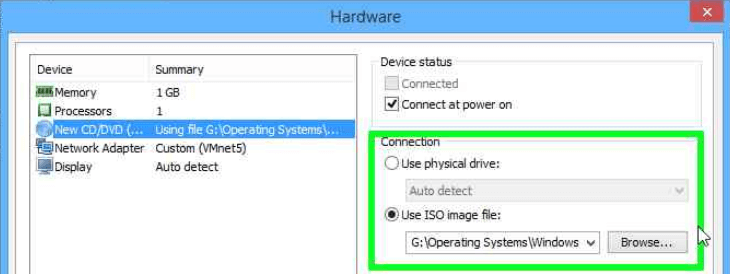
Before clicking on Finish, select Customize hardware to add the ISO image path of the Server OS
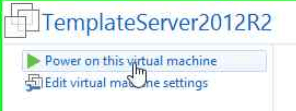
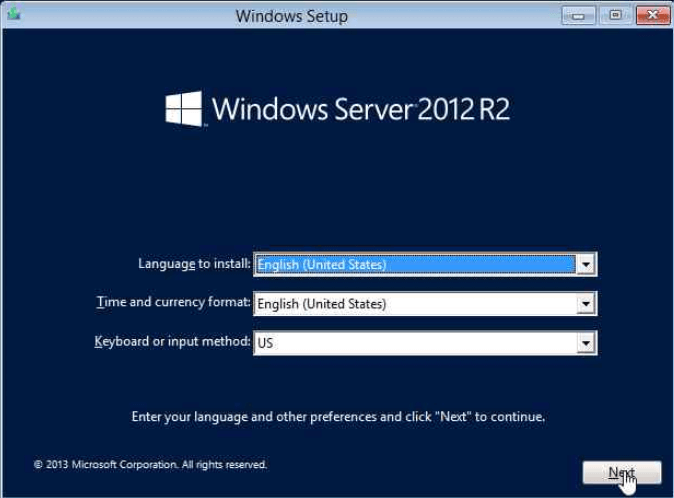
Next, you can power-On this VM by clicking the green triangle in the Top left corner. You should see the VM booting and showing you the Windows server 2012 R2 default installation screen.
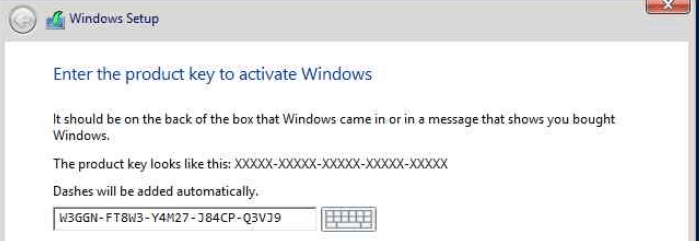
Provide the product key here.
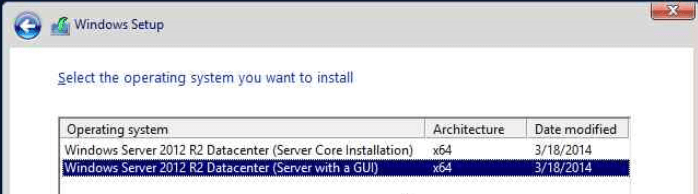
Select Windows Server 2012 R2 Datacenter with GUI.
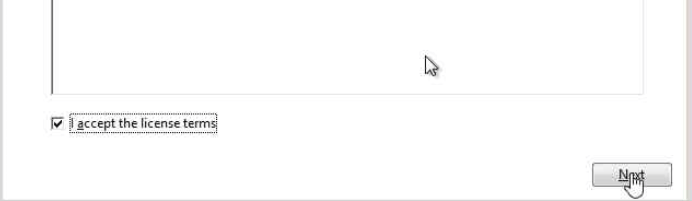
Accept the License agreement.
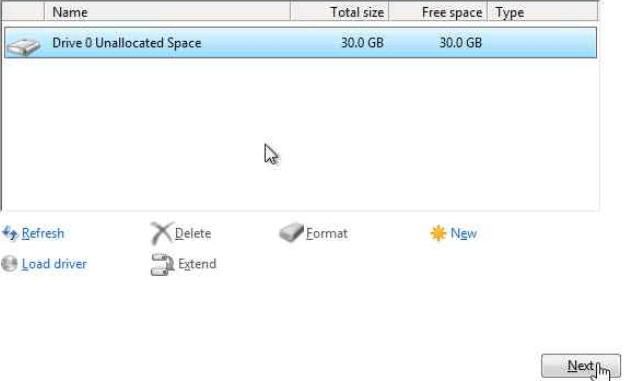
Select Custom install.

Next select the 30Gb drive that we allocated earlier on.
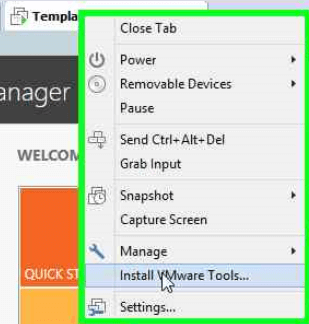
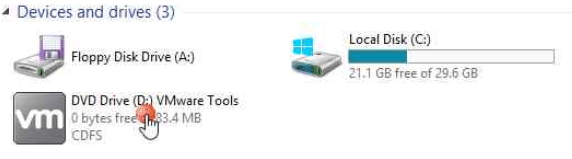
Once done, it will install the Operating system. In the next step, we will Install VMWare Tools.
The installation of VMWare Tools is necessary step, since it will install all the necessary drivers for your VM (Display, network, hard drive…. Etc….)
Once done, you will see it as your D drive.
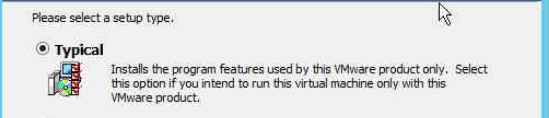
Select the Typical option and continue with the installation.
You can disconnect the ISO of Windows Server 2012R2 now. We will not need it anymore.
Next up, we need to shrink the size of the C drive so that we can keep it just around the 8.5GB mark.

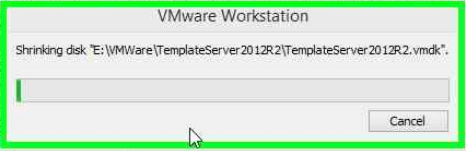
This is pretty good, since from now on we’ll use only delta files which will use as a base this VMDK file image. Now we only need to Sysprep the VM and Turn it into Template.
Do a Sysprep and shut down the VM.
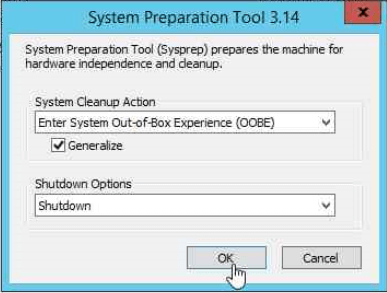
By doing a Sysprep, the next time we will do a linked clone and start the clone, the VM get it’s new identifier, new NetBIOS name, etc etc.. And we’ll not have a trouble with dealing with double SIDs.
Now when the Sysprep operation has finished, the VM has been automatically stopped. We need to create a template.
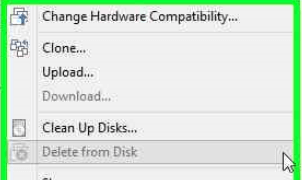
To make this template a real “Template” you need to check in the VM properties the “Enable Template Mode”

As you can see, our VM is now protected from accidental deletion and Delete from disk option is disabled.
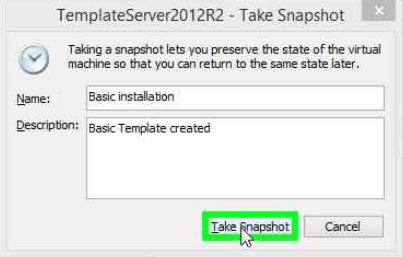
The last step would be to take the snapshot of the Template.
In the next part, we will create a Domain Controller using the Template we just created.
This is the third part of the VMWare vSphere Lab using VMWare Workstation. Links to the rest of the articles can be found below.
- What do you need to build VMWare vSphere Lab?
- The network design of VMWare vSphere lab in VMware Workstation.
- Preparing Windows Templates for VMWare vSphere Lab
- How to create the Domain Controller Virtual Machine
- Installing of Nested ESXi hosts in our VMware vSphere Lab
- Installing the vCenter Virtual Machine for VMWare vSphere Lab
- Designing the Shared Storage for VMWare vSphere Lab


4 Comments
Hi , good practice lab!!
But if i want to install first esxi hosts and then install DC inside the local datastore and with wan configuration but not using my local network as the managment network? I need to set routing as i know , i tried to that with GNS3 with cisco router set to RIP v2 but n0 internet connection only local connection same as vmware workstation , I now that i can add vmnet0 autobridge interface to ESXi but but how can i apply it on vm network or other?
Add another network card to that vm and attach it to your local network (bridged).
I think that should work
Hi.
how can i shrink the size of the C drive in win server 2016. and by the way you are shrinking the C drive in the VM or in the physical Machine ?
I personally think its a typo, His screen shot shows that he is actually shrinking disk E: It is definitely the VM template Server he is shrinking. If you notice he shrunk it to 8.65 gb in the screen shot.