
Hi All,
Welcome back to the series, How to setup VMware vSphere Lab in VMware Workstation.
This is the last part of the guide, where we will be installing the Shared Storage for VMWare vSphere Lab. In the previous article, we finished installing vCenter server.
As a recap, in the first part we dealt with the prerequisites and in the second, we designed the network using Virtual Network Editor. In the third, we created a template to install the necessary VM's and in the fourth part, we installed a Domain Controller using the same template. And the fifth dealt with Installing the ESXi hosts.
In order to test the advanced features of vSphere like like vMotion, High Availability etc, the VM's must live on shared storage.
Shared storage is basically a data store that is visible from every host of your cluster. When you install a new VM, the destination space of that VM is that shared storage. The VM’s hard disk VMDK files are stored there, together with VMX (conf files) and Swap files as well.
Every single host must see that shared storage in order to implement vMotion or HA.
There are many ways to configure that shared storage, the most commonly used one is the OpenFiler. But we will use the vCenter VM as an iSCSI target with the free edition of StarWind iSCSI SAN. You can download it from Starwindsoftware.com: http://www.starwindsoftware.com/starwind-free
It’s very easy to install and setup to implement the shared storage. I’ll first add a second virtual hard drive and another vNIC for the storage network, to my vCenter VM.
Let’s move on. First, power down the vCenter VM and Add the second vNIC which will be configured with VMnet3 (our iSCSI network). The vCenter VM should have 2 vNICs.
![]()
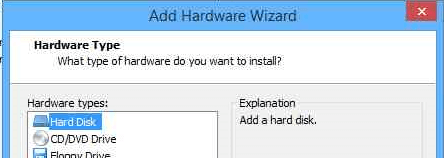
Then, we will add an additional disk drive to this VM.
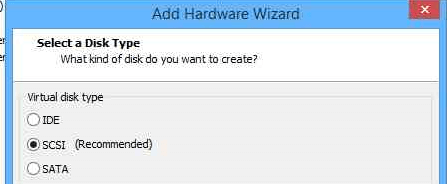
Select SCSi as it is the recommended.
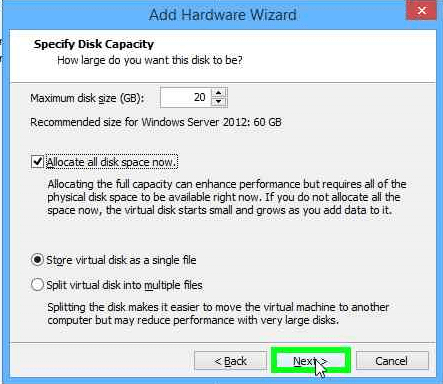
We will set up a 20GB drive.
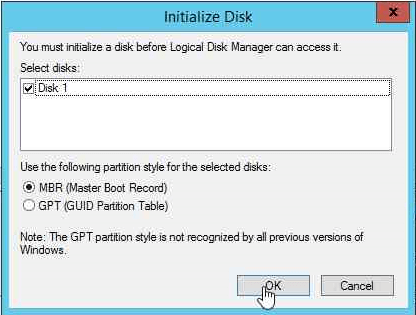
Next up. open Computer Management. Click on Disk Management and Initialize the disk that we just added.
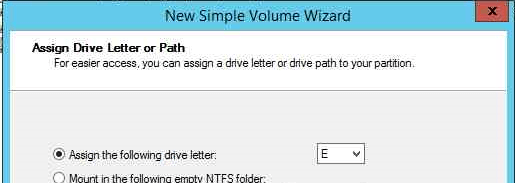
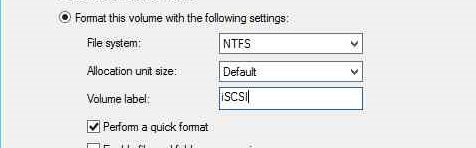
Now create a Simple volume of the disk and assign E drive with NTFS partition.

Now go to network manager, and rename the adapter added to ISCSI and assign an IP Address of 10.10.3.1 and subnet mask of 255.255.255.0

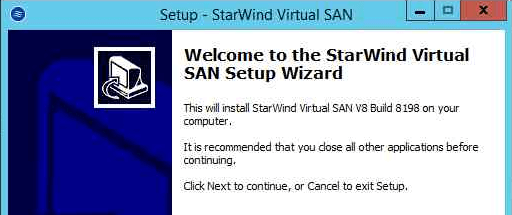
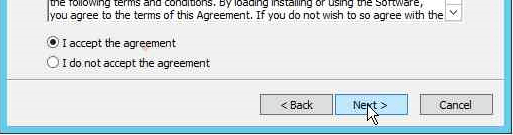
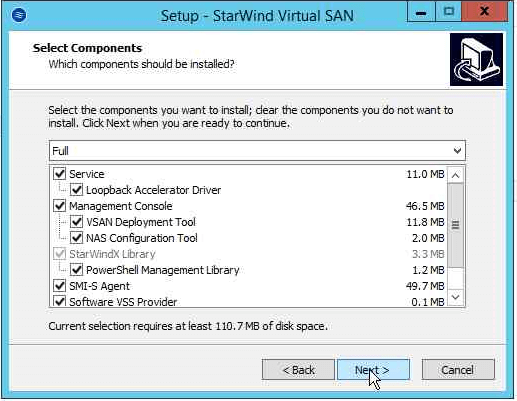
In the final step, we will be installing the StarWind Virtual SAN downloaded before. Do a Full installation as seen below and provide the License key when prompted for.
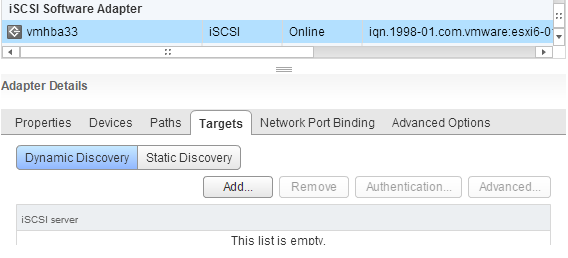
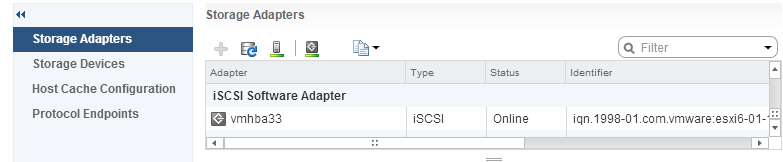
Start both vESXi 6 servers now, open your vSphere Web Client and connect to vCenter. Go to the storage adapters and Add software iSCSI adapter. (Click on Manage)

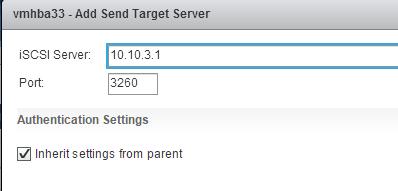
Now you will be to see vmhba33 in the list as seen below. Click on Targets, Add Dynamic discovery and provide iSCSI server Address as 10.10.3.1.
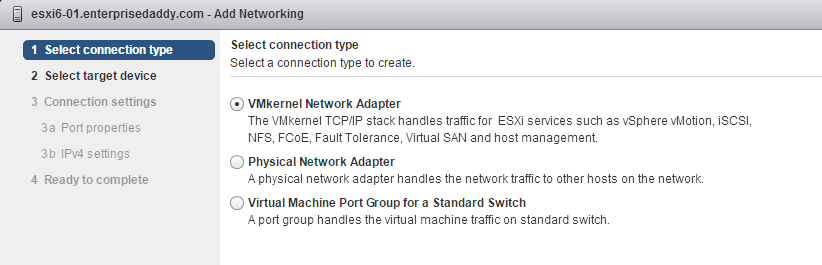
For now do not rescan, if prompted. First we’ll add our 2 new network adapters to the iSCSI VMkernel port.
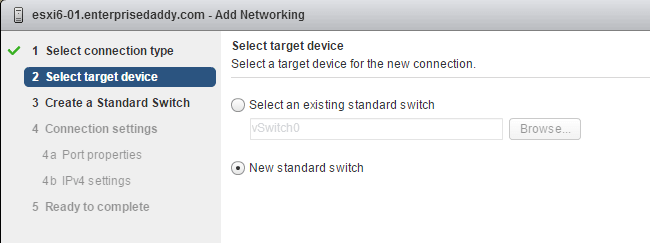
Go and select one of the hosts in vSphere, and then select Manage> Networking > VMKernel Adapters > Add
 Next up, select a New Standard switch.
Select VMNic2 as active adapter and VMNic3 as Unused for now as shown below. Name the VMkernel port group as iSCSI1.

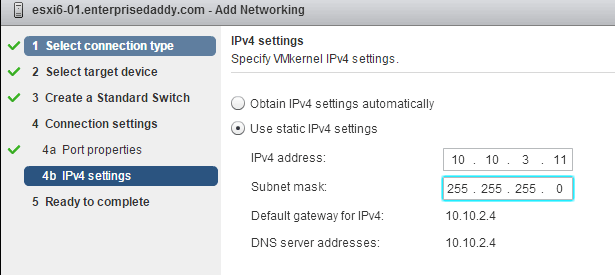
Select the IP address as 10.10.3.11 and subnet mask of 255.255.255.0.
Similarly create another VMKernel port group and name it as iSCSI2 and provide the IP address of 10.10.3.12.
Once you rescan the storage adapters, you should now be able to see the identifier on the vmhba33 adapter.
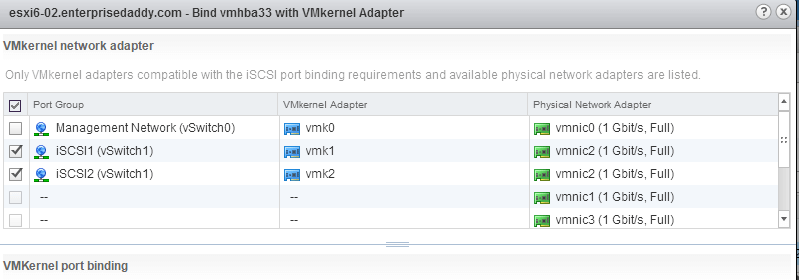
Next up, you need to bind the ports. Click on Manage > Storage Adapters > Select vmhaba33 > Network Port Binding > Add
Select both as shown below.
Once done, follow the same process on the second ESXi host and give the vmkernel group iSCSI1 the IP address of 10.10.3.21 and ISCSI2 as 10.10.3.22.
Now click on Storage Devices > Rescan Storage.
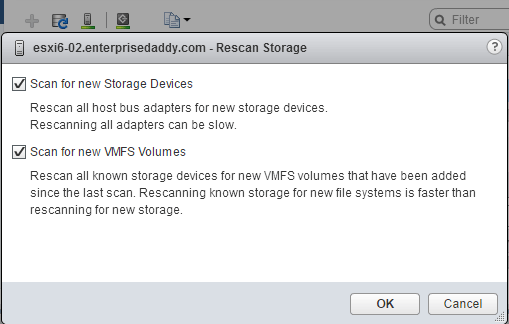
The shared storage will show up as seen below.

Now go to ESXi6-01 host > Related Objects > Datastores > Add
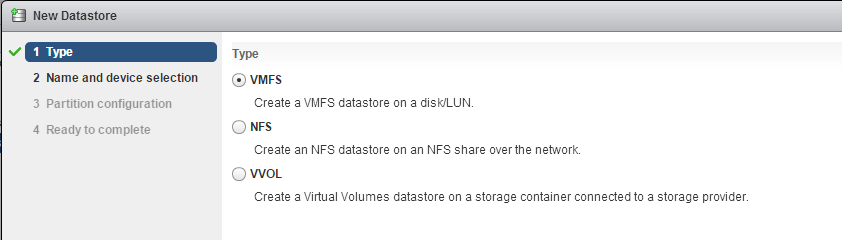
Select VMFS.

Select the StarWind iSCSI Disk as seen above.

Select all available space.

That's it! You now have the shared storage added to both the hosts.
I will be writing another bonus lesson continuing on the Network concepts as I believe that will help everyone better.
This is the last part of the VMWare vSphere Lab using VMWare Workstation. Links to the rest of the articles can be found below.
- What do you need to build VMWare vSphere Lab?
- The network design of VMWare vSphere lab in VMware Workstation.
- Preparing Windows Templates for VMWare vSphere Lab
- How to create the Domain Controller Virtual Machine
- Installing of Nested ESXi hosts in our VMware vSphere Lab
- Installing the vCenter Virtual Machine for VMWare vSphere Lab
- Designing the Shared Storage for VMWare vSphere Lab


10 Comments
Great work here. I appreciate your time to document all these.
Hi – Excellent Post.
Just one request – How about creating a post towards vSAN and other new features released with vSphere 6.5. That will be of great help for people who are following your document to create a fully functioning home lab.
I am going to setup a home lab on Dell Alienware with 32GB Memory and 1 TB SSD (512GB x2). The laptop will run Windows 7 x64 with VMWare workstation 12. I guess this configuration should be sufficient to test most of vSphere 6.5 features.
Thanks
Ram
Hi, thank you for this post. I am stuck at adding a second VMKernel port group after creating the first one. When I want to create the second one I can only choose vmnic4 (vmnic 2 and vmnic 3 are no longer visible in the “create virtual switch” setup. Am I doing something wrong or do I just don’t understand it?
You have to — select existing vswitch — in this case you created vswitch1 and then u can proceed. Just redo the order of the nics.
Very useful article series. One question regarding StarWind, when you are installing it are you installing it on the Host machine where VMware Workstation is runing or are you loading it onto one of the VMs inside there (vCenter Server, etc?
Hi All,
This is a great lab, and more clearly written than most. I’m struggling with this, though. I believe I have done it per instructions (after fixing the vSwitch issue explained by Jay, I now have vmnic 2 and 3 on each vmk on each Host) but I am not getting the iSCSI to appear in the storage devices at the re-scan stage.. At a bit of a loss here.
Mr. Arif:
Thank you very much for the great stuff you shared to Everybody, I can test all the vSphere features on my desktop, this is Great!!!
One simple question, We installed the vCenter Server on a windows server 2012, Can we use the iSCSI server function instead of StarWind Solution?
Regards
Peter
I tried, it worked too.
Great! I have recently articles on using EMC unityvsa for NFS, iSCSI and vVOL. You can check them out.
Reading through all of the articles in this series I see time and again the issue being an unclear description of the networking requirements back in post #2. For many of the users having problems later on, the issues stem from this faulty post. I think you would help a lot of people, especially those less familiar with the networking required to create a successful home lab, by fixing the errors you have admitted to making in that post.